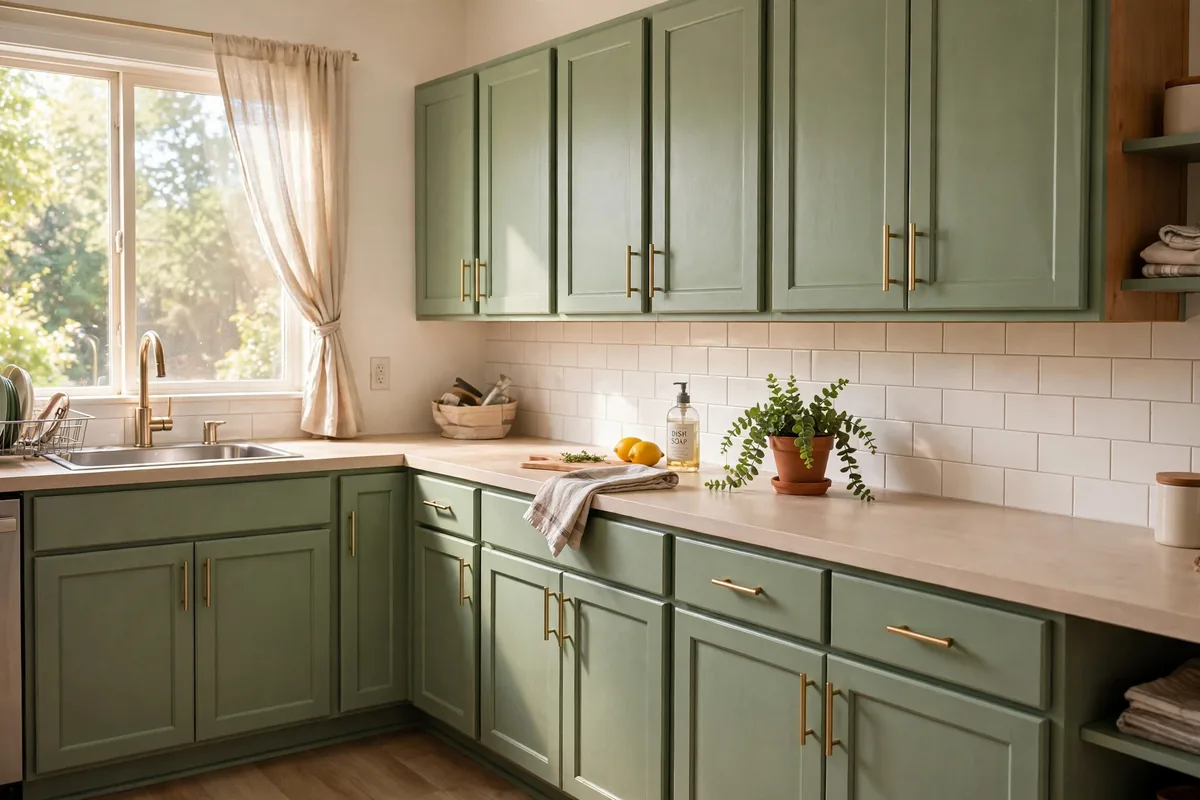
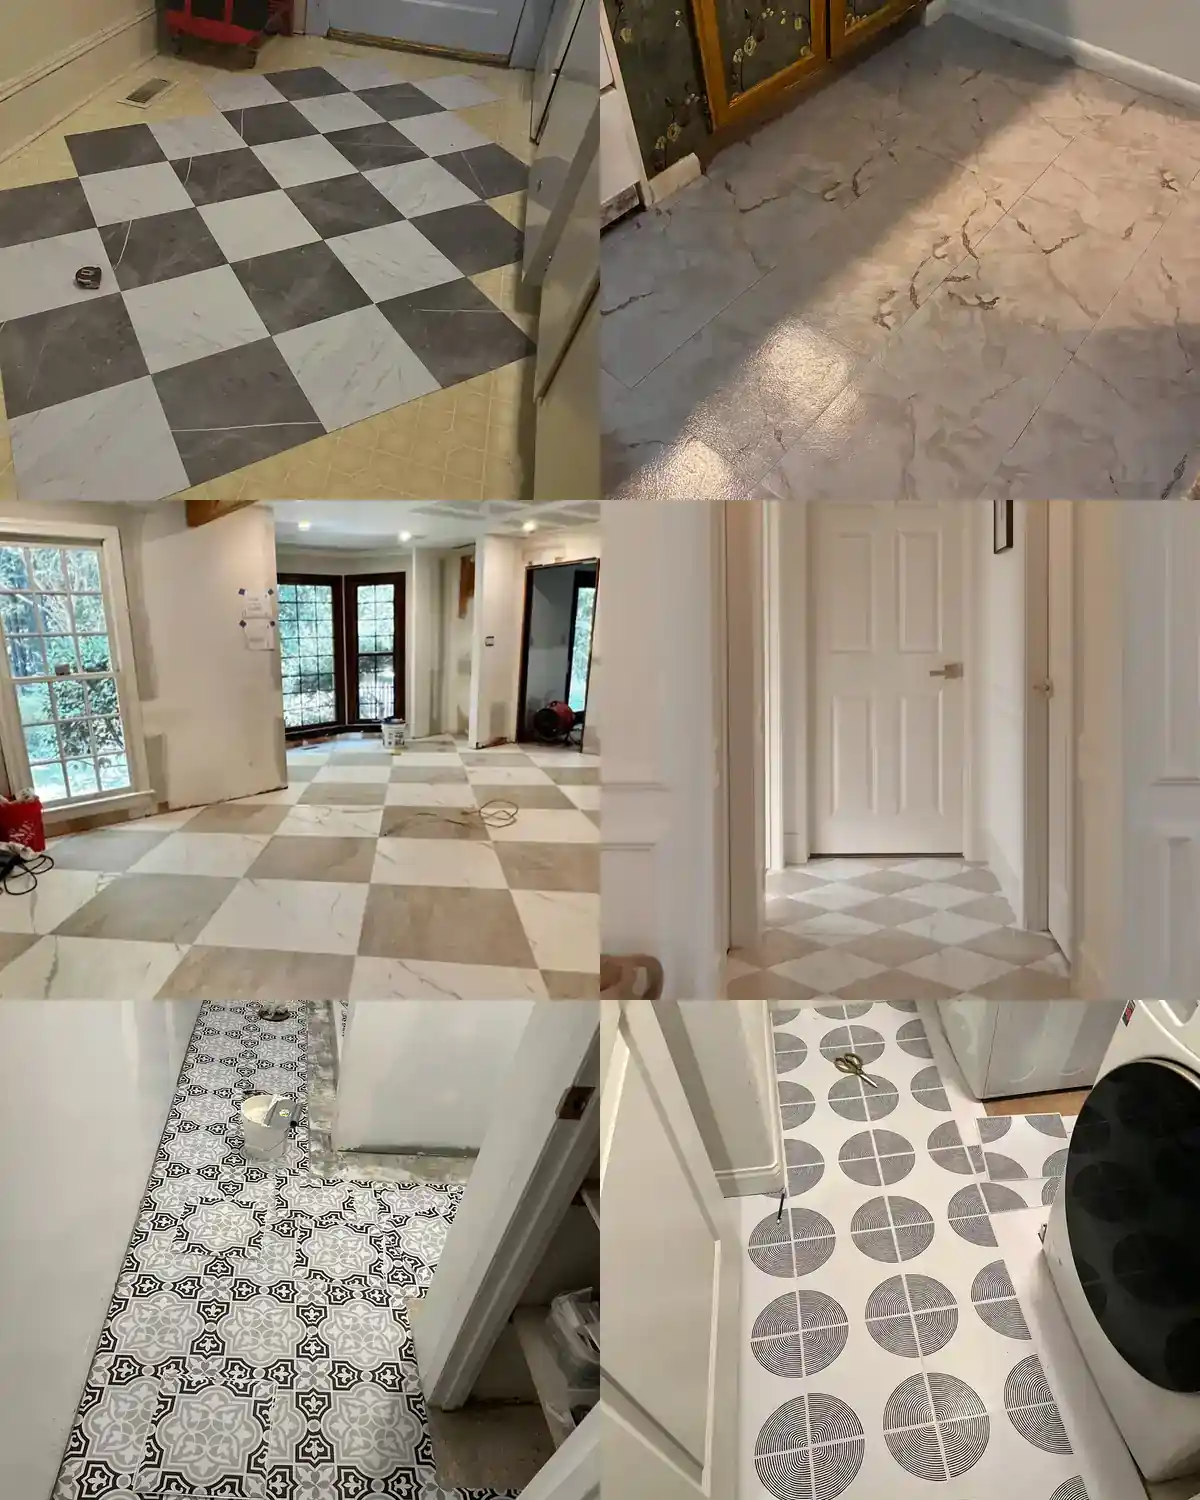

Every rental seems to come with one floor you would hide if you could: yellowed sheet vinyl in the kitchen, a bathroom tile color nobody chose on purpose, scratches right where the light lands. The good news is that a rental floor is the easiest big surface to change without changing anything at all. Modern floor covers sit on top of the old floor, do their work for a year or three, and lift away when you leave. The pages below walk through how to cover ugly rental floors method by method, with real renter projects as proof, so you can pick the cover that fits your room, your budget and your lease. Start with the five ground rules, then jump to the method that matches your floor. One honest note before the photos: a few pictures show the dream version in real materials, and each of those entries says so and gives the renter translation. The rest are renter projects exactly as their makers posted them, halfway mess and all.
Table of Contents
Flooring Basics
Idea 1
Idea 2
Idea 3
Idea 4
Idea 5
Idea 6
Idea 7
Idea 8
Idea 9
Idea 10
Idea 11
Idea 12
Idea 13
Idea 14
Idea 15
Idea 16
Idea 17
Idea 18
Idea 19
Idea 20
Idea 21
Idea 22
Idea 23
Idea 24
Idea 25
Removal Day
Floor Cover Mistakes
Rental Floor Questions
Choose Your Method
Final Thoughts
Before You Cover Anything: Five Ground Rules
Rule 1: The lease decides, not the product box. “Removable” on a label means the maker thinks it comes up. Your deposit depends on your lease and your landlord. Read the clause about alterations, and for anything with adhesive, send one short email asking permission and keep the reply. A yes in writing beats every product promise ever printed.
Rule 2: Photograph the floor before you touch it. Take wide shots and close shots of every stain, scratch and loose corner, with the date visible in the photo info. Do the same the day you remove your cover. Those two sets of photos are your deposit insurance if anyone claims the damage was yours.
Rule 3: Clean and dry beats clever. Every cover in this list fails early on a dirty or damp base. Sweep, vacuum the edges, mop, and let the floor dry fully, a day for bathrooms. Skipping this step is the top reason peel and stick tiles lift at the corners within a month.
Rule 4: Buy one box more than the math says. Cuts go wrong, patterns need matching, and one tile always lands face down on the sticky side. A spare box also covers the tile a chair leg ruins in month eight. Keep the receipt and the box; matching a pattern later is harder than it sounds.
Rule 5: Plan the exit on day one. Keep offcuts, keep the original packaging for foam and carpet tiles, and note which method you used in each room. Removal day should take an afternoon, not a weekend of surprises.
Which cover fits which room? Kitchens and bathrooms want waterproof surfaces: peel and stick tiles, sheet vinyl, or a vinyl mat, all sealed at the wet edges. Living rooms take anything from loose lay planks to a full rug, and the choice turns on traffic and furniture weight. Bedrooms forgive softer covers, carpet tiles and layered rugs, because shoes and spills are rare there. Entries and hallways need thin, hard and washable: tiles, floor cloths, runners. When two methods both fit, pick the one whose removal you can picture most clearly; that picture is your deposit talking.

1. Start With the Checkerboard Peel and Stick Classic
This kitchen shows the method mid-job, which is exactly why it is convincing: marble look checkerboard tiles going down over beige patterned linoleum, no demolition, no glue buckets, the old floor simply disappearing square by square. The renter even left the tape measure on the finished part, the universal sign of a real project. Checkerboard is the most forgiving first pattern because the eye reads the contrast, not small alignment slips.
Lay it in a diamond or straight grid, starting from the room’s center line and working to the edges, so cuts land at the walls where baseboards hide them. Peel and stick vinyl tiles like these are the closest thing rentals have to a standard answer: waterproof surface, cuts with a utility knife, and heat from a hair dryer softens the adhesive when moving day comes.
A few working details from jobs like this one. Warm tiles stick better than cold ones, so let boxes sit in the room overnight rather than bringing them in from a cold car. Change knife blades often; a dull blade tears vinyl instead of cutting it, and torn edges are the ones that lift later. And save every offcut until the last tile is down, because the odd sliver beside the fridge is always shaped like a piece you threw away an hour earlier.
Center line marked in pencil. First four tiles dry fitted. Knife and straight edge ready. Spare box open, not stored away.
2. Run a Test Strip Before You Commit a Room
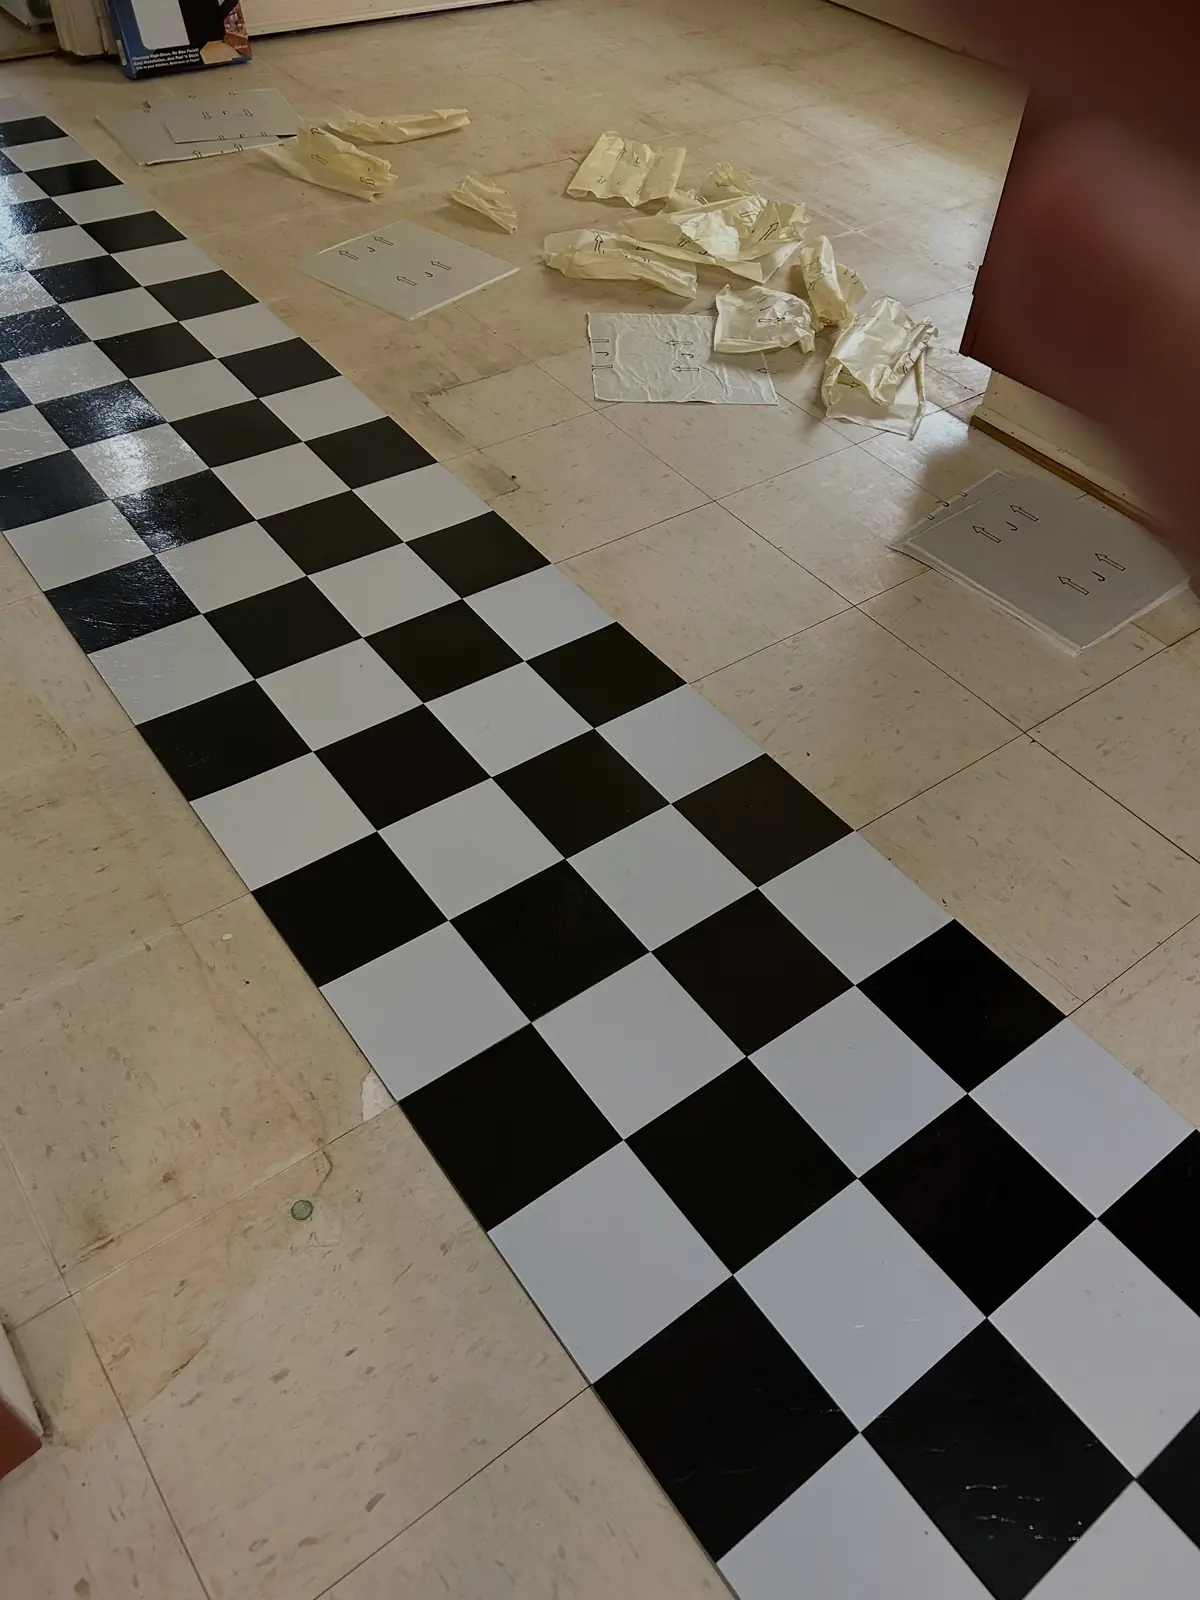
Before the full grid, this renter laid a single bold strip of black and white checkerboard down a worn beige floor, backing papers still scattered at the far end. A test strip answers the three questions photos on a shop page cannot: does the pattern suit the light, do the tiles bond to your exact floor, and does the thickness clear the door swing.
Live with the strip for a week. Walk it in socks, drag a chair over it, mop it once. If the edges stay down and the look still pleases you, the full room is a safe bet, and the strip simply becomes row one. If it lifts, you have lost four tiles instead of forty, and you can switch to sheet vinyl or a rug with the lesson learned cheaply.
Socks, chair drag, one mop, door swing check. Four checks passed means the room gets the green light.

3. Float Plain Vinyl Tiles Where Pattern Would Fight
Not every ugly floor needs a louder replacement. In this kitchen corner, plain light tiles are being fitted against wood cabinets, and the calm surface lets the warm cupboards carry the room. Plain tiles also hide the small gaps and pattern-matching slips that bold prints advertise, which makes them a kind first project.
Work from the longest straight wall outward, and keep a small gap, about 1/8 inch (3 mm), at the walls for expansion on warm days, covered by the baseboard or a bead of removable caulk. Butt the seams tightly and roll each tile with a rolling pin or a seam roller; pressure in the first minute is what the adhesive remembers.
Wall gap: 1/8 inch (3 mm). Roll every tile for 30 seconds. Order: longest wall first, cuts last.

4. Give the Laundry Corner a Graphic Sheet
Laundry corners are where ugly floors retire to: small, damp and ignored. This one got a bold sheet with big grey circles, cut around the machines, and the whole corner now looks designed on purpose. Small rooms are the best place for a loud pattern because the area is tiny, the cost is low, and the machines hide most edges anyway. A pattern you would tire of across a whole kitchen stays fun at this scale for years.
For laundry and utility spots, a single sheet of vinyl, cut to size at home, often beats individual tiles: no seams for water to find. Measure twice, cut once, and leave the sheet slightly large, trimming the final edge in place with a knife against a straight edge. If the sheet is loose laid without adhesive, removal is a two minute job.
Under 40 sq ft: go graphic. One sheet, no seams. Trim in place, never on the kitchen table.

5. Prove the Peel Test Before You Trust It
This close shot is the most important photo in the guide: a hand peeling a vinyl tile corner back, the sheet flexing, the floor beneath unmarked. Before you cover a whole room, do this test in a hidden corner. Stick one tile, wait 48 hours, then peel. If it lifts clean with no residue and no damage, the method is safe on your floor.
If the test tile leaves glue behind, all is not lost. A layer of low tack liner or parchment style barrier under tiles is one workaround renters use, and the no-adhesive methods later in this list, sheet vinyl, foam and rugs, skip the question entirely. The peel test takes two days and saves the whole deposit argument.
One tile, hidden corner, 48 hours. Clean lift: proceed. Residue: switch methods, do not argue with glue.

6. Smooth Patterned Tiles Down by Hand
Scale patterns like this fish scale design ask for patience: more edges per square foot, and every edge wants to sit flat. The hand smoothing in the photo is the technique that makes it work, firm pressure from the center of each tile outward, pushing air to the edges instead of trapping it in the middle.
Patterned tiles hide wear better than plain ones and forgive small level changes in the old floor, which is why renters reach for them in bathrooms and entryways. Buy the spare box rule seriously here: pattern repeats are the first thing a shop discontinues, and a mid-project reorder can arrive in a slightly different dye lot.
Center first, edges last, one tile at a time. Air moves out, never across into the next tile.

7. Fake the Marble Kitchen Floor
Some rental kitchens need the full illusion, and this finished floor delivers it: pale marble look tiles wall to wall in a small kitchen, seams tight enough that the eye reads stone, not stickers. The trick is scale. Large format tiles with soft veining read as real flooring because real stone floors also come in large pieces with quiet patterns.
Keep grout colored designs out of it; the busier the print, the more it looks printed. Choose a matte finish when you can, since shine is what gives vinyl away under kitchen lights. This is the cover to pick when guests matter: nobody kneels to inspect a kitchen floor that looks this calm.
Large tiles, soft veins, matte finish. Shine is the giveaway, busy print is the second.

8. Lay Foam Mats Where Standing Hurts
A different problem, a different cover. This living room is floored wall to wall in grey interlocking foam mats: soft underfoot, warm over a cold slab, and safe for the toddler gym and home workouts that the pouf and open space suggest. Foam tiles lock together with puzzle edges, need no adhesive at all, and come up in minutes.
Use them where comfort matters more than looks: play spaces, workout corners, standing desks, cold basements. The honest limits: chair legs dent them, high heels poke them, and they read as mats, not flooring. For a rental year or two, that trade is often exactly right, and a rug over the middle hides the puzzle edges when guests come.
Best: play, workout, standing zones. Avoid: dining chairs and heels. Removal: minutes, zero residue.

9. Face the Bathroom Floor Honestly First
Every bathroom project should start with a photo like this before shot: worn wood look flooring, tired grout lines, the full truth. Beyond the deposit record from rule two, the before photo tells you what the cover must handle. Bathrooms punish floor covers with water, so read the floor first: soft spots, lifting corners and mold at the edges all need telling the landlord about before you cover, never after.
Dry is the whole game here. Run the fan, wait a full day after the last shower or mop, and test tape a tile overnight to see if moisture creeps. A cover laid over a damp bathroom floor traps the damp, and trapped damp is the one outcome worse than an ugly floor.
Soft spots reported, edges dry, fan run for a day. Cover second, questions first.

10. Then Give That Bathroom a Bold Pattern
Here is the same kind of small bathroom after its cover: black and white patterned tiles that turn a forgettable floor into the room’s main event. Small bathrooms are the highest reward rooms in a rental, because a bold floor there costs little, takes an afternoon, and guests always end up standing in this room looking down.
Seal the edges with a bead of removable caulk around the tub and toilet base so splashes cannot creep under the cover, and cut tiles dry first before peeling anything. The pattern also earns its keep: in a room this size, print hides the hair, dust and water spots that plain floors announce daily.
Caulk the wet edges, dry fit every cut, bold pattern for small rooms. Afternoon job, years of payoff.

11. Break Up Checkerboard With a Warm Tone
Checkerboard doesn’t have to be black and white. This bathroom pairs warm brown with cream, and the effect is softer, older and kinder to a small room that black contrast might shout down. The top down view also shows the practical side: in tight bathrooms the tiles around the vanity get cut once and the pattern still reads clean.
Warm checkerboard suits rentals with wood cabinets and beige fixtures, the ones where a stark black grid would fight everything. Repeat of rule one applies double in bathrooms: match the cover to what is staying, not to the room you wish you had.
Black and white for contrast kitchens. Brown and cream for wood and beige rooms. Match what stays.

12. Lay Loose Vinyl Planks Over Worn Wood
This corner went from worn bare boards with purple painted trim to a grey marble look surface, using loose lay vinyl planks in what the poster calls a weekend job. Loose lay planks are the heavy, grippy kind that stay put by weight and friction rather than glue, which makes them the most deposit friendly hard cover on this list.
They cost more per box than peel and stick, and the thickness, often around 3/16 inch (5 mm), can catch on doors, so test the swing before ordering for a whole room. In exchange you get a floor that feels solid, quiets footsteps, and lifts up plank by plank when you leave, leaving the wood exactly as worn as you found it. Downstairs neighbors, if you have them, will notice the quiet before you notice anything else.
No glue, weight does the work. Check door clearance first. Removal: lift, stack, done.
13. Pick a Leaf Print for a Dated Kitchen
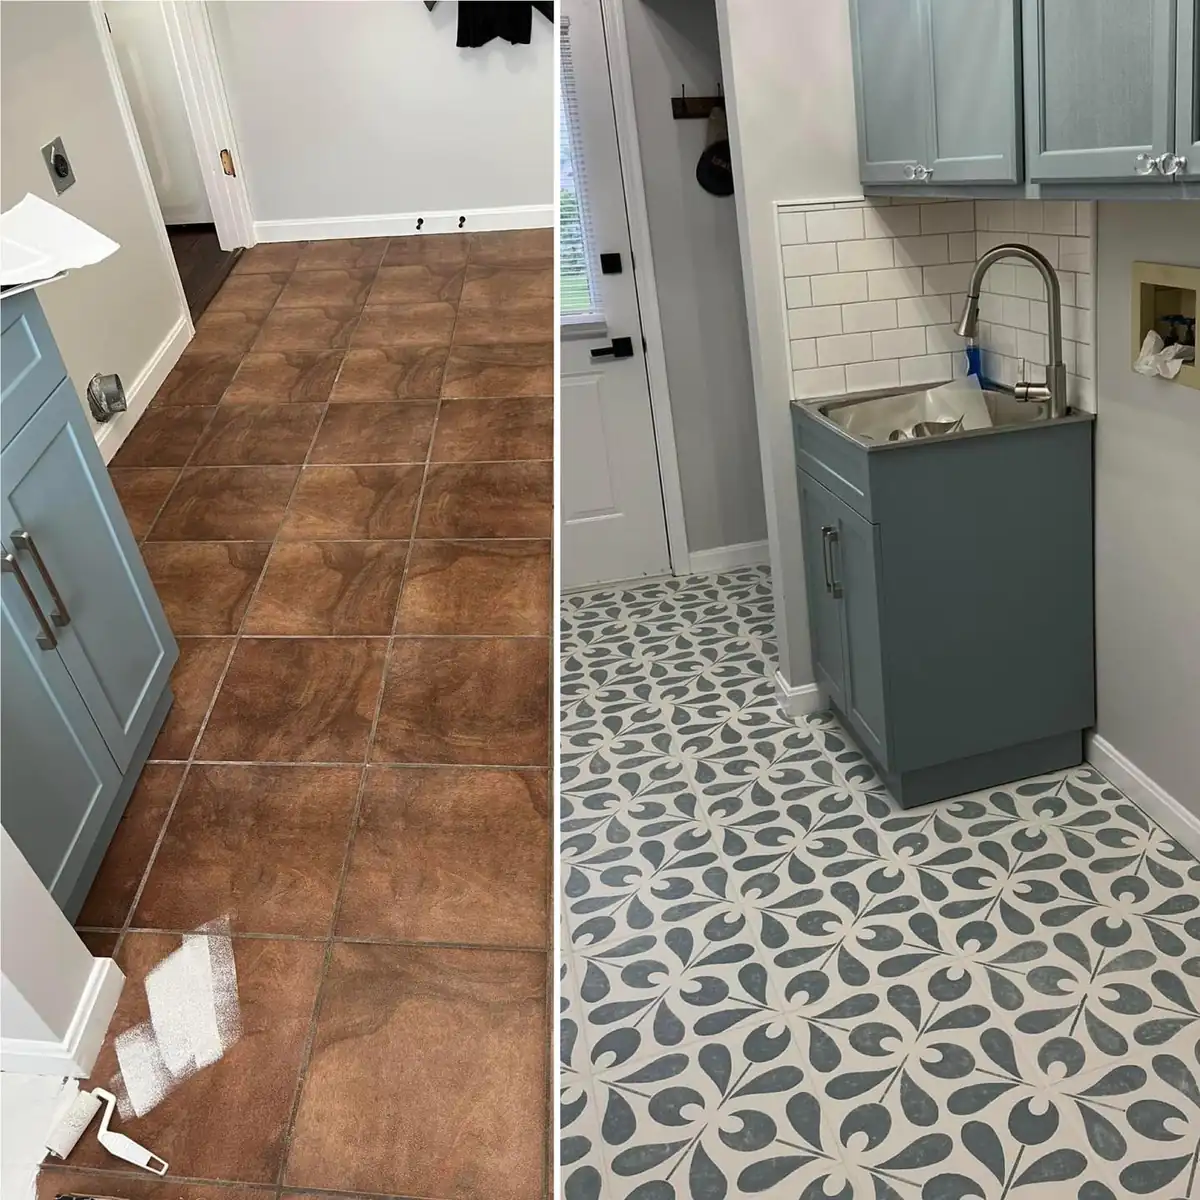
Set this kitchen beside the one in idea 7 and the lesson is range: the same product family, here in a grey and white leaf print, covering a small laundry kitchen whose brown tiles dated the whole room. Leaf and vine prints are kind to imperfect floors because the wandering pattern gives the eye no straight line to check your cuts against.
They also bridge old and new well: the print is modern, but the soft shapes sit happily beside older cabinets and appliances. If your rental kitchen is stuck between decades, a botanical print floor is the cheapest way to make the mix look chosen rather than inherited.
Straight patterns show every slip. Wandering prints hide them. First project? Wander.

14. Expect the Awkward Middle Stage
Halfway photos rarely get posted, which is a shame, because this is what covering a floor actually looks like: patterned tiles marching down a narrow hall, raw concrete still showing along one edge, the roll of next tiles waiting. Knowing the ugly middle is normal keeps renters from ripping up a good job at the halfway wobble.
Work in runs you can finish, a hallway in an evening, a bathroom in an afternoon, rather than starting the whole flat at once. Keep a walkway of old floor or cardboard until the end so you are never stepping on fresh tiles to reach the kettle. The edge in this photo gets its cut tiles last, and from the doorway the finished part already looks like a different home.
Finish one run at a time. Keep a walkway open. Edge cuts always last.

15. Finish the Hallway With Matching Cuts
And here is that same style of hallway finished: patterned tiles edge to edge, cut tight around the door frames, the whole run reading as one designed floor. Hallways are where rental floors show their worst, scuffed by every trip in and out, so a hard wearing cover here changes the feel of the entire flat, not just the corridor.
Measure a hallway in sections between doorways; patterns break naturally at thresholds, which gives you permission to change direction or even pattern at each door. A washable runner over the middle third doubles the life of the cover in the traffic line, and the runner can move to the next home with you.
Sections end at doorways. Runner on the traffic line. Pattern can turn at thresholds.

16. Cover Big Worn Floors With Carpet Tiles
For a floor this big and this worn, individual vinyl tiles would take a week. This long room got wall to wall grey carpet tiles instead: fast to lay, warm underfoot, and quiet in a way hard floors never are. Carpet tiles hold by their own weight and a few tack dots at the edges, and a damaged one lifts out alone for washing or swapping.
They shine in bedrooms, basements and long rental rooms where the old floor is more shabby than stained, and where warmth matters. The renter rule from the exit plan applies: keep two spare tiles, because the one under the door swing will wear first and the range will be gone when you need it.
Big rooms, cold floors, quiet needed. Two spares minimum. Single tile swaps beat whole room regrets.

17. Try the Diamond Layout in a Small Hall
Turning square tiles 45 degrees turns a plain hall into this: a light diamond pattern that makes a narrow entry feel wider and a touch grand. The diamond layout costs about 10 percent more tiles in edge cuts, and every edge is a cut, so it suits small areas where the extra box is cheap and the effect is the whole point.
This is also the friendliest possible version of a white floor: the pattern breaks up scuffs, and the tiles can be swapped one at a time when a corner finally gives up. Entries and halls under 30 sq ft are where diamond layouts earn their cutting time.
Add 10 percent for cuts. Small halls only. One spare tile fixes any corner.

18. Match a Checkerboard Kitchen to Dark Cabinets
This kitchen pairs its checkerboard with dark counters and white cabinets, and the floor does the diplomatic work of joining them. Notice the squares are large: in a full kitchen, bigger tiles mean fewer seams, faster laying, and a calmer pattern that does not buzz at breakfast.
If your kitchen already has one strong element, a dark counter, colored cabinets, then let the floor be the second voice, not a third. Brown and cream checkerboard is the diplomat pattern: it flatters wood, white and black alike, which is why it keeps appearing in rental kitchens that cannot change anything else.
Fewer seams, calmer pattern. Let the floor support the room’s one strong element.

19. Know the Floor You Are Covering
Recognize this floor? The brown patterned linoleum in this kitchen entry is practically standard issue in older rentals, complete with the pattern designed to hide dirt in 1978. Photograph yours the same way before you start, then check its weak points: curled corners, bubbles, and seams that lift. A cover is only as flat as what it sits on.
Loose bits of the old floor must be dealt with first: a curling corner under new tiles becomes a lump and then a crack. Ask the landlord to fix real damage, or at minimum get the email that says you reported it. Flat, sound and dry, from rule three, is the base every method below quietly assumes.
Curls, bubbles, lifting seams: report before covering. A cover copies every flaw below it.

20. Transform the Kitchen in One Weekend
This galley kitchen shows the full arc in two frames: tired tile and torn patches on the left, clean marble look flooring on the right. Jobs like this usually happen with sheet vinyl or large tiles over one weekend, and the before photo, torn floor and all, is doing quiet deposit work in the background of the celebration shot.
Plan the weekend in the right order: empty and photograph on Friday, clean and dry overnight, lay on Saturday, trim and caulk on Sunday, furniture back Monday. The order matters more than speed; the drying gap between cleaning and laying is the step every failed project skipped.
Friday: empty and photograph. Saturday: lay. Sunday: trim. Skipping the dry night is how floors fail.

21. Aim at the Look, Then Pick the Renter Method
End with the dream version: a big marble checkerboard across an open room, light pouring in, the floor as the whole design. This one is real stone in a real house, and that is fine, because now you know the renter translation by heart: the same grid in marble look peel and stick, laid from the center line, tested first, spares in the cupboard.
That is the honest pattern behind every idea here. Inspiration photos set the look; the lease sets the limits; the methods in between, tiles, sheets, planks, foam, carpet and rugs, get you most of the way there for a fraction of the cost, and all of it lifts up when you leave. If you want the tile side of the story in one place, this guide to peel and stick tile over linoleum goes deeper on the kitchen classic.
Dream photo sets the look. Lease sets the limits. Method bridges the two, and lifts at the end.

22. Steal the Small Checkerboard for a Tiny Bathroom
Small squares change the maths of a tiny bathroom. This red and charcoal checkerboard, shot from above beside a glass block wall, uses tiles small enough that the pattern completes several repeats even in a room where you can touch both walls. Big tiles in a tiny room get cut into awkward slivers; small ones finish whole, which is why so many classic small bathrooms use them.
For the rental version, this is a sheet vinyl print or small format peel and stick laid wall to wall, with the cuts hidden under the baseboard line. The deep red will not suit every flat, but the size lesson will: match tile size to room size, roughly one tile per hand span in the smallest rooms, and the floor looks tailored instead of chopped.
Tiny room, small tiles, full repeats. Big room, big tiles, calm seams. The floor should never look chopped at the edges.

23. Copy the Fireplace Room’s Grounded Grid
Some floors make a room feel settled, and this living room’s black and white grid under a stone fireplace is the textbook case. The pattern is doing quiet structural work: it grounds the pale walls, gives the blue chairs something to stand on, and makes a formal room feel usable. Living rooms are where renters hesitate to cover floors, mostly because rugs feel like the only legal option.
They are not. A full peel and stick grid in a living room is a bigger job, two days rather than an afternoon, but it lifts the same way, and under a rug in the seating zone the traffic wear halves. If the full room feels like too much commitment, cover the fireplace half or the dining half and let a threshold line divide the zones; checkerboard reads as architecture, so a half room still looks deliberate.
Full grid, two days, rug on the traffic zone. Or half a room at a threshold, finished on purpose.
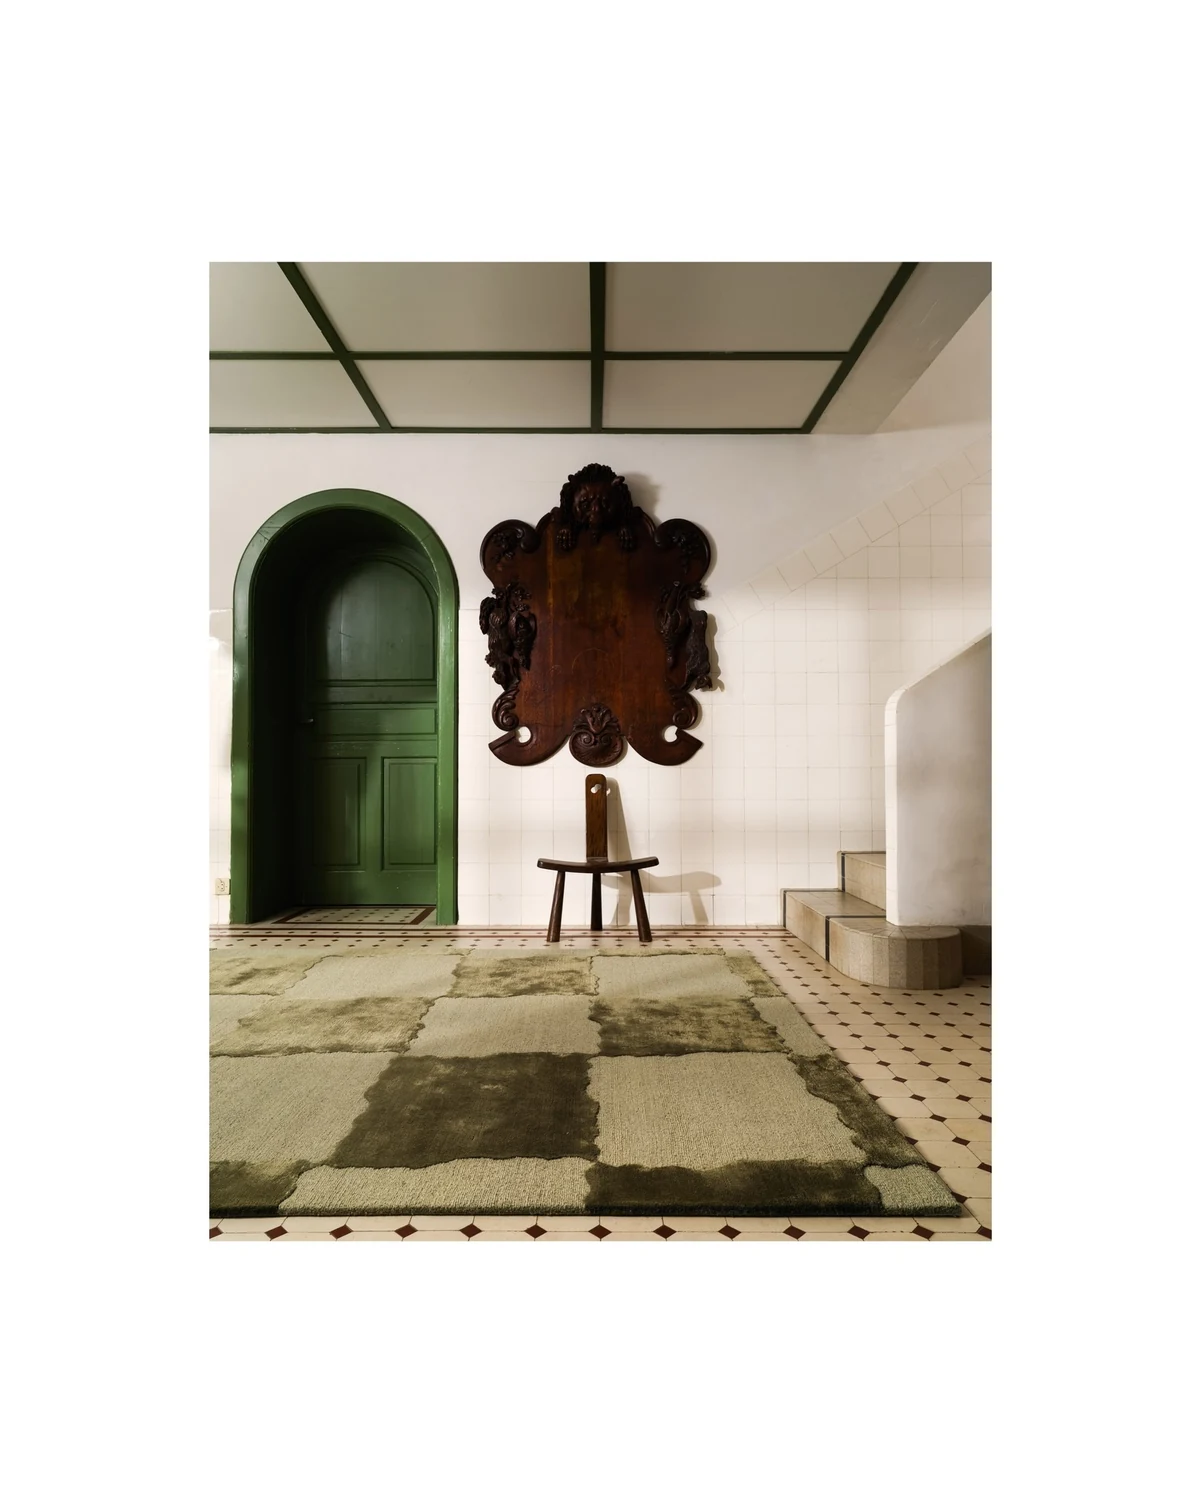
24. Use the Olive Checkerboard at the Door
Entries take the worst of every floor: wet shoes, grit, the daily scrape of the door itself. This entry pairs an olive checkerboard with a matching flat mat, and whether the base layer here is tile or a printed floor cloth, the rental lesson is identical: the entry is the best first room to cover, because it is small, it is seen by everyone, and it decides what the rest of the home feels like.
Floor cloths and vinyl mats deserve a place in the renter toolkit beside tiles: painted or printed canvas and vinyl sheets that lie flat, wipe clean, and roll up for the next home. They cover a worn entry in minutes with zero adhesive, and the checkerboard print delivers the same architecture as tile without a single cut.
Smallest room, biggest welcome. A floor cloth or vinyl mat covers it in minutes, adhesive free.

25. Let Wood Look Vinyl Warm the Open Plan
This open plan apartment runs wood look flooring from sofa to kitchen, and the warmth is the whole story: grey walls and dark cabinets would feel cold on the old floor, while the mid tone planks pull the space together. Open plans are the one layout where the floor cannot hide, since every zone shares it, so covering here changes the flat more than any paint job.
The rental route is loose lay planks or a large low pile rug under the living zone with sheet vinyl in the kitchen zone, split at the counter line where the eye expects a change anyway. Keep plank direction running the long way, as here, so the room reads longer, and match the tone to the cabinets rather than the walls: floors and woodwork are the pair the eye compares.
One cover, long direction, split at the counter line. Match tone to cabinets, not walls.
How Removal Day Actually Goes
Removal is the half of the project nobody photographs, so here is the honest version. Peel and stick tiles: warm each tile with a hair dryer for twenty to thirty seconds, slide a putty knife or an old bank card under a corner, and pull slow and low, back over itself rather than up. A standard kitchen takes one to two hours. Sheet vinyl rolls up in minutes if it was loose laid, longer if edge tape was used, and the tape is the part to warm and peel with patience. Loose lay planks stack like books. Foam and carpet tiles lift by hand, fastest of all, and a rug simply rolls.
Residue is the question everyone asks about, so: on sealed tile, vinyl and finished wood, what little adhesive remains usually rolls off with a thumb, warm soapy water and a cloth. Work through one tile patch at a time, keep the water mild, and stop if a finish starts to dull; that is the point where the landlord joins the conversation before any stronger cleaner does. Photograph each room as it clears. When the bare floor matches your day one photos, the job is done and the evidence is in your pocket.
5 Floor Cover Mistakes That Cost the Deposit
1. Sticking anything down without the peel test. One hidden tile for 48 hours tells you if the adhesive and your floor agree. Skipping the test turns the whole room into the experiment, and removal day into the argument.
2. Gluing or grouting a “temporary” cover. The moment real adhesive, grout or nails enter the job, it stops being a rental cover and becomes an alteration. Keep every layer reversible: if it cannot lift by hand or with gentle heat, it does not belong in a rental.
3. Covering a damp or damaged floor in silence. Trapped moisture grows mold, and covered damage gets blamed on the person who covered it. Report problems first, keep the email, then cover a dry, sound floor.
4. Forgetting door clearance and edges. Thick covers catch doors, trip at thresholds and curl where they meet the tub. Test swings before ordering, and finish every edge on purpose: caulk in wet rooms, a threshold strip in doorways, baseboard gap in dry rooms.
5. Throwing away the spares and the photos. The spare box is your repair kit for the whole tenancy, and the before photos are your proof. Both cost nothing to keep and everything to lose.
Rental Floor Questions, Answered
Will peel and stick tiles really damage my floor when I remove them?
On smooth, sound floors like sealed tile, vinyl and finished wood, most come up clean with gentle heat and slow pulling, which is what the peel test checks on your exact floor. Risk rises on old, soft or already damaged finishes, which is why the test tile and the landlord email come before the full room.
What is the safest floor cover if my lease bans adhesive?
Loose laid sheet vinyl, loose lay planks, interlocking foam or carpet tiles, and large rugs. All four hold by weight, friction or interlock, and every one of them leaves the floor exactly as found.
How much does it cost to cover a rental kitchen floor?
Very roughly, peel and stick tiles for a small kitchen often land between 1 and 3 dollars per square foot in materials, sheet vinyl a little less, loose lay planks more. Prices swing by country and brand, so treat those as planning numbers, not quotes, and always add the spare box.
Can I cover a bathroom floor, with all that water?
Yes, with the right details: tiles or a sheet rated for wet rooms, seams butted tight, edges sealed with removable caulk, and a bone dry base before you start. The bathroom pairs above, ideas 9 to 11, show the before, after and color logic in order.
What do I do at moving out time?
Work backwards. Lift tiles slowly with hair dryer heat on the adhesive, roll sheet vinyl up, stack planks and foam, photograph the bare floor, and compare against your day one photos. Residue, if any, usually lifts with warm soapy water and patience; anything stronger needs the landlord in the loop first.
Which cover lasts longest in a rental?
Loose lay planks and carpet tiles usually outlast peel and stick in heavy traffic, while foam is the shortest lived and the cheapest. Match the cover to how long you plan to stay: a one year lease does not need a five year floor.
How to Choose Your Method in Five Minutes
Still torn between methods? Answer four questions and the choice usually makes itself. One: does water reach this floor weekly? If yes, only the waterproof covers stay on the list, tiles, sheet vinyl, vinyl mats. Two: did the peel test pass? If no, the adhesive family leaves the list and loose systems take over. Three: how long is the lease? Under a year argues for the cheapest cover that looks right; two years or more repays planks and carpet tiles. Four: what does the room do all day? Standing argues for foam or a cushioned mat, sitting argues for warmth and carpet, traffic argues for hard and thin.
Run the hero kitchen through the test as a worked example: water yes, peel test passed, two year lease, daily cooking traffic. Answer: peel and stick tiles, exactly what its maker chose. Run a playroom: water no, test not needed, one year lease, floor level living. Answer: foam mats with a rug. The questions are boring, and that is the point. Floors are a logistics choice dressed as a decor choice, and renters who treat them that way keep both the look and the deposit.
Final Thoughts
Ugly floors feel permanent because they are big, but size is the only thing they have going for them. Every cover here is a layer, and layers lift. Choose the method by room and by risk: adhesive tiles where the peel test passes, loose systems where it does not, soft covers where comfort rules. Take the photos, keep the spares, keep the landlord’s email, and the deposit question answers itself. Renters who want the full removable playbook will find the same thinking across the whole flat in 19 ways to make a rental feel like yours, and once the floor behaves, the walls are next, starting with a removable wallpaper accent wall. Start with the room whose floor annoys you every single day. That room, covered well, changes how the whole home feels by Monday.

Elora Vania here, founder and Senior Editor of Home Aure. With years of experience in interior styling and home decor, I created this site to bring thoughtful, practical design advice to real homes—helping you create spaces that feel warm, personal, and beautifully lived-in.