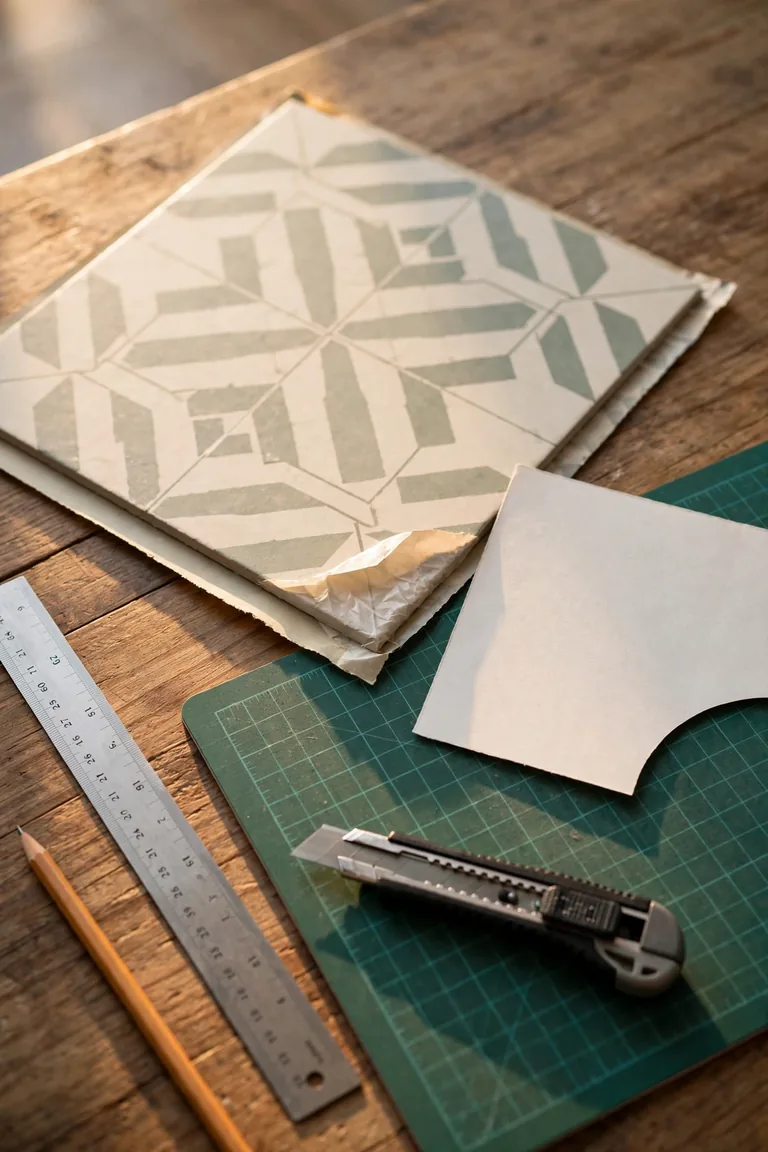
21 Budget Home Decorating Ideas for Small Homes

budget-home-decorating-ideas-small-living-room

The most useful budget home decorating ideas start with what you already own: rearrange furniture, clear crowded surfaces, repeat a few colors, and spend on the corners that need help. In a small home, a better layout, a useful lamp, or one well-chosen wall display can be a satisfying place to begin.

Maybe your living room doubles as a workspace, your entrance opens straight into the sofa, or your rental walls feel bare. You can work with those limits. These 21 ideas cover free changes, inexpensive purchases, painted details, paper crafts, thrift finds, and practical storage. Choose the ones that solve a problem in your home, then build your shopping list around them.

Jump to the decorating ideas, or use this quick guide to choose a starting point.

Choose your starting point

These are resource categories, not quoted prices. Reuse supplies where suitable; check permission before paint or new fixings.

21 small-home ideas at a glance
IdeaWhat you may needBest starting placeCheck first
1. Rearrange furnitureUse existing itemsLiving roomKeep access clear
2. Clear surfacesUse existing itemsAny roomKeep daily essentials handy
3. Shop your homeUse existing itemsAny roomKeep the other room functional
4. Repeat a color paletteUse existing itemsConnected spacesStart with retained finishes
5. Change cushion coversCovers if neededSofa or bedMeasure existing inserts
6. Improve lightingMove a lamp or buyReading or work cornerCheck fixture and outlet
7. Reposition a mirrorReuse or buyLiving room or entryPlan secure mounting
8. Fit ready-made curtainsReuse or buyLiving room or bedroomMeasure panels and hardware
9. Paint a focal wallPaint and suppliesAlcove or small wallPermission and preparation
10. Paint a borderSuitable paint and toolsDesk nook or alcovePractice and check surfaces
11. Frame paper artworkPaper and frameDesk or living roomChoose the frame size first
12. Fold paper fansPaper and fasteningsReading or craft cornerSuitable attachment
13. Make paper silhouettesPaper and display materialsBedroom or shelfAvoid damp and heat
14. Organize with basketsReuse or buyShelf or cupboardMeasure usable capacity
15. Style a vase or jarUse existing items firstTable or consoleKeep the surface useful
16. Thrift picture framesSecondhand purchaseWall or existing ledgeInspect condition and hardware
17. Find a small side tableSecondhand purchaseBeside a sofa or bedInspect and total repair costs
18. Give furniture two jobsUse existing items firstLiving room or bedroomCheck both functions
19. Use vertical storageReuse or buyLiving room or workspaceAnchor and respect load limits
20. Create an entry drop zoneUse existing items firstNarrow entrywayKeep the door route open
21. Add suitable greeneryReuse, propagate, or buyA suitable light positionCheck care and household needs

How to Decorate Your Home on a Tight Budget

Start with one sentence describing what bothers you: “The room feels crowded,” “There is nowhere to put my keys,” or “The seating corner is too dark.” That sentence gives your budget a purpose. A basket helps scattered belongings; a lamp helps evening reading. Neither purchase fixes furniture blocking the doorway.

Next, make four short lists: keep, move, repair, and buy. Look through cupboards before adding anything to the last list. An unused frame, a plain pillow cover, or a small table from another room may already solve the problem.

Measure the available space, including door swings, drawer clearance, and the route you use every day. Photograph the room from its entrance and check that view while considering purchases. A lovely object can still be the wrong size for its destination.

Set a spending limit that includes supplies, delivery, hardware, and any repair work. If you choose a hypothetical $100 limit, assign your own spending caps before shopping; that figure is a planning example, not a promise about local prices.

For rentals, check your lease and ask about painting or new fixings before choosing a project. Removable products also need compatible surfaces and correct removal. Keep a little of the budget unspent until the room has been used for a few days. You may discover the missing piece is something different from your first guess.

A small-budget decorating plan

Give every change a purpose before you spend.

Use what you own

Move a chair, rotate artwork, or reuse a suitable basket.

Fix one problem

Choose the crowded surface, dark corner, or missing storage.

Choose one upgrade

Buy only what the room still needs after the free changes.

Check the total

Include supplies, delivery, repairs, and suitable hardware.

Free and Inexpensive Home Decorating Ideas

1. Rearrange Your Furniture to Open Up the Room

Follow your usual route from the entrance to the sofa, window, and adjoining room. Notice where you turn sideways, step around a table, or move something before opening a cupboard. Those awkward spots are a useful starting point for a small-room layout.

Try moving one piece at a time. A chair might work better beside the window; a bulky side table might serve another room. If a coffee table causes the bottleneck, test the room without it before replacing it with a smaller one.

For example, a compact living room with a sofa, two chairs, and a desk may feel easier to use when one chair moves to the bedroom. The remaining chair can angle toward the sofa while the desk stays close to its outlets.

Live with the arrangement before buying anything. Check access to curtains, radiators, sockets, and storage. Furniture can sit against a wall or float away from it according to the room’s dimensions. For more layout examples, explore how to make a small room look bigger without buying anything new.

2. Clear Visual Clutter from Shelves and Surfaces

A small surface often carries several jobs. The coffee table holds drinks, mail, chargers, and decorative objects, while the kitchen counter becomes a landing place for everything else. Start by separating items you use there from things that arrived by accident.

Give frequent-use belongings an easy home. A drawer may suit chargers, a small dish can collect keys, and a basket can hold the current magazines. Put occasional items elsewhere so the surface remains usable.

Then choose which decorative pieces deserve the space. On a narrow console, a lamp and a meaningful photograph may be enough. On a bookcase, leave some room around a favorite bowl instead of filling every gap.

You can rotate objects rather than permanently parting with them. Store a few pieces and bring them back when you want a change. This is one of the simplest inexpensive home decorating ideas because it lets you assess what the room needs before adding more possessions. Aim for a home you can comfortably use and clean.

3. Shop Your Home Before Buying New Decor

Gather a few unused or overlooked items on a table: cushion covers, small frames, baskets, ceramics, throws, and books. Seeing them together makes connections easier to spot. A color in a bedroom print might already appear in the living-room rug.

Borrow one item at a time and judge it in its new position. A woven basket can hold sofa blankets, a small pitcher can become a vase, and a spare stool may provide a bedside surface if it is stable and suitable for the load.

Keep the original room functional. Taking its only reading lamp simply moves the lighting problem. Focus on duplicates, stored pieces, or objects whose current placement serves little purpose.

Try a simple combination: an existing tray, a favorite ceramic piece, and a book you actually enjoy. Photograph the arrangement and leave it for a day. If it feels useful and personal, you have a finished corner. If something is missing, you now have a specific size, function, or color to look for while shopping.

4. Build a Simple Color Palette Around What You Own

Look first at the surfaces you plan to keep: flooring, sofa upholstery, kitchen cabinets, and existing curtains. Their colors provide a more practical starting point than a photograph of a room with completely different finishes.

Choose a background color and a small selection of accents you enjoy. A warm beige sofa might work with ivory, muted green, and brown wood. A charcoal sofa could suit cream, rust, and a little black repeated in frames or a lamp base.

Carry those colors through a few visible details. A green cushion can relate to a print across the room; a warm wood frame can connect with an existing table. The pieces can have different shapes and textures while sharing those references.

Collect fabric swatches or photographs before shopping, and check colors in your home’s daylight and evening lighting. Keep patterns you love in the plan, including inherited or handmade textiles. Simple house interior design can accommodate personality when the surrounding choices give those pieces room to stand out.

Budget Living Room Decor Ideas for Small Homes

5. Refresh Existing Cushion Inserts with New Covers

Check the cushions you own before buying complete replacements. If the inserts are comfortable and in good condition, suitable covers let you change the look while keeping the useful part. Read the measurements and closure details rather than relying on a listing photograph.

For a compact sofa, begin with the number of cushions you comfortably use. Too many can become a daily pile on the floor. One textured cover and one patterned cover may provide enough variation alongside plain upholstery.

Pull a color from something already in the room, such as artwork, curtains, or a rug. A small rust detail in a print could guide a cushion choice without requiring several matching accessories.

Consider cleaning needs too. Check whether the cover can be washed, how it should dry, and whether it suits pets or everyday lounging. An existing throw can add another texture, folded over an arm or within reach in a basket. Budget-friendly home decorating ideas work best when the finished sofa remains comfortable to sit on.

6. Improve One Dark Corner with Better Lighting

Choose the activity that needs light: reading, working at a desk, or relaxing beside the sofa. Move an existing lamp into that position first. Its location may make a useful difference without changing the fixture.

If a purchase is needed, check the available surface, outlet position, shade dimensions, and manufacturer guidance for compatible bulbs. A lamp should fit without leaving its base near the edge or its cord stretched across a walking route.

Compare bulb brightness using the labeled light output and choose a color appearance you like beside the room’s existing lights. Buying similar-looking bulbs for lamps visible together can help the space feel consistent. Follow the fixture’s ratings and instructions.

In a small living room, a table lamp beside the chair and an existing ceiling light may serve different purposes. Test them separately and together after sunset before adding another fixture. A secondhand lamp also deserves attention to its condition; damaged cords or questionable electrical parts call for qualified assessment before use.

7. Place a Mirror Where the Reflection Helps

Before hanging a mirror, stand in the proposed position and look at what it will reflect. A window, an attractive shelf, or a clear stretch of room may be a welcome view. An overflowing laundry basket will remain visible from another angle.

Try the position temporarily with help, keeping the mirror securely supported while you assess it. Check the reflection from the sofa and doorway, where you will actually see it. Avoid a location that creates uncomfortable glare.

Choose a size related to its surroundings. A modest mirror above a narrow console can feel considered, while several tiny mirrors may create a busier wall than you intended. An existing mirror can sometimes move from a bedroom to an entrance without any new purchase.

Plan appropriate fixings for the mirror’s weight and the wall construction, and obtain rental permission where needed. A heavy mirror needs secure installation. Its decorating value comes from the view and light available in that particular position, so assess your room before treating it as the answer to a dim corner.

8. Choose Ready-Made Curtains That Fit the Window

Measure the window, existing rod, and distance to your intended hem position. Check whether a listing includes one panel or a pair. A low advertised price becomes less helpful if you discover you need twice the quantity.

Choose fabric according to how the room works. A living room may need daylight and some privacy; a bedroom may need more control over morning light. Look at opacity and care instructions as well as color.

Long curtains can suit a compact room when the layout allows them to hang freely. Shorter treatments may be more practical beside a desk, sink, or heater, subject to the appliance’s clearance requirements. Use the actual window and surrounding furniture to guide the choice.

Before replacing anything, wash or refresh existing curtains according to their labels and assess their hanging position. If they already suit the room, a modest adjustment may be enough. Keep curtain rods and brackets compatible with the installation method and fabric weight, and consider alteration costs when comparing ready-made options.

Four decisions for a small living room

Start with the part of the room that is hardest to use.

Layout

Keep your everyday walking route and storage access clear.

Lighting

Place suitable light where you read, work, or relax.

Textiles

Reuse sound inserts and choose covers that fit your palette.

One focal point

Give a favorite print, mirror, or textile room to be seen.

Wall Painting and DIY Paper Wall Decor on a Budget

9. Paint One Small Focal Wall Instead of the Whole Room

A small alcove, a short entrance wall, or the wall behind a desk offers a contained place to introduce color. Choose a surface that already belongs to the room’s layout so the painted area feels connected to its purpose.

Check the paint manufacturer’s coverage, recommended coats, preparation, and drying instructions before calculating quantity. Add rollers, brushes, protection, and any appropriate primer to the budget. Sample paint is intended for assessing color and may have a different formulation or finish from the paint needed for the completed wall.

View a suitable color sample in daylight and under your evening lighting. Muted green beside warm wood or a soft clay tone beside cream can be starting points; your existing finishes should guide the final choice.

Follow label precautions and arrange ventilation during and after painting, as described in the EPA’s indoor painting guidance. Before disturbing old paint in a U.S. pre-1978 home, consult the EPA’s lead-safe renovation guidance. Renters should agree on permission and any required restoration before beginning.

10. Try a Simple Painted Border or Stencil

A narrow painted detail offers another way to use color: a border around an alcove, a small geometric repeat, or a restrained stencil behind a desk. Keep the design limited enough that it suits both your patience and the room.

Sketch the placement on paper and try the technique on scrap material first. Check that leftover paint is usable, suitable for the surface, and sufficient for the design. Matching a dried-out or unidentified paint later can turn a modest project into a larger purchase.

Allow for measuring, preparation, practice, and cleanup when deciding whether the project is worthwhile. Follow the paint and tape manufacturers’ instructions for compatible surfaces and removal. A freshly painted or delicate finish may need a different approach.

If painting is unavailable to you, compare framed art or a freestanding display. Our peel-and-stick wallpaper ideas offer other decorative directions, with product compatibility and removal to consider. Choose a treatment you can realistically complete and maintain rather than starting several unfinished wall projects.

11. Frame Paper Cutouts, Sketches, or Simple Abstract Art

Paper can provide a personal focal point with ordinary materials. Try your own line drawing, a few overlapping cutout shapes, a handwritten recipe, or an abstract composition using leftover colored paper. Start with a frame you already own so the artwork has a clear size.

For a calm arrangement, repeat colors from the room. Cream paper with olive and terracotta shapes could connect to a green cushion and warm wood table. Leave space around the composition so every part of the frame does not need filling.

Arrange the pieces loosely before attaching them to the backing. View the design from across the room; a few clear shapes often remain easier to read than many tiny details. Use materials suitable for the paper and frame, especially when displaying something you want to preserve.

One larger composition can be sufficient above a small desk. Several related pieces may suit a wider wall. This approach to DIY paper wall decor lets you make something specific to your home while controlling materials and scale.

12. Make Folded Paper Fans or Geometric Rosettes

Folded paper decorations can work in a reading corner, above a craft desk, or as a temporary seasonal display. Choose a small set of colors and vary the size of the shapes. Matte ivory, sage, and one deeper accent create a different effect from bright party colors.

Begin with a trial piece. Accordion folds create a fan; joined folded sections can form a rosette. The paper’s thickness, sheet dimensions, and fastening method affect the result, so use the trial to decide what materials you need.

Arrange the finished pieces on a table before placing them on the wall. A compact group usually needs fewer materials than a display spread across the entire room. Keep the overall outline deliberate, with enough surrounding space for the shapes to be visible.

Choose an attachment method suitable for the wall finish and the decoration’s weight. Even lightweight adhesive products can affect some surfaces. A framed backing or existing display board may be more suitable in a rental. Keep paper away from heat sources and places where it becomes damp.

13. Create Botanical Paper Shapes or a Minimal Garland

Simple leaf silhouettes or repeated geometric shapes can add a handmade detail to a bedroom or shelf display. Use one template in several sizes, or repeat a single shape for a quieter result. Paper offcuts are useful when they are large enough for the design.

Try a short arrangement above an existing picture ledge or within a frame. A narrow garland can also connect a small group of objects when its ends have suitable supports. Plan its location before cutting a large batch of pieces.

Choose colors you already use nearby. Olive leaves on a warm cream backing might relate to a plant and wooden bedside table. Naturalistic detail is optional; clear silhouettes can look pleasing from across the room.

Keep the display out of humid areas and away from lamps, candles, or other heat sources. Avoid loose strings where children or pets could reach them. For home decoration ideas using paper craft, a manageable project with a clear destination is a good way to keep both cost and clutter under control.

Choose a wall project that fits your home

Compare supplies, effort, and the surface before deciding.

A focal wall or border

Budget for suitable paint, preparation, tools, ventilation, and any required permission.

Your own wall art

Start with an existing frame. Plan the artwork size and suitable display hardware.

A compact handmade display

Make one trial piece. Check the fastening method and keep paper away from dampness and heat.

Dollar Store and Thrift Store Decorating Ideas

14. Use Coordinated Dollar Store Baskets and Containers

Measure the shelf or cupboard before browsing containers. Include its depth, height, and any space needed to lift a lid or pull out a basket. Bring those numbers with you so a promising find has a definite destination.

Choose a job for each container: spare cables, cleaning cloths, stationery, or sofa blankets. Open baskets suit items you reach for often; covered boxes may suit occasional supplies. Check the material and construction against the intended use.

For visible storage, repeat a color or finish across a few containers. They can differ in size while still looking connected. A plain label can help household members return things to the right place.

Compare usable capacity and total cost with other shops and items you already own. Dollar store home decor ideas are most useful when the product fits the problem. Buying several undersized bins can cost more and occupy more shelf space than one appropriate basket. Start with the smallest quantity that organizes the belongings you need to keep.

15. Style Simple Vases and Jars as a Small Centerpiece

Look for an existing jar, pitcher, or simple vase before shopping. Clean it using a method suitable for the material, remove unwanted labels where practical, and check for chips or cracks. Choose one place where the arrangement will be enjoyed.

A dining table might suit a low vessel that leaves conversation and serving space clear. A narrow console could take one taller vase, provided it sits securely. Everyday use should determine the size of the display.

Use a small amount of greenery or flowers appropriate for your household, or let the vessel’s shape stand alone. If there are children or pets, check plant suitability and choose a position that limits knocks and spills.

A tray can group a vase with a useful object, such as a small dish, but it is optional. Skip additional purchases when the arrangement already feels complete. On a kitchen counter, leave the preparation area usable; on a desk, preserve working space. This keeps inexpensive styling connected to the way the room functions.

16. Build a Small Gallery with Thrifted Frames

Secondhand frames offer variety in shape, finish, and proportion. Before buying, inspect the corners, glazing, backing, and hanging hardware. Check whether the opening suits artwork you own or whether a new mat will add to the cost.

Choose a connection for the group. Similar wood tones can link different frame shapes; related artwork can connect mixed finishes. You can also use just two frames if that is what the wall and your budget allow.

Lay the arrangement on the floor and photograph it from above. Move the pieces until their spacing feels deliberate, then check the overall dimensions against the intended wall. This makes it easier to avoid a display that spreads into a doorway or crowded corner.

Use appropriate hardware for each frame and wall surface. If new holes are unavailable, consider an existing picture ledge or a securely supported arrangement on furniture. Thrift store decorating ideas benefit from this planning because the frame’s purchase price is only part of getting it ready to display.

17. Find One Useful Secondhand Side Table or Stool

Choose the destination before looking for furniture. Measure the available footprint and suitable height beside the sofa or bed. Save those dimensions on your phone, along with a photograph of the surrounding finishes.

Inspect a possible purchase for stability, loose joints, missing parts, visible damage, and signs of pests. Ask about condition and check any identifiable product for recalls. The CPSC’s guidance for secondhand products explains how consumers can use its resources to identify hazards and check recalls.

Include transport, cleaning, repairs, and any needed professional work in your comparison. A piece that works in its current condition may suit a tight budget better than a large restoration project. If you plan to refinish it, establish an appropriate method for the material and existing coating before buying supplies.

A compact table can hold a reading lamp or morning drink. A stool can serve as a surface when suitable, while seating use requires it to be intended and sound for that purpose. Buy for the function you will use.

Where should the next piece come from?

Use the destination, condition, and full cost to guide the choice.

Reuse at home

Check stored frames, spare jars, baskets, lamps, and useful small furniture.

Compare new essentials

Measure containers, check materials, and buy the quantity you actually need.

Inspect secondhand finds

Check condition and recalls, then add transport, repairs, and display hardware to the price.

Low-Budget Interior Design Ideas for Small Homes

18. Give One Furniture Piece More Than One Job

Look at furniture whose surface or storage is used only occasionally. A desk might also support a small vanity setup; a suitable bench could provide seating and storage; a cabinet could hold household supplies while displaying a favorite print.

Check how the jobs interact. A desk used for paid work needs enough clear space and convenient storage for personal items. A folding table needs somewhere to live when closed. Storage seating needs a lid or drawers you can reach without moving half the room.

Try the arrangement with existing furniture before ordering a specialist piece. A tray containing everyday makeup can move from a drawer to a desk, then return when work begins. That small routine may be sufficient.

If a new item is justified, measure it in every relevant position, including open drawers, extended leaves, or raised lids. Compare its practical capacity with the furniture it would replace. Low-budget interior design for small homes becomes easier when each larger purchase has a clearly defined role and fits your daily habits.

19. Combine Vertical Display with Contained Storage

An existing bookcase can hold practical belongings and a few decorative objects in the same footprint. Begin by grouping items according to how often you need them. Keep everyday supplies within comfortable reach and heavier objects in suitable lower positions.

Use baskets or boxes for loose items, then leave selected books, ceramics, or framed art visible. Repeat a material or color across the shelf so the arrangement relates to the rest of the room. Leave enough space to take things out easily.

If you need additional shelving, measure its depth as carefully as its height. A tall piece that blocks a walking route creates another problem. Check load limits and suitable installation for any wall-mounted shelf.

Furniture with shelves, drawers, or doors needs appropriate anchoring; the CPSC’s Anchor It guidance explains the importance of securing furniture against tip-overs. Coordinate necessary fixings with your landlord where relevant. Vertical storage earns its place when it holds real belongings, remains accessible, and is installed for the way it will be used.

20. Create a Practical Drop Zone in a Narrow Entryway

Notice what arrives with you: keys, a bag, shoes, mail, or a jacket. Choose storage for that small collection rather than trying to recreate a large foyer in a narrow passage. The entrance should still open and work comfortably.

An existing tray on a nearby cabinet may be enough for keys. Appropriate hooks can hold everyday items where the surface, fixings, and permissions allow them. A compact basket can collect a limited number of accessories.

Keep the setup specific. If mail belongs elsewhere, take it there instead of adding another pile to the entrance. If shoes obstruct the doorway, find a suitable position beyond its swing and preserve a clear route through the home.

One useful decorative detail can finish the area: a small print, an existing bowl, or a color repeated from the living room. For more options when permanent changes are restricted, see ways to make a rental feel like yours when you cannot paint.

21. Add One Plant Suited to the Available Light

Assess the proposed spot before choosing a plant. Notice its daylight, distance from the window, and nearby heating or cooling sources. Read the plant’s care information and choose something suited to those conditions and your household.

An existing plant can move into a more visible suitable position. A cutting from a plant that propagates that way may also be an option, provided you know its requirements. If you buy, include an appropriate pot, drainage arrangement, and any needed supplies in the cost.

Protect furniture and flooring from water with a suitable setup, and check plant suitability where pets or children may reach it. Leave room for access so watering does not involve moving a heavy arrangement every time.

One plant beside a reading chair or on a stable shelf can provide a clear decorative focus. You can also choose a botanical print if living-plant care does not fit your routine. Treat greenery as a personal decorating choice, with the same attention to space and ongoing effort as any other addition.

Budget Decorating Mistakes That Waste Money

Buying before measuring. A low-priced rug, curtain panel, or table still needs to fit. Keep room dimensions, window measurements, and useful photographs together before browsing. Check product dimensions rather than estimating from styled images.

Ignoring the full project cost. Paint needs suitable tools and preparation; a thrifted frame may need glazing or hardware. Compare the finished cost of an option with alternatives you could use immediately. A repair project can be enjoyable when you budget for the work it actually needs.

Collecting bargains without destinations. Give each potential purchase a place and purpose. If you cannot name either, leave time to think. Small homes have limited storage for objects waiting for a future makeover.

Changing too many things at once. Try the layout and existing decor first, then choose the next improvement. This lets you judge whether a new color, better lighting, or useful storage deserves the remaining budget.

Choosing maintenance you will struggle to keep up with. Read care labels for textiles, think about dusting access, and assess plant care honestly. A room that suits your routine is easier to enjoy after the initial decorating session.

Cheap home decorating ideas need the same practical judgment as expensive purchases. A useful item in the right place can earn its cost; an unwanted bargain still takes up space.

Frequently Asked Questions

What is the cheapest way to decorate a house?

Begin with free changes: rearrange existing furniture, clear crowded surfaces, rotate artwork, and move suitable decor between rooms. Choose one problem to solve before spending. If a purchase is still needed, compare its full cost with using or repairing something you own. Paint, paper projects, and secondhand finds can be options, depending on supplies and condition.

How can I decorate a small living room on a low budget?

Make the layout comfortable first, then improve one visible or useful detail. Existing cushion inserts with suitable covers, a lamp in the right position, or a small group of artwork can be starting points. Measure before buying and leave enough room for sitting, walking, and everyday storage. Choose the change that addresses your living room’s actual difficulty.

How can I make a simple house interior look cohesive?

Use existing flooring and larger furniture to guide a small selection of colors and materials. Repeat those references in a few details, such as a cushion, frame, or basket. Keep meaningful pieces in the plan and give them space. Consistency can come from shared colors or textures even when your furniture was bought at different times.

What are some easy paper crafts for home decoration?

Framed cutout shapes, your own sketches, folded fans, and botanical silhouettes are approachable options. Choose a destination and color palette before gathering materials. A single framed composition may suit a living room, while a small folded-paper display can work above a craft desk. Plan a suitable attachment method and keep paper away from dampness and heat.

How can I decorate a small apartment without painting?

Focus on furniture placement, textiles, suitable lighting, plants, and artwork. Reuse existing frames or display art on an appropriate existing ledge. Check your lease before adding fixings, and follow product guidance for any adhesive attachments. Our guide to decorating a rental when you cannot paint offers more ideas for working with the finishes already there.

Choose One Small Decorating Project to Start

Walk through your home and choose the corner that would benefit most from attention. Try one free change, such as moving a chair or clearing a shelf, then use the space before deciding what to buy.

If it still needs something, write down the purpose, dimensions, and complete spending limit. That gives your next purchase a clear role, whether it is a useful basket, a cushion cover, a thrifted frame, or supplies for paper artwork.

A small home can develop gradually. Finish one comfortable, personal area, enjoy it, and let what you learn guide the next.


How to Tell if Mudcloth Is Real: 8 Checks Before You Buy

Ivory linen sofa styled with a black-and-cream mudcloth-inspired geometric cushion, a sage cushion, and a plant on a light oak side table

To tell if mudcloth is real, look for evidence of strip-woven cotton, hand-applied dye work, and a traceable Malian maker or source. Compare the actual cloth’s seams, weave, pattern, and reverse with the seller’s explanation. Smell, roughness, and price cannot authenticate a piece on their own.

Jump to the eight buying checks.

A pillow can have the right colors and still be a printed interpretation. It can also have a genuine mudcloth front, a different backing, and a zipper added by a maker in another country. Those are different products, and their descriptions should make the difference clear. The useful question is not whether a cushion looks handmade from across the room. It is whether the seller can explain how the textile was made and provide photographs that support that explanation. This guide helps you read those details without turning one loose thread into an authenticity certificate.

Ivory linen sofa styled with a black-and-cream mudcloth-inspired geometric cushion, a sage cushion, and a plant on a light oak side table
Illustrative image: a styled decorating scene created for this guide.

At a glance

Traditional bogolan and mudcloth-style print

CheckTraditional bògòlanfiniMudcloth-style print
ConstructionOften joined, narrow handwoven cotton strips.Often one continuous base; inspect the actual product.
Surface textureVaries with the cloth, finishing, and use.Can also be textured or heavy; smoothness is not a rule.
Dark tonesMay vary with application and surface.Can reproduce uneven or shaded tones.
PatternMay show variation or controlled repetition.Can copy irregularity from an original design.
ReverseUseful for joins, fabric, and assembly; need not match the front.Appearance depends on printing method and fabric.
EdgesMay be raw, hemmed, or incorporated into a finished cover.Printed fabrics can fray or have neat hems too.
SmellNo required scent establishes authenticity.Odor does not establish a printing process either.
PriceDepends on size, condition, source, and product form.Neither a low nor high price authenticates the item.
Seller informationLook for a clear production and sourcing account.A transparent listing identifies the print and base fabric.
WashingFollow instructions for the actual textile.Follow its care label; washing is not an origin test.

Read the whole item and its source together. These are buying clues, not independent authentication tests.

Understand What Real Mudcloth Means

Start With Bògòlanfini, the Malian Tradition

In this guide, real mudcloth means traditional Malian bògòlanfini, often called bogolan: a textile associated especially with Bamana culture and a dyeing process involving plant preparations and mud. It does not mean every black-and-cream geometric fabric sold under an African-inspired decorating label. The Smithsonian’s Malian Bogolan exhibition explains the Bambara name through words for mud or clay, with, and cloth. Its documentation also shows named artists and workshops. That is a useful reminder that this is a living craft tradition with makers, not a generic pattern category. folklife.si.edu For a buyer, authenticity has several parts: what the base cloth is, how it was decorated, where that work happened, and what the seller actually promises. Keep those questions separate. Hand-sewn does not necessarily mean handwoven. Hand-painted does not automatically establish which colorants were used.

Understand the Process Behind the Pattern

The Metropolitan Museum’s record of a cloth by Gneli Traoré describes cotton strips joined into a larger textile and decoration using plant extracts and prepared clay. In that documented process, the background is painted dark while the lighter designs remain unpainted, then further treatment removes clay and lightens areas of the cloth. The Metropolitan Museum of Art That detail corrects a common oversimplification: genuine mudcloth is not always made by painting dark symbols onto a finished white sheet. Background and motif work can be more involved than a seller’s short description suggests. The V&A’s explanation of African textile traditions also describes plant treatment, iron-rich mud, and further work to reveal the lighter pattern. The finished contrast comes from a process, not from loose mud sitting on top of the cloth. V&A Avoid treating a fixed fermentation time as a buying test. You cannot establish how long a material was prepared by looking at a pillow. A production story should explain the work coherently, without replacing evidence with an impressive number.

Use evidence in layers

Some clues deserve more weight

Source and process

Actual-piece photographs, coherent production details, and sourcing information you can check.

Supporting observations

Strip joins, woven character, pattern details, and the connected reverse.

Weak shortcuts

Smell, roughness, fraying, price, or the word authentic used on its own.

Do not turn the checklist into a score. Several weak clues do not replace a clear explanation of the textile.

Use These 8 Checks Before You Buy

These checks work together. They help you decide what to ask, what the photographs support, and when a listing remains uncertain. They are not a laboratory test or a points-based authentication system.

1. Look for the Construction Beneath the Design

Traditional examples often show narrow cotton strips stitched side by side. The useful detail is a physical join: look for the meeting of two woven edges, stitching, and a change in the weave across the seam. A dark vertical stripe printed onto fabric is not the same thing. Ask for a close photograph taken in side light, with another showing the same area from the reverse. Seeing both sides makes it easier to understand whether a line is part of the image or part of the cloth’s construction. There is an important exception for small products. A narrow pillow panel, pouch, or framed fragment may have been cut from a section that contains no join. A backing or lining can hide construction too. Missing seams in one small photograph do not prove the textile is printed. Handworked clue: Physical strip joins that agree with the seller’s description. Printed alternative: A continuous base fabric with lines that exist only in the surface design. Either way, ask how the pictured product was cut and assembled.

2. Examine the Weave Instead of Judging Softness Alone

Zoom in far enough to see individual threads. Look at thread thickness, spacing, and how the surface catches light. Compare an undecorated area with a dark area so the pattern itself does not hide the base. Texture can support a description of handwoven cotton, but roughness is not a pass mark. Washing, use, finishing, photography, and the particular cloth all affect how the surface appears. A soft textile is not automatically a print, and a coarse fabric is not automatically bogolan. The same caution applies to shopping by touch. A printed design can be applied to a heavy, slubby cotton or a linen-look base. Feeling bumps tells you something about that fabric, not necessarily about the origin of its pattern. Handworked clue: Visible woven character supported by information about the base cloth. Printed alternative: A surface pattern on a fabric the seller identifies as printed cotton, poly-cotton, or another material. Read the fiber description alongside the close-up rather than asking the photo to answer both questions.

3. Compare the Dark Areas Across the Whole Cloth

A close-up of one brown patch is less helpful than photographs of several areas in consistent light. Look at how dark fields meet lighter areas and how the appearance changes across the woven surface. Variations in brown, charcoal, or black may be consistent with hand-applied work. They do not confirm a particular dye recipe. A camera can deepen shadows, a filter can warm a neutral black, and a printed design can reproduce uneven tones. Do not reject a carefully worked textile because its dark areas look controlled. Skill can produce a deliberate finish. Equally, do not pay a premium for blotches that the seller cannot explain beyond saying natural means imperfect. Handworked clue: Tonal and surface details that make sense with a documented process. Printed alternative: Color variation contained in a repeated printed image. Ask whether the coloring uses fermented mud and plant preparations, another hand-dye process, or a surface print. A precise answer is more useful than a poetic color name.

4. Study Repeated Motifs Without Demanding Crooked Lines

Choose one motif that appears several times. Compare its proportions, spacing, line edges, and relationship to the weave. Then look at a wider image to see how those marks fit the composition. Small changes can support a description of hand-applied decoration. But a repeating design is not inherently suspicious. Artists can work with repeated patterns, and a practiced maker can produce clean, confident lines. The reverse is also true. A digital print can reproduce the irregularity of an original cloth, including the same smudge many times. If an unusual mark repeats in exactly the same position throughout a long fabric, ask how the repeat was produced. Treat that observation as a question rather than a verdict. Handworked clue: Variation that agrees with the broader construction and production account. Printed alternative: An acknowledged screen print, digital print, or other reproduction. Hand-printing can itself involve skilled work, but it still needs a description that distinguishes it from traditional mud-dye production.

5. Request the Reverse of the Same Piece

A reverse photograph helps you examine seams, base fabric, finishing, and whether the pictured front belongs to the product you will receive. Ask the seller to turn over a corner so you can connect both views. Avoid the rule that real mudcloth must look identical on both sides. Different processes, treatments, cloth thicknesses, and finished-product construction can produce different appearances. A paler reverse alone does not establish that something is a print. Color reaching the reverse alone does not establish authenticity either. For pillow covers, ask a more specific question: do you want to see the reverse of the decorative fabric, or the back of the finished cushion? They are not necessarily the same material. A plain linen or cotton back can be an openly disclosed design choice. Handworked clue: The reverse clarifies the textile and its assembly. Printed alternative: The seller confirms that the decorative face is printed. Photographs are most useful when they support clear information, not when they are forced into a universal front-versus-back rule.

6. Separate Construction Character From Damage

Look at edges, joins, hems, repaired areas, and any stains the seller mentions. Ask for close photographs of flaws before buying, especially when a piece is described as vintage. An unfinished cloth may have a raw edge. A pillow made from that cloth may have neat modern seams. Neither finish settles whether the underlying textile is genuine. Fraying can happen to different woven fabrics, and a tidy hem can be added later. Do not make dirt, debris, or damage part of the price of admission. A seller should describe a tear as a tear and a stain as a stain, even when the cloth is handmade. Natural variation and poor condition are separate purchasing questions. Handworked clue: Construction details that fit the account of the cloth. Condition concern: Unexplained holes, heavy shedding, stains, or weak areas. Ask whether flaws affect the intended use. A fragile piece suited to display may be a poor choice for a cushion that will be handled every day.

7. Treat Smell as a Condition Question

There is no useful at-home smell test that proves a cloth was made with fermented mud. Storage, cleaning, packaging, and previous use can all affect odor. A seller’s claim that it smells earthy is not a substitute for production information. If you are buying online, ask whether the piece has any noticeable odor and whether it has been cleaned or stored in a smoking environment. That is ordinary condition information, particularly for a textile you plan to place on a bed or sofa. If an item arrives with an unpleasant or unexpected smell, document its condition and contact the seller before washing or altering it. Do not assume you must accept the problem as evidence that the cloth is authentic. Useful answer: A clear condition description and a workable returns policy. Weak evidence: Scent presented as the main reason to trust the origin. The same applies to dust or residue. Their presence does not authenticate a textile.

8. Check the Seller’s Story Against the Actual Item

Ask who made or sourced the textile, where the textile work happened, and how the decorative pattern was applied. If it is a pillow, ask who assembled the cover and which fabric appears on each side. A reseller can provide good information. Being the person who sewed the zipper does not make someone the weaver, and importing a cloth does not automatically make a seller unreliable. What matters is an honest account of the supply chain and its limits. For an older piece, the maker’s name may be unknown. Look for a clear statement of what is known and what is an attribution. A detailed invented biography is not better than a careful acknowledgment of uncertainty. Stronger evidence: Actual-item photographs, coherent production details, and sourcing information that can be checked. Weaker evidence: Authentic, artisan, fair trade, or one of a kind repeated without explanation. Price can help you compare offers after these questions, but it cannot repair missing information.

Saveable buying checklist

8 checks before you buy

  1. Construction: Look for physical joins, then ask how the finished piece was cut.
  2. Weave: Inspect threads and surface character without equating roughness with origin.
  3. Dark tones: Compare areas in consistent light; color variation is supporting evidence.
  4. Motifs: Check repeated details without demanding crooked lines.
  5. Reverse: Request the reverse of the same decorative textile, not only the cushion back.
  6. Edges and condition: Separate construction character from stains, tears, and weak areas.
  7. Smell: Ask about condition; do not use odor to authenticate the cloth.
  8. Seller and source: Compare the production account with the actual-item photographs.

If the information conflicts, ask for clarification before paying for a traditional-production claim.

Recognize Listing Wording That Needs a Closer Look

Read the Description Beyond the Title

Mudcloth-inspired, mudcloth-style, digital print, and screen-printed are useful terms when they accurately identify the product. A print honestly sold as a print is not pretending to be a traditional mud-dyed cloth. The problem is conflicting information. A headline might say authentic African mudcloth while the material section says printed polyester. Pause there and ask what authentic refers to: the pattern inspiration, the base fabric, the decoration process, or the complete finished item. Generic wording such as boho tribal print provides little sourcing information. It may describe the look a seller wants to market, but it does not identify a textile tradition or a production method.

Separate Handmade Assembly From Handmade Fabric

A maker can cut printed yardage, sew a pillow beautifully, and truthfully describe that cover as handmade. That does not mean the yardage was handwoven or mud-dyed. Likewise, a genuine bogolan front can be paired with a factory-woven cotton back. Read the description of each component. This is especially useful when comparing prices for covers that look similar in a styled room photograph.

Ask for Product Views, Not More Styling Photos

A sofa photograph shows scale and color. It rarely shows the weave, joins, or reverse clearly enough to support an origin claim. Request a full front, a connected reverse view, a close-up of the construction, and any condition issues. If the shop uses representative photographs, ask how much your actual piece will differ and whether you can see it before shipment. Matching stock photographs across shops are a reason to investigate the supply chain. They do not, by themselves, prove that every seller is dishonest or that the textile is machine-printed.

Decide Whether a Mudcloth-Style Print Meets Your Needs

There is room for a printed interpretation when the description is clear and the price suits the product. You may want washable fabric for a busy room, consistent yardage for several cushions, or a pattern that works with materials you already own. Compare the care label, fiber content, dimensions, and construction quality on their own terms. Do not assume printed means washable or handmade means too delicate; the actual product information should guide those choices. If supporting a particular maker or preserving a traditional technique is your priority, buy around that goal. Spend more time on the source and the process, even if it means choosing one smaller piece instead of a matched set. For ideas about using textiles alongside woven baskets, wood, and plants, see our Afrohemian small apartment decor guide. A room can feel personal with one well-chosen textile. It does not need several products making claims you cannot verify.

Check What the Product Price Actually Includes

Before comparing two offers, write down what each one contains. A 20-inch pillow cover might use bogolan on the front and a separate backing, while another uses the same decorative textile on both sides. An insert, lining, closure, pattern placement, and custom sizing can change the finished product without changing the source cloth. Ask for finished dimensions rather than assuming a named size includes an insert. For a full cloth or wall hanging, request the actual measurements and note whether the seller is including fringe or another unfinished edge. A tightly cropped listing photo can make a fragment look much larger than it is. Think about how the pattern will sit in your room. If a particular motif or seam matters to you, ask whether the pictured arrangement is the one you will receive. A maker cutting several covers from a larger textile may produce different placements while using the same original cloth. For a vintage or repaired piece, ask where the repairs sit relative to the finished product. A small patch may be acceptable for display but inconvenient on the center of a seat cushion. This is a practical use decision, separate from whether the textile’s origin is documented. Comparing these details prevents you from paying for assumptions. It also gives a careful seller a fair chance to explain the work included in the price.

Compare Current Prices Without Inventing a Minimum

These are a small sample of advertised listings checked on October 17, 2026. They show the sellers’ descriptions and displayed prices, not an independent authentication of the stock. Two examples were marked out of stock. Shipping, taxes, import costs, and availability may differ.

ListingDisplayed priceWhat the listing helps illustrate
Fabrics USA, Authentic Malian Mud Cloth, BrownUS $55 sale priceSeller-described cotton/handwoven cloth, sold by the piece; check the stated exchange-only policy.
Ananse Village, Handwoven Cotton Mud Cloth #235US $89A cloth described as handwoven, approximately 40 × 60.5 inches.
The African Fabric Shop, Mixed Mud Cloth WMC108£105, marked out of stockAn individually listed cloth in the shop’s bogolan collection.
The African Fabric Shop, Large White Mud Cloth WMC104£210, marked out of stockA larger listed cloth with a different asking price.

These prices and descriptions were displayed on the referenced listings when checked. Fabrics USA INC Keep the currencies separate; these figures are not a single dollar price range. More importantly, four listings are not enough to establish a global market minimum. Compare like with like. A full cloth, a small fragment, a pillow front, and a completed cover contain different amounts of material and labor. A cover-only price is not directly comparable with a cushion that includes an insert. Ask how size, condition, age claims, decoration, assembly, and the seller’s services affect the asking price. A vintage label needs support beyond a distressed appearance. A low price deserves questions when it conflicts with the description, while a high price deserves the same questions.

Compare products before prices

A high price cannot fill an evidence gap

Check the product

Full cloth, fragment, front-only cover, two-sided cover, or filled cushion?

Check the units

Dimensions, currency, shipping, tax, and current availability all matter.

Check the source

Ask which production, condition, and sourcing details support the description.

Distinguish Mudcloth From Other African Textiles

Shared colors or geometric designs do not make different textile traditions interchangeable. Use the name as a starting point for questions about origin and technique.

TextileUseful distinction for a buyer
Bògòlanfini / bogolanMalian textile tradition using plant preparations and mud-based dye work.
Korhogo clothAssociated with Senufo makers and northern Côte d’Ivoire; often features painted figures or animals.
Kuba clothAssociated with the Kuba region of the Democratic Republic of the Congo; commonly uses raffia and decorative techniques such as embroidery or appliqué.
Ankara / African wax printA printed cotton textile category with its own history; it is not another name for bogolan.
AdireA Yoruba resist-dyed textile tradition associated with southwestern Nigeria.
Country clothA broader label used in different contexts; the wording alone does not establish a mud-dye process.

The Smithsonian’s Korhogo collection record identifies Senufo authorship, while the V&A’s textile overview explains distinctions among Kuba, Ankara, and adire. These references are more useful than assuming every cream cloth with dark figures belongs to the same tradition. National Museum of African Art A listing that combines Korhogo, bogolan, Kuba, and mudcloth as interchangeable keywords needs clarification. It may reflect loose marketing rather than a deliberate attempt to deceive, but you still need a precise description before paying for a specific craft.

Vet a Seller With Five Direct Questions

Laptop, notebook, pencil, tape measure, and folded black-and-cream geometric textile arranged on a light oak desk for textile buying research
Illustrative image: researching a textile purchase before you buy.

Keep your message short enough to answer. The aim is to establish what you are buying, not to ask a seller to write a cultural history.

  1. 1. What is the base cloth, and how was it woven? Ask about the actual item, including any separate backing or lining.
  2. 2. How was the pattern applied? Request a plain explanation of mud-and-plant dye work, another dye method, or printing.
  3. 3. What do you know about its source? A maker, workshop, place, supplier relationship, or clear statement of uncertainty is useful.
  4. 4. Can I see the actual front, reverse, and a construction close-up? Connect these views to the piece you will receive.
  5. 5. What are the care instructions and return conditions? Ask about known stains, repairs, odor, and any restrictions that affect your intended use.

Save the answers with the listing and receipt. If the description changes later, you still have the information used to make your decision. On Etsy or another marketplace, a shop’s rating can tell you something about previous customers’ experiences. It is not a textile-production record. Read reviews for useful specifics, such as whether buyers received the pictured piece, whether condition matched the description, and how the seller handled questions. Treat fair-trade or artisan-support language as a claim to understand. Ask what relationship, organization, or purchasing practice the seller means. Do not assume that a high retail price tells you how much the maker received. You can also make a good decision by waiting. If a seller cannot provide enough information for the kind of purchase you want to make, keep the listing for reference and compare another source. An uncertain piece may still be attractive, but it should not be treated as documented bogolan without further evidence.

Copy this seller enquiry

Ask about the actual piece

Hello, I am considering this textile. Could you confirm the base fabric, how the pattern was applied, and what you know about its maker or source? Please send the actual front, the connected reverse, and a construction close-up. If this is a pillow cover, please identify the front and backing fabrics separately. I would also like the care instructions, condition details, and return policy. Thank you.

Choose Care Instructions for the Actual Textile

Do not wash a cloth to find out whether it is genuine. Color loss, shrinkage, or dye transfer would not establish its origin, and the experiment could change the item before you have resolved a concern with the seller. Read the care information before paying. A full textile and a pillow assembled from several fabrics may need different treatment. A zipper does not automatically mean that a cover is machine washable. Ask which component controls the instructions. For an older, fragile, or valuable piece, obtain advice appropriate to that textile before wet cleaning. Do not assume a seller’s general advice for new fabric applies to a vintage wall hanging. Also consider where the textile will live. A frequently handled cushion, a child’s play area, an upholstered seat, and a wall display ask different things of a fabric. Authenticity does not establish abrasion resistance, colorfastness, or suitability for upholstery. If a piece suits display better than daily handling, that can still be a worthwhile choice. Our rental decorating ideas when you cannot paint can help you plan a place for textiles without treating every cloth as heavy-use furnishing fabric.

Read Side-by-Side Photographs Carefully

A useful comparison shows the whole front, a joined edge or weave close-up, the connected reverse, and the finished product. Both textiles should be photographed at a similar scale and under similar light. Filters, strong shadows, and mismatched zoom levels can exaggerate differences. Label each sample by what is actually known. For example, seller-described handwoven Malian bogolan is a different claim from a textile with independently documented maker and process. A retailer’s description should not become independent verification because it appears beneath a photograph. This guide is based on published sources and listing information, not a Home Aure side-by-side purchase test. There are no invented sample purchases, washing results, or claims that a pictured seam has been examined in person. When using this checklist on your own purchase, keep notes on what each view establishes and what remains unknown. The photograph may confirm a seam while leaving the colorant unanswered. That is a useful result, even when it does not produce an immediate yes or no.

Frequently Asked Questions

Is Mudcloth Made With Real Mud?

Traditional Malian bogolan uses prepared mud as part of a process involving plant-treated cloth. The finished textile is not meant to be authenticated by finding loose mud on it. Ask how the seller’s particular piece was made, especially when mudcloth is being used as a style label.

What Is the Difference Between Bogolan and Mudcloth?

Mudcloth is an English name commonly used for bogolan or bògòlanfini. In retail listings, the English word is also applied to inspired prints and other textiles. The name alone is therefore less useful than a description of the cloth, its decoration, and its source.

Does Real Mudcloth Have to Smell Earthy?

No smell is required for a textile to be genuine. Odor can reflect storage, cleaning, packaging, or previous use. Ask about condition and contact the seller if the item arrives differently from the description. Do not use smell as an authentication shortcut.

Why Can Mudcloth Be Expensive?

An asking price can reflect textile production, size, decoration, age claims, condition, shipping, retail services, and the work of making a finished product. Ask what applies to the particular piece. A high price does not prove traditional production or fair payment to a maker.

Can Mudcloth Be Machine Washed?

Use the care instructions for the actual textile and any materials added to it. There is no responsible blanket machine-wash instruction for everything marketed as mudcloth. Resolve an authenticity or condition concern before washing, and seek specialist advice for fragile or valuable pieces.

Is Mudcloth the Same as Korhogo Cloth?

They are distinct textile traditions, even though sellers sometimes group them together. Korhogo cloth is associated with Senufo makers and Côte d’Ivoire; traditional bogolan is associated with Mali. Ask which textile the seller means and what evidence supports that identification.

Make Your Buying Decision in Three Moves

Learning how to tell if mudcloth is real is about combining evidence. Look at the actual construction and decoration. Ask for a clear account of the source and process. Compare prices only after you understand the product’s size, condition, and form. If the description openly says print and that suits your needs, you have a clear purchase. If you want traditional bogolan, look for information that supports that specific claim. Save the checklist below to keep those questions beside your shortlist.

Keep with your shortlist

Look. Ask. Compare.

1 / Look

Examine the actual construction, decoration, reverse, and condition.

2 / Ask

Get a clear account of the source, base cloth, and decoration process.

3 / Compare

Compare size, product form, condition, currency, and included work.

An honestly labeled print can be a clear purchase. A traditional bogolan claim needs information that supports that claim.

Sources and Price References

  • The Metropolitan Museum of Art: bògòlanfini by Gneli Traoré
  • Smithsonian Center for Folklife and Cultural Heritage: Malian Bogolan
  • Victoria and Albert Museum: Africa fashion, cloth of a continent
  • Smithsonian National Museum of African Art: Korhogo cloth
  • Ananse Village: Handwoven Cotton Mud Cloth #235
  • Fabrics USA: Authentic Malian Mud Cloth, Brown
  • The African Fabric Shop: mudcloth collection and listed prices

Price information was checked on October 17, 2026. Listing descriptions are the sellers’ claims; they are not independent authentication reports.

Can You Install Peel and Stick Tile Over Linoleum? Read This First

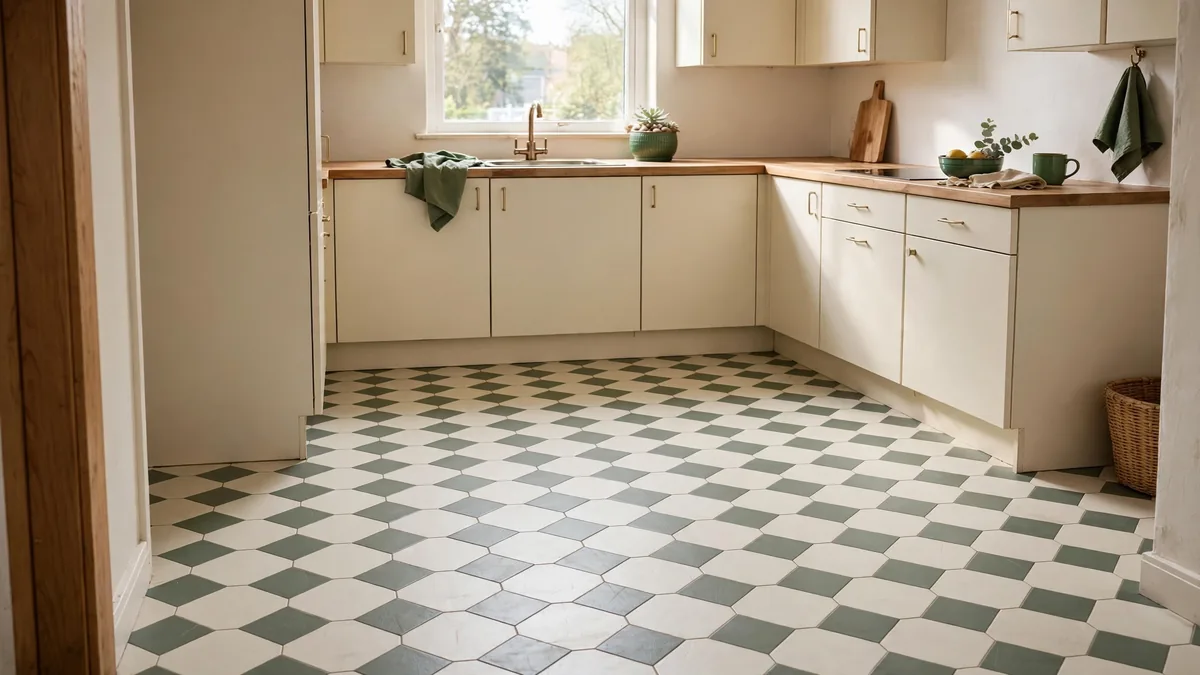
Small apartment kitchen with ivory and sage geometric peel and stick vinyl tile floor, cream cabinets and light oak countertops

You can sometimes install peel and stick tile over an existing resilient floor, but only when the tile manufacturer approves that exact surface. The old floor must also meet its requirements for firmness, smoothness, cleanliness, and moisture. If your floor is true linoleum, do not assume instructions for sheet vinyl apply to it.

That distinction can save you a room full of lifting corners. For example, WallPops says FloorPops should not be installed over linoleum. A different product may allow an existing vinyl floor under specific conditions. A convincing makeover photo does not change the instructions on your box.

The appeal is understandable. You want a better kitchen or bathroom floor without pulling apart the room. Yet a new pattern cannot fix a loose base, a plumbing leak, or a surface the adhesive cannot bond to.

This guide helps you decide whether an overlay makes sense, calculate the quantity you need, plan the work, and avoid the repairs that a rushed installation can create. The installation sequence applies only after your floor and chosen product have been confirmed as compatible. For renters, permission and eventual removal belong in that decision too.

Plan the project

Active work

4 to 8 hours

Planning estimate for a sound, straightforward 120-square-foot room.

Elapsed time

Several days

Allow for acclimation, preparation, and product-specific waiting periods.

Difficulty

Moderate

Fixture work, damaged bases, and uncertain materials need separate assessment.

These are planning estimates, not a tested installation time. Your product instructions and room condition control the schedule.

Gather what the approved system needs

Your flooring kit

Measure and plan

  • Tape measure
  • Pencil and room sketch
  • Carpenter’s square
  • Approved marking tool or chalk line
  • Paper for templates

Cut and protect

  • Utility knife and spare blades
  • Metal straightedge
  • Cutting board or mat
  • Knee pads
  • Label-required protective equipment

Prepare and install

  • Compatible tiles
  • Approved cleaning products
  • Specified patch or embossing leveler
  • Specified primer, if required
  • Required roller and finish details

Buy preparation products from the approved installation system. Extra glue, a power sander, and improvised underlays are not default supplies.

Check What Your Old Floor Is Before Buying Tiles

People often call any older, flexible kitchen floor linoleum. The material may actually be sheet vinyl. Those names are not interchangeable when you are choosing an adhesive flooring system.

Forbo explains the difference between linoleum and vinyl: linoleum uses ingredients such as linseed oil, while vinyl is made using PVC. Both belong to the wider resilient-flooring family. That family name does not make every surface an approved base for every tile.

Look for an old invoice, installation record, spare labeled material, or information from the owner. A photograph can help a flooring supplier start the conversation. It cannot establish the material or identify every layer below it.

Do not lift a corner, cut a sample, or scrape the backing to identify an unknown old floor. Resolve the material question without disturbing it, using professional help where needed.

Once you know what you have, open the installation sheet for the exact tile you want. Read the sections headed existing flooring, suitable substrates, limitations, and surface preparation. A listing that says suitable for kitchens is answering a different question from suitable over this particular floor.

If linoleum is not named, ask the manufacturer to confirm compatibility in writing. Give the product number and describe the existing material, finish, condition, room, and layers. Silence about a surface is not approval.

Keep that answer with your receipt. It gives you a clear basis for the project and a useful reference if someone later recommends a different primer or shortcut.

Inspect the Floor Without Disturbing It

Start with what you can see during ordinary use. Look for raised seams, bubbles, curled edges, discoloration, torn areas, and changes around sinks, toilets, or appliances. Notice whether the floor feels soft or moves when walked on normally.

An overlay needs a dependable base. When the old layer shifts, the new tile moves with it. Pressing harder on the top tile cannot repair the attachment below.

Smoothness matters too. A raised imitation grout line may feel minor under your hand but remain visible through a thin tile. This is called telegraphing. A bold new print can distract your eye from it; the print does not remove the ridge.

Separate a cosmetic problem from a floor problem. An unfashionable color is cosmetic. A damp patch beside the dishwasher is a floor problem until its cause is found. Repeatedly damp areas, unexplained softness, and loose flooring need assessment before decorating continues.

TrafficMaster’s published vinyl-tile instructions illustrate how specific the rules can be: the approved existing vinyl is a single layer, firmly bonded and without cushion backing. That document also prohibits sanding the existing vinyl. Use the current instructions for your own product rather than treating this example as permission for another brand.

Do not rely on a tapping or knock test to certify the floor. It does not tell you whether hidden moisture, cushioning, or an unsuitable layer is present.

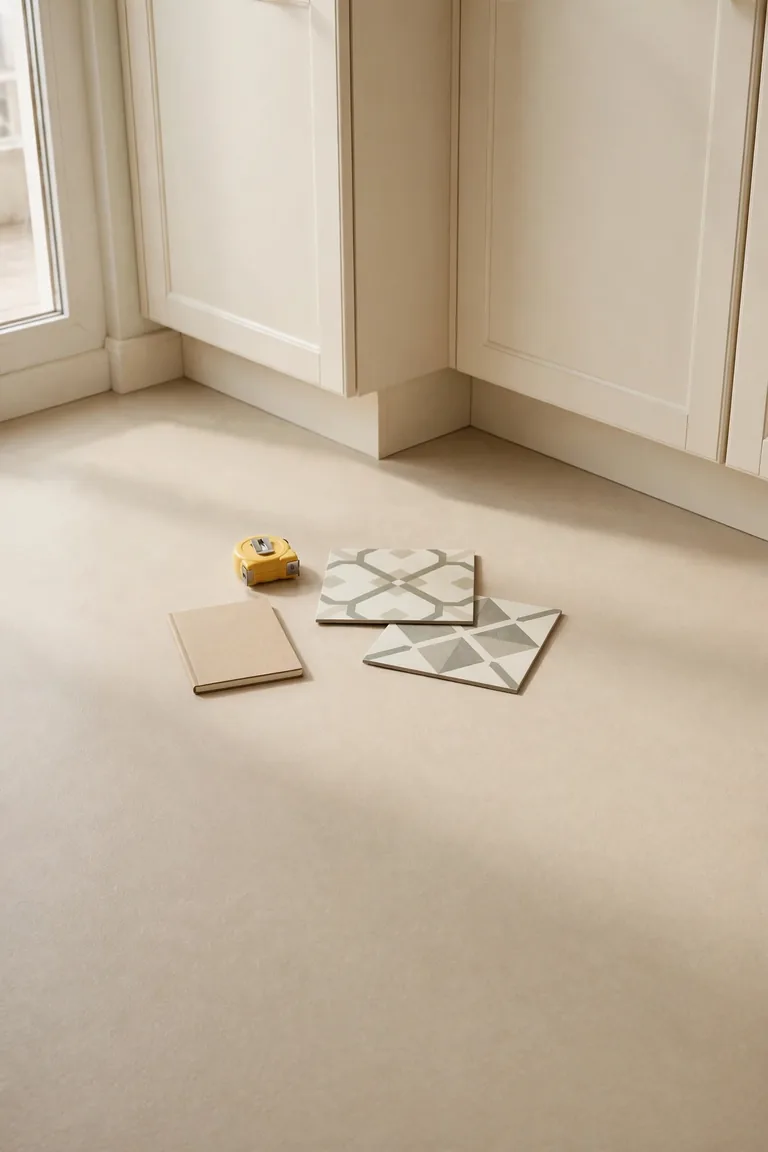
Two peel and stick tile samples with a tape measure and notebook resting on an intact beige sheet vinyl floor

Infographic 01 · Before you buy

Can your floor support this project?

01

Identify the material

Establish whether the existing floor is linoleum, sheet vinyl, or another material without disturbing it.

02

Get product approval

The exact tile manufacturer must approve that material and the existing floor assembly.

03

Check the base

Meet the product’s requirements for attachment, smoothness, cleanliness, and dryness.

04

Plan the full project

Check finished height, appliance access, approved preparation, and written rental permission.

Proceed only when every check passes. Otherwise, resolve the issue or choose another approach.

Stop Before Disturbing an Old or Unknown Floor

Older resilient flooring, backing, or adhesive may contain asbestos. Age, color, and tile size cannot confirm or rule it out.

The EPA’s homeowner guidance on asbestos advises leaving intact, undisturbed material alone and using a trained, accredited professional when assessment or sampling is needed. Do not sand, scrape, drill, or cut suspect material. Do not sweep or vacuum suspect debris with household equipment.

Covering an existing floor may sometimes be part of an appropriate plan. It is not automatic permission for a DIY adhesive overlay. Safety assessment and product compatibility are separate decisions. Prep or later removal could still disturb the old material.

Decide Whether an Overlay Is Worth Doing

An adhesive tile project can be a sensible cosmetic update when the existing surface is suitable and preparation stays modest. It becomes less appealing when you need extensive repairs before you can begin.

Write down the problem you want to solve. Is the floor sound but visually dated? Are you trying to coordinate mismatched cabinets? Or are you hoping to hide cracks, softness, and a leak? The first two are decorating goals. The last one needs a different starting point.

Consider the shape of the room as well as its area. A square utility room with open edges may take less work than a smaller bathroom with a toilet, pedestal basin, several door trims, and pipes. Each obstruction creates measuring and cutting work. Square footage alone is a poor guide to difficulty.

Think about access during the project. If this is your only bathroom, you need a plan for the installation period and any restrictions afterward. In a kitchen, food preparation, appliance access, and a safe walking route may affect when the work is practical.

Check the finished height before committing. Even a thin finish adds something at doorways. A door that already brushes the floor, a tight threshold, or an appliance fitted closely under a counter deserves attention now.

There is also a reasonable point to walk away. If the approved prep system, tools, and repair work push the total near an alternative you prefer, compare complete projects rather than comparing the tile prices alone.

For a rental that needs personality more than construction, our ideas for making a rental feel like yours when you cannot paint offer other places to start.

Get Written Permission Before Changing a Rental Floor

Peel and stick describes installation. It does not promise a damage-free exit.

Flooring adhesive has to withstand shoes, chairs, cleaning, and everyday movement. That purpose is different from a removable wall decoration. WallPops, for example, warns that its floor tiles can leave adhesive residue and may lift paint when removed. Treat any claim of temporary flooring carefully.

Send the owner a clear proposal before buying. Include the exact product, the manufacturer’s answer about the existing floor, the preparation materials, and what will happen when you move out. Ask whether the approved finish should stay or be removed.

Photograph the current floor in good light. Include thresholds, existing marks, damaged edges, and the areas beside appliances. Keep those photographs with the written agreement so the starting condition is clear.

An approved sample test may reveal an immediate adhesion problem or visible finish damage. It cannot guarantee how a whole floor will behave after years of use. Do not perform a removal test on an unidentified or suspect older surface.

Avoid improvised barrier layers such as contact paper beneath the tiles. The tile then depends on that extra layer remaining attached, and the assembly may fall outside the manufacturer’s instructions. A shortcut that makes installation feel reversible can make performance less predictable.

If permission is uncertain, put your budget into items you own. A suitable rug, freestanding furniture, or a change to the wall behind the dining table may serve the room better. For another surface to explore, see our peel and stick wallpaper ideas, with the same attention to surface suitability and removal.

Calculate the Tile Quantity Before Ordering

Measure the floor you will actually cover. For a rectangular area, multiply length by width using the same unit. Sketch an irregular room as smaller rectangles, calculate each area, and add them together. Include an alcove or closet only if it is part of the project.

Keep the sketch. You will need more than the total area when planning border cuts and deciding where the pattern should start.

Here is a worked example for a 10-foot by 12-foot room using 12-inch square tiles:

CalculationResult
Room area: 10 × 12120 square feet
Chosen planning allowance: 15%18 square feet
Coverage to order: 120 + 18138 square feet
Example carton coverage20 square feet
Cartons: 138 ÷ 20, rounded up7 cartons
Coverage purchased: 7 × 20140 square feet

The 15% allowance is a planning choice for this example, not a rule for every product. Follow the manufacturer’s allowance and increase your order when the layout creates more waste. A diagonal pattern, directional print, or many awkward cuts can use material differently from a straight grid.

Carton rounding matters. Multiplying the room area by the price per square foot would miss the extra material you must buy. Check the coverage on the actual carton; a tile count alone is not enough when tiles have different dimensions.

Order the planned quantity together where possible. Check the batch or run numbers on arrival, and inspect the design before installing. Keep labels and reserve suitable leftovers for future repairs.

Build a Budget That Includes the Preparation

Use the following figures as an illustrative budget, not current store prices or a contractor quote. Each amount is a chosen assumption so you can see how the calculation works.

Example expenseAssumed amount
140 square feet of tile at $2.50 per square foot$350
Compatible cleaner and preparation products$55
Blades, marking supplies, and small tools$25
Roller rental, if required$40
Trim or doorway transition allowance$30
Illustrative total$500

This example excludes tax, shipping, deposits, professional assessment, repairs to the base, plumbing work, and appliance handling. Add the items your room needs. Remove a rental allowance only if you already have the specified tool or your instructions genuinely permit an alternative.

A useful shopping list has three columns: required item, actual price, and reason. That last column catches unnecessary purchases. You might need a manufacturer-approved primer, for example. You do not automatically need a tub of extra adhesive because someone used it in a video.

Ask for a separate repair estimate if the floor has problems. Mixing cosmetic materials and unknown repair costs into one optimistic total makes it harder to judge whether the project is worthwhile.

Infographic 02 · Worked example

120 square feet does not mean buying 120 tiles

ADD THE ALLOWANCE

120 + 18 = 138 sq ft

Using a chosen 15% planning allowance.

ROUND TO FULL CARTONS

7 × 20 = 140 sq ft

Example cartons contain 20 square feet each.

ILLUSTRATIVE PROJECT TOTAL

$500

Tiles$350

Preparation$55

Small tools$25

Roller rental$40

Trim allowance$30

Chosen assumptions, not current prices. Excludes tax, delivery, assessment, base repairs, plumbing, and appliance handling.

Choose a Pattern That Works With the Room

Bring a sample into the room before ordering the full quantity. Look at it beside the cabinets, wall paint, and adjoining floor in daylight and under your evening lights. The same ivory tile can look warm beside one cabinet finish and unexpectedly yellow beside another.

Start with the fixed elements you intend to keep. If the cabinets are a strong wood tone, a quiet floor may give them more room. If the room is plain, a restrained geometric pattern can provide a focal point without adding objects to the counters.

For a softer palette, consider warm ivory with sage or muted gray-green. For a sharper scheme, pair cream with charcoal. These are styling directions, not technical recommendations. A beautiful tile still has to pass the compatibility check.

Lay out several samples together. One tile cannot show how a repeat looks across a narrow walkway. Look from the doorway, where you will usually see the whole floor, and from beside the busiest work area.

Notice how the pattern ends. A detailed medallion sliced into tiny pieces along a visible threshold may bother you more than a slightly off-center layout. Decide which sightline matters before the adhesive is exposed.

If the aim is a calmer small room, examine the layout and visible floor space too. Our guide to making a small room look bigger without buying anything new can help you assess changes that do not require a new floor.

Infographic 03 · Follow the sequence

Prepare first. Peel later.

  1. Record product requirements.
  2. Acclimate the tiles.
  3. Clear the work area.
  4. Remove approved residues.
  5. Allow the surface to dry.
  6. Smooth approved imperfections.
  7. Apply specified primer if needed.
  8. Mark square reference lines.
  9. Dry-lay the border layout.
  10. Cut new pieces on a board.
  11. Place tiles to the layout.
  12. Roll using the specified tool.
  13. Finish approved edges and trim.
  14. Follow return-to-use times.

Use this sequence only after the exact product and existing floor are confirmed compatible. The product guide controls preparation, tools, and waiting periods.

1. Record the Requirements for Your Exact Tile

Make a project sheet from the current installation guide. Note the accepted base, preparation products, room conditions, roller, perimeter detail, and waiting times. Keep the product number on the page. Resolve conflicting advice with the manufacturer before work starts, and attach any written clarification.

2. Acclimate the Tiles as Directed

The boxes need time in the installation environment when the product requires it. Armstrong’s vinyl-tile guide specifies 48 hours at room temperature. Your tile may have a different range or handling instruction.

Store the cartons in the position the guide specifies, away from wet work and direct heat. Start the clock after the room is within the required conditions, rather than counting time spent in a cold delivery area. Write the earliest installation date on your project sheet. Keep the instructions accessible instead of leaving them inside a carton you may discard.

3. Clear the Planned Work Area

Arrange a separate cutting area and a bin for backing paper. Remove furniture that interrupts your layout. Plan appliance movement before touching connections; use qualified help for gas, electrical, or plumbing work. Check future servicing access at the new floor height. Keep a clear route out of the room.

4. Remove Approved Surface Residues

Use the cleaning or stripping method accepted by both the existing floor and the new flooring system. Follow the label for dilution, contact time, rinsing, ventilation, and protective equipment.

A shiny surface may contain a maintenance coating rather than ordinary dirt. A general-purpose degreaser is not automatically a suitable wax remover. Avoid oil soaps or products that leave a film, and keep cleaning liquids out of open seams and damaged areas.

Hand in a protective glove wiping a sheet vinyl kitchen floor with a damp microfiber cloth

5. Let the Prepared Surface Dry

A dry-looking surface is not proof that the base is ready. Follow the preparation products’ drying periods and any required moisture test. Record the result.

If dampness returns, investigate its source before proceeding; an arbitrary overnight wait cannot establish that a moisture problem has been resolved.

6. Smooth Only the Approved Imperfections

If the manufacturer permits the existing surface but requires its texture to be filled, use the specified embossing leveler or patch system. Check its compatibility with the existing finish and tile adhesive.

Measure the mixing water according to the label rather than judging the consistency by eye. Work within the stated working time and permitted thickness. Wall filler, general-purpose caulk, and a thicker top tile are not substitutes for approved floor preparation.

Let the material reach its stated readiness before moving on. If the required correction exceeds the product’s limits, pause for a revised plan.

7. Apply Primer Only When the System Requires It

Check primer compatibility with both the base and the tiles. HENRY 336’s technical information, for example, lists its intended uses and application requirements.

Follow the accepted product’s coverage and drying instructions. A primer cannot make a prohibited base suitable, and an unapproved coating adds another uncertain bond to the assembly.

8. Mark Square Reference Lines

Walls can be out of square, so do not assume the first wall gives you a reliable grid. Establish reference lines using the method in your tile guide. A carpenter’s square helps check the intersection.

Armstrong’s installation guidance highlights room layout and irregular walls as details to review before installing. Make marks that remain visible without leaving loose chalk where the adhesive needs to bond.

9. Dry-Lay Rows to Check the Borders

With the backing intact, arrange trial rows in both directions. Check wall pieces, the doorway, and pattern matches. Shift the starting position if it creates narrow strips in visible areas.

Photograph the chosen layout. Include your product’s perimeter clearance in every measurement rather than borrowing a gap size from another flooring type.

Peel and stick vinyl tiles arranged in a dry layout trial row on a kitchen floor before installation

10. Cut the New Edge Pieces Off the Floor

A spare board or suitable cutting mat protects the existing surface from the blade. Mark each new tile with its backing intact and check the orientation before cutting. Use the cutting method allowed for its thickness.

A metal straightedge helps guide a straight cut, with your free hand kept clear of the blade path. Replace a dull blade rather than pushing harder. Check the fit before removing the liner.

Label fitted pieces on their backing so they return to the right position. Keep offcuts separate from uncut pieces to avoid confusing a short piece with a full tile.

11. Place Each Tile Against the Reference Layout

Follow the direction arrows and joint instructions when positioning each tile. Check alignment as you work; a small drift becomes obvious across several rows.

Discard the slippery backing immediately. Do not leave decorative gaps in a non-groutable product or drag exposed adhesive across the prepared base.

12. Roll the Installed Tiles as Specified

Pressure is part of the bonding process. Armstrong’s flooring FAQs explain why rolling matters for pressure-sensitive self-stick adhesive. Use the tool, weight, timing, and directions required by your tile.

Some systems specify a substantial floor roller; others give different instructions. Plan the rental before installation day so the required tool is available at the right time.

Kneeling on a tile or sliding furniture over it does not provide a controlled substitute. Check the edges while they remain accessible, and note any section that does not sit correctly.

13. Finish the Perimeter Using the Required Detail

Follow the installation guide for walls, thresholds, trim, and any sealant. Avoid forcing pieces into a tight space to hide an inaccurate cut. Fit a transition that suits the finished height and remains secure underfoot.

Decorative caulk cannot correct a loose base or turn an ordinary tiled assembly into a wet-room system. If grout is part of the design, proceed only with a tile labeled groutable and the specified grout, spacing, and timing.

Finished doorway where geometric peel and stick vinyl tiles meet an oak-look floor at a clean transition strip

14. Restore Normal Use on the Product’s Schedule

Look up separate permissions for walking, moving furniture, replacing appliances, and wet cleaning. They may not share one waiting time.

As an example of the variation, Armstrong’s luxury-vinyl installation guidance says to avoid wet mopping for at least 5 days after a self-adhesive or glue-down installation. Use your product’s schedule, maintain its required room conditions, and protect the surface during any approved furniture move.

Plan the Awkward Cuts Before They Interrupt the Job

Paper template with a curved cutout, pencil, metal ruler and closed utility knife beside a new vinyl floor tile on a cutting mat

Make Paper Templates for Irregular Shapes

A template lets you work out a shape before risking a new tile. Use paper that holds its shape, fit it around the obstruction without disturbing the old floor, and mark which side faces up. Copy the approved clearance into the template rather than tracing a tight fit.

Lay the template over the backed tile and check how the printed pattern will face. A shape can fit the corner yet be rotated the wrong way in the finished design. Make the cut on your cutting board, then check the piece before exposing its adhesive.

Check Doorway and Register Details

At a doorway, decide where one finish ends and the next begins. Look at the join with the door both open and closed. A transition placed casually can leave an untidy strip visible from the adjoining room.

For an accessible removable floor register, plan the new pieces around the opening and keep the required clearance. Do not cover the opening, trap the removable cover, or allow a cut edge to interfere with its fit. Check that the cover sits correctly at the new height.

Avoid automatic advice to undercut old door trim. Cutting unknown old building materials introduces a separate assessment question. Choose a compatible finishing detail with the installer or manufacturer when existing trim cannot be disturbed.

Decide How to Handle Toilets and Pedestal Fixtures

A toilet base presents two different tasks: shaping the finish and maintaining a sound plumbing installation. Cutting carefully around the visible base may leave a conspicuous joint. Removing and resetting the toilet creates plumbing work and a possible change in the relationship between the floor and flange.

Discuss that detail with a qualified plumber before the tile goes down. Do not bury a leak, cover the flange, or improvise the seal because the new flooring looks thin. The same planning applies around a pedestal basin that is secured through the floor.

When an obstacle makes the job exceed your skills, treat that as a project cost. A room with several specialist details may still be worth doing, but the installation is no longer represented by the price on the tile carton.

Troubleshoot Problems by Finding Their Cause

If something changes after installation, photograph it and note when it appears. A problem beside one doorway suggests a different investigation from lifting across the whole room.

Do not apply a general-purpose adhesive to every loose corner. First check the installation record, room conditions, and base. A repair should follow the product maker’s directions and address the reason the bond failed.

Find the cause before the repair

If this happens, check this

If this happensPossible causeNext action
A corner liftsContamination, poor contact, movement, or incompatibility.Check the base and installation record. Use the manufacturer’s approved repair.
A raised area appearsTexture, debris, movement, or another problem below.Establish the cause before lifting or puncturing anything.
Joints openLayout drift, room conditions, movement, or product fit.Check the guide and seek assessment. Do not default to caulk.
Old texture shows throughThe base texture was not adequately addressed.Ask about an approved correction. A new print will not flatten it.
The floor crunchesPossible grit, movement, or incomplete attachment.Locate and record it. Do not assume a universal settling period.

One recurring question is whether a crunching sound means the floor needs a week to settle. There is no reliable universal rule for that. Grit, movement, or incomplete attachment can sound similar from above. If the sound persists or a tile moves, document the location and ask the manufacturer or installer to assess it.

Also avoid puncturing a bubble as a default repair. It may not be trapped air, and a hole adds damage before you understand the cause. Keep spare tiles available so a manufacturer-approved replacement remains an option.

If a problem spreads, pause cosmetic fixes. More glue, more weight, or more caulk can make later assessment harder while leaving the original issue in place.

Set Realistic Expectations for Durability

There is no honest universal promise that peel and stick tile over old linoleum will last a particular number of years. Product construction, the approved base, preparation, traffic, room conditions, cleaning, and installation all affect the result.

Treat a warranty as a set of written terms. Check what it covers, the exclusions, the remedy offered, and whether labor is included. A long warranty name is not a prediction that every overlay will remain trouble-free for that length of time.

Think in terms of the floor’s job. A lightly used room and a busy kitchen have different demands. Narrow chair legs, an appliance move, or repeated moisture at one doorway can create concentrated stress even when the rest of the room sees little wear.

Keep a few matching tiles, the carton label, the receipt, and the installation guide. Store leftovers as the manufacturer directs. A spare from the same purchase may be more useful than trying to match a discontinued pattern later.

Inspect the busy spots during routine cleaning. An edge that begins to catch a shoe deserves attention before it becomes a larger damaged area. Early reporting also gives the manufacturer clearer evidence than a heavily altered repair.

Keep the expectations realistic

A new finish, on a suitable base

BEFORE

A sound, approved floor with an unwanted color or pattern.

Project goal: change the visible finish.

AFTER

A new pattern with product-specific care and use requirements.

Still necessary: a stable base, leak control, and maintenance.

An overlay does not repair a moving floor, solve water damage, or guarantee damage-free removal.

Clean and Protect the Finished Floor

Build your care routine around the specific floor’s maintenance sheet. Remove loose grit with the approved method, wipe spills promptly, and use the recommended cleaner at its stated dilution. More cleaner is not a better cleaning method when it leaves residue behind.

Avoid flooding the floor. Water-resistant tile material does not, by itself, make every seam, edge, and penetration waterproof. Keep plumbing problems separate from cleaning decisions and deal with leaks promptly.

Check furniture feet before bringing pieces back. Remove trapped grit and use protectors accepted for the floor. Heavy items should be moved using the manufacturer’s protection method rather than dragged across the finish.

Ask about mat backing too. A mat being soft does not prove its backing is suitable for vinyl. Check the floor and mat makers’ compatibility guidance before placing one at the sink or doorway.

Use a steam cleaner only if your exact floor explicitly permits it. Do not add polish, wax, a seam coating, or a household solvent because it is recommended for a different kind of floor. Keep one approved care sheet near your cleaning supplies so routine maintenance stays consistent.

Answer the Questions That Affect the Decision

Do I Have to Remove the Old Linoleum First?

Not automatically. First identify the existing material and check your new tile’s accepted substrates. If direct installation is not approved, ask a flooring professional about a suitable alternative assembly or replacement plan. Do not begin lifting an old floor merely to find out what is underneath it.

Do Peel and Stick Tiles Stick to Linoleum Without Extra Glue?

An immediate bond is not the same as an approved installation. Self-stick tiles already have adhesive, and Armstrong says extra glue is not required for its self-stick vinyl tiles. Check your own product before adding anything. A primer or adhesive cannot overrule a prohibited base.

Will the Old Pattern Show Through?

A printed color and a physical texture are different issues. A suitable opaque finish may hide the color while raised lines or depressions remain visible in the surface. Inspect the texture and follow the approved smoothing method. Do not assume a thicker tile will resolve every uneven area.

Can I Use Peel and Stick Tile in a Bathroom?

Use a product approved for that room and base, with the specified details around edges and fixtures. A bathroom label does not make it a shower-floor or wet-room product. Plan for splashes, plumbing access, cleaning restrictions, and any toilet work before installation starts.

Can I Grout Peel and Stick Floor Tiles?

Only if the exact product is intended to be grouted. The instructions must provide the joint spacing, accepted grout, application method, and waiting periods. Do not add gaps to a non-groutable tile to imitate ceramic. If the product has tight joints, grout is not a repair for poor alignment.

Is Peel and Stick Flooring Removable for Renters?

It may be physically removable, but clean removal without residue or damage is not guaranteed. Get the owner’s written agreement about installation and the end of the tenancy. Keep records of the original floor and the approved work. Do not treat the words peel and stick as a promise about your deposit.

Make the Final Decision Before Opening the Backing

Can you install peel and stick tile over linoleum? Only proceed when the exact material, chosen product, and floor condition support an approved installation. A suitable base and a clear plan matter more than the speed of the makeover.

If the checks pass, measure carefully and follow the product’s sequence. If they do not, choose another finish or another way to improve the room.

Save the reference card below to Pinterest so the compatibility checks stay with the design inspiration.

Infographic 04 · Save this card

Before the backing comes off

Approve the project

  • Identify the old material.
  • Confirm exact-product compatibility.
  • Resolve safety and base concerns.
  • Get rental permission in writing.

Prepare for the work

  • Measure and allow for cuts.
  • Round up to full cartons.
  • Follow the approved prep system.
  • Have the specified roller ready.

Protect the result

  • Check the layout before bonding.
  • Follow the edge details.
  • Use product-specific waiting times.
  • Keep spare tiles and records.

Your exact product guide controls the method. No blanket sanding, extra-glue, curing-time, or removal promise applies to every floor.