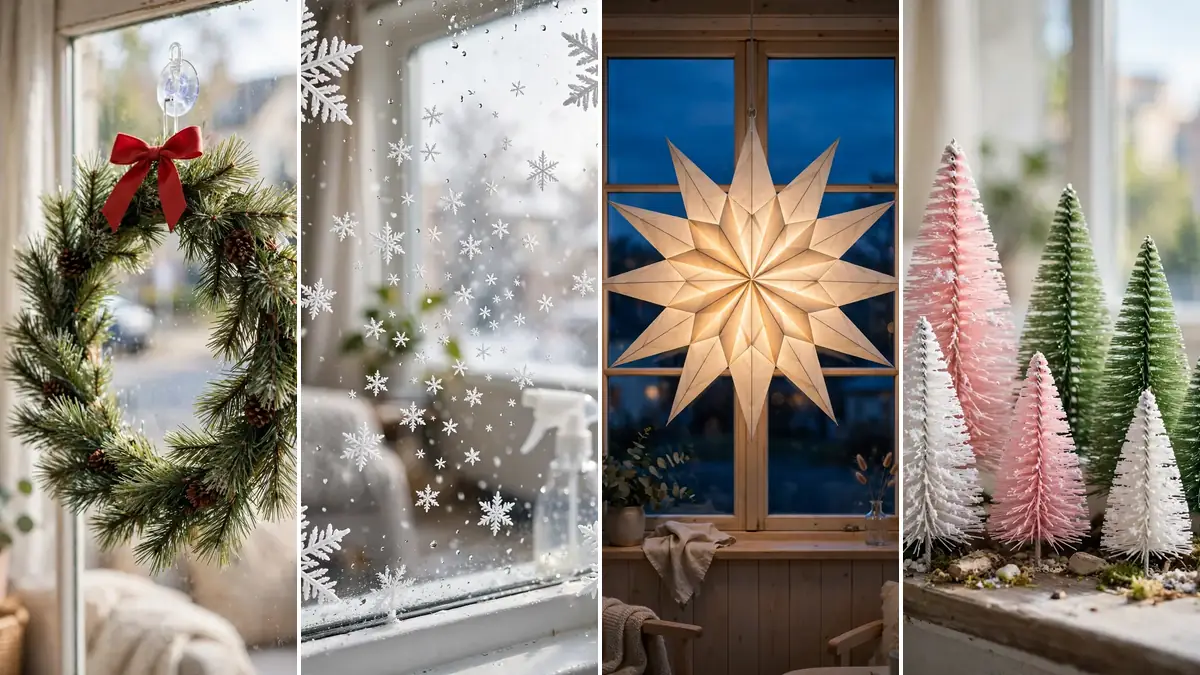
December walks in and every window on your street starts glowing. Then you remember your lease. No nails, no screws, no holes in the walls, and definitely no explaining to your landlord why there are tack marks around the window frame.
Most Christmas decorating guides ignore that problem. They tell you to hammer finishing nails above the window or use a staple gun on the trim, as if deposits grow on trees. Renters need a different playbook, and the window is actually the best place to start. Glass, sills, and frames give you so many no-damage anchor points that you can build a full holiday scene without touching a single nail.
These 32 christmas window decor renters ideas all follow one rule. If it cannot come down clean in January, it does not make the list. Every idea includes the exact hanging method, a real cost range, and how it comes off when the season ends. Pick one window to start, and by the weekend your apartment will look like it belongs on the nice list.
GROUP 1 OF 6
No-Nail Wreaths: big holiday impact, zero holes
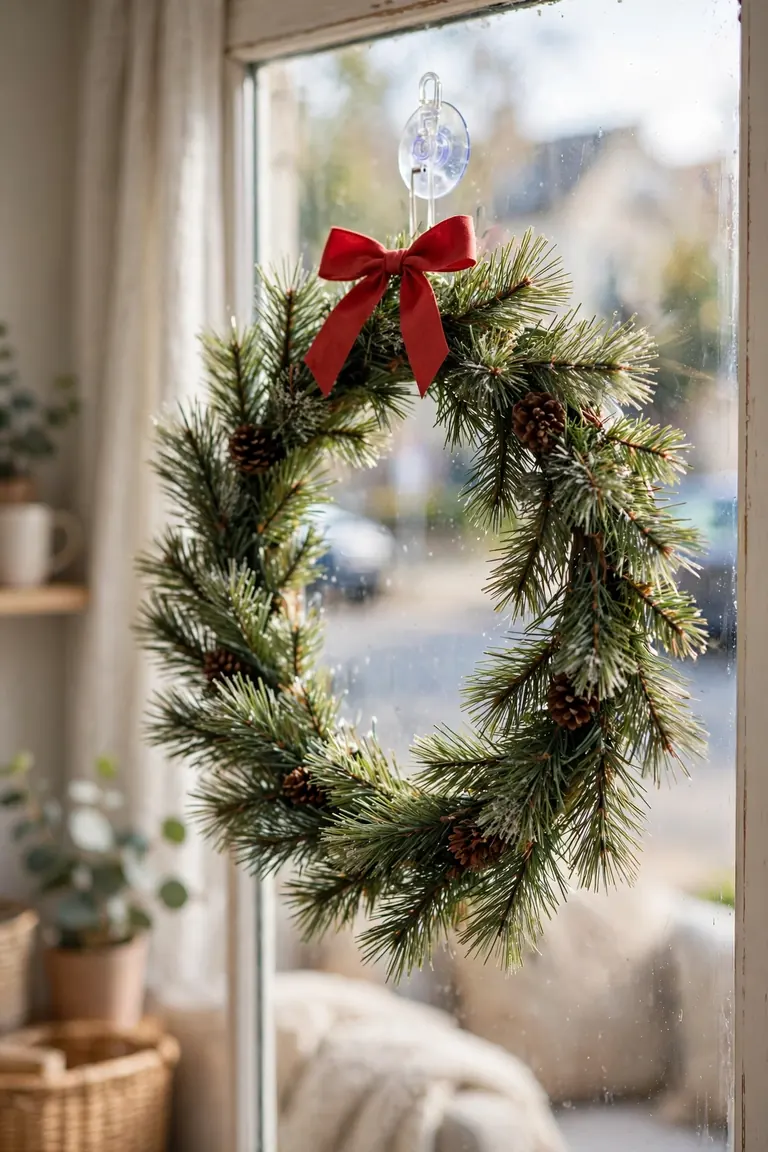
1. Hang a Suction-Cup Christmas Wreath: The Easiest Christmas Window Decor Renters Can Do
Start with the single fastest win on this whole list. A medium faux pine wreath, about 18 inches across, pressed onto the center of your window glass with one heavy-duty suction cup hook. It takes three minutes, costs less than a pizza, and from the street it reads as a full decorated home.
The trick is the suction cup. Cheap ones pop off when the temperature drops, so buy one rated for at least 5 pounds and made for outdoor or bathroom use. Clean the glass first with rubbing alcohol and let it dry completely. Press the cup hard in the center and give it the little twist or lever lock if it has one. Hang the wreath by its built-in loop or a short ribbon.
▸Cost: $8 to $20 for the wreath, $3 to $6 for a good suction cup hook.
▸Hanging method: heavy-duty suction cup on clean glass.
▸Removal: lift the release tab and it pops off. Wipe the glass and no one will ever know.
One honest warning. Suction cups hate textured or frosted glass, so test yours on a small corner first. If it holds for an hour, it will hold all season.
💡 Quick Tip
Press the suction cup on in the morning when the glass is cool. Warm afternoon glass expands slightly and weakens the seal.
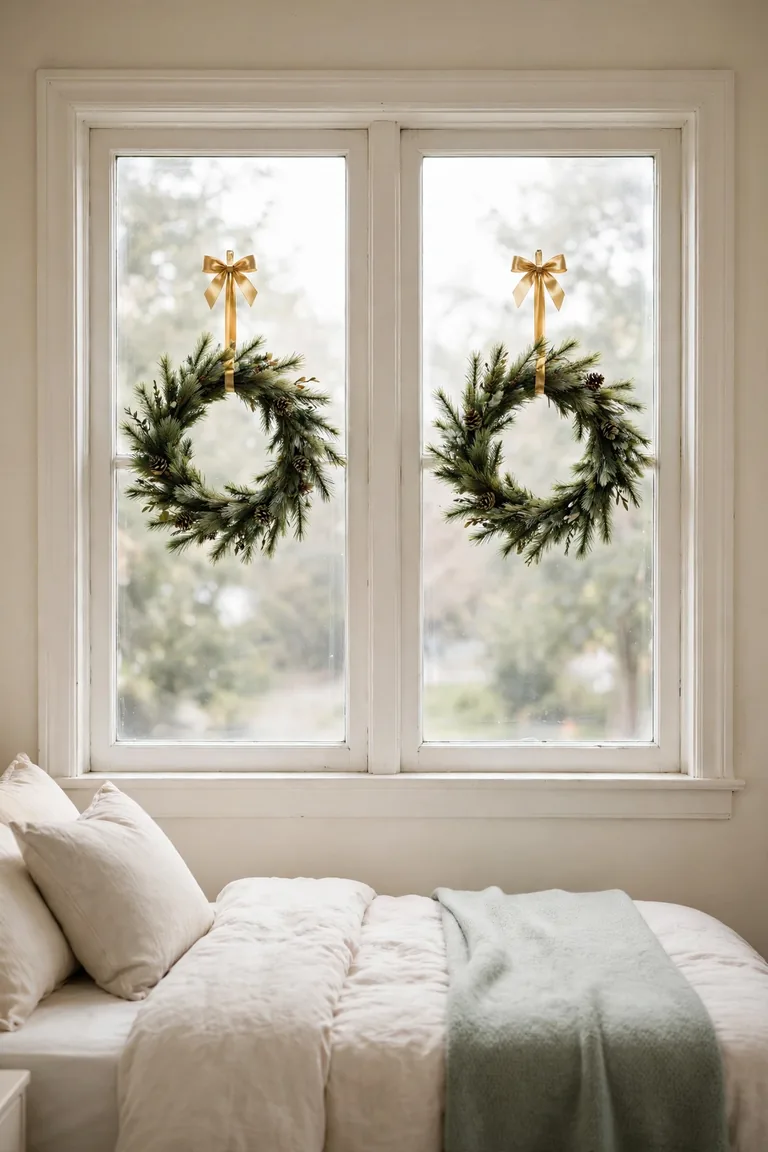
2. Double Up With Two Mini Wreaths, One Per Pane
Got a double window with a divider down the middle. One wreath looks lopsided on it, but two small wreaths look intentional. Buy a pair of matching 10 to 12 inch mini wreaths and hang one centered on each pane. The symmetry does all the styling work for you, and from outside the pair reads as one big polished display.
Mini wreaths are light, usually under a pound each, so small adhesive hooks work fine on the frame or the glass. Stick one hook at the top center of each pane, then hang each wreath from a 6-inch ribbon loop so they sit at exactly the same height. Tie a small red or gold bow at the top of each wreath to tie the pair together visually. This is the move for bedrooms and kitchens where a giant wreath would feel like too much.
Cost stays friendly. Mini wreaths run $5 to $10 each at discount stores, and a pack of small adhesive hooks costs about $4. Removal is the classic peel: warm the adhesive tab with a hair dryer for 20 seconds, pull straight down slowly, and the hook releases clean. Check that your adhesive hooks are rated for glass and painted trim before you buy, because the cheap paper-grade ones fail in cold weather.
⏱️
Time
15 minutes
💰
Cost
$14 to $24
🧰
Damage risk
zero
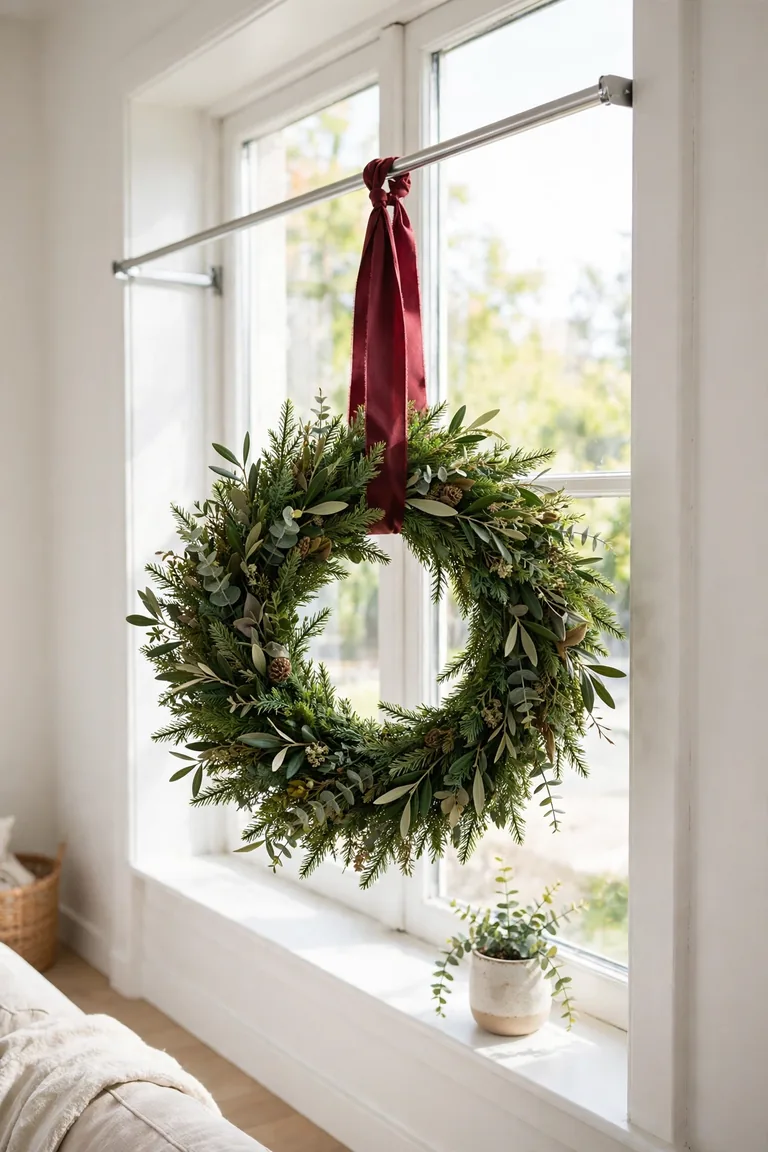
3. Try the Tension-Rod Christmas Wreath Hack for Apartment Windows
Here is the renter loophole most people miss. A tension rod wedged inside the window frame gives you a hanging bar with no screws, no adhesive, and no marks at all. Hang your christmas window wreath apartment style: loop a wide ribbon over the rod, tie the wreath to the ribbon, and let it float in front of the glass. It looks like it is hanging from thin air.
Measure the inside of your window frame first, then buy a tension rod that covers that range with room to spare. Twist it tight about 4 inches below the top of the frame so the wreath hangs centered in the glass. Use a ribbon at least 2 inches wide in red, green, or gold, because thin ribbon twists and looks messy. The wreath should be light to medium weight, since the rod holds by friction and heavy wreaths can slide it loose over time.
What to grab first
✅Tension rod sized to your window frame, $8 to $12
✅Wide ribbon, 2 inches or more, in a holiday color
✅Light to medium wreath, 16 to 20 inches
Total cost runs $15 to $30, and removal is literally a twist. Loosen the rod, slide it out, and the frame looks untouched. This hack also works for hanging stockings, ornaments, and paper stars later in this list, so keep the rod up all season.
4.
Hang a Dried Orange Slice Wreath for a Natural Look
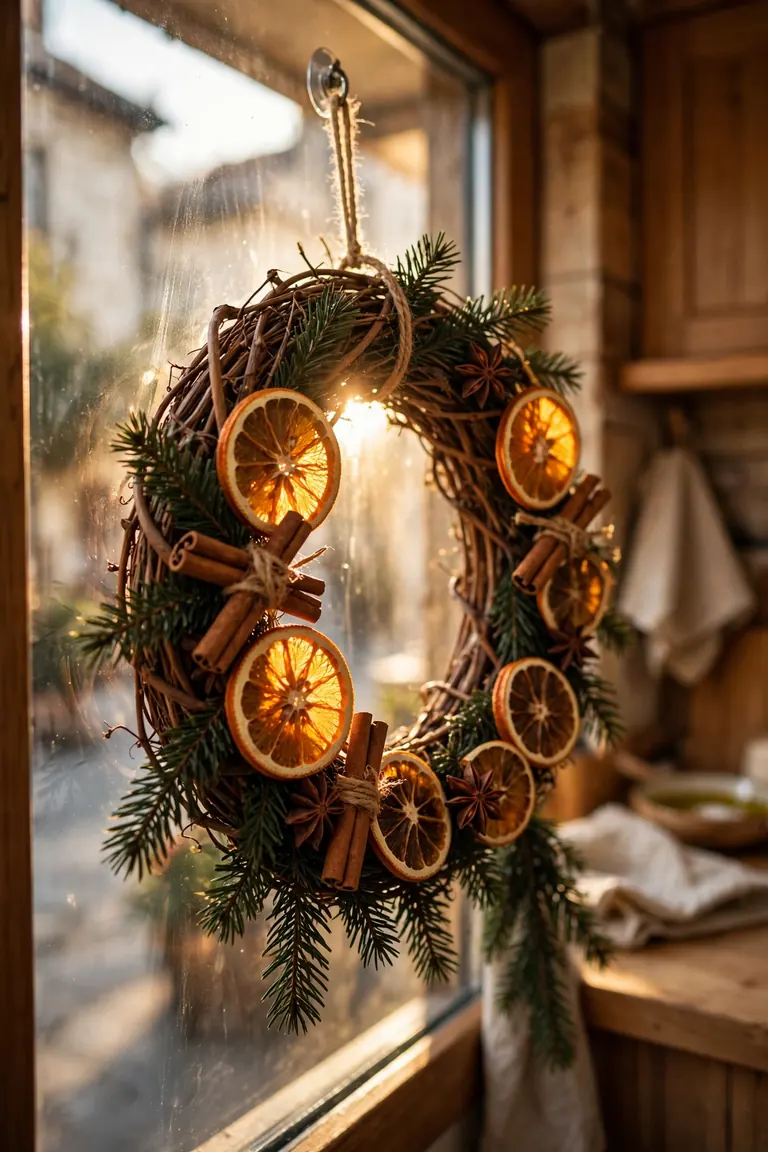
Walk past any holiday market and the wreath that stops you is never the plastic one. It is the one with dried orange slices glowing amber against dark green pine. You can buy one ready-made for $15 to $25, or make one in an afternoon by wiring dried orange slices and cinnamon sticks onto a plain grapevine wreath form.
These wreaths are featherlight, which suits renters well. A single small suction cup or adhesive hook holds one with room to spare, and the natural materials smell faintly of the holidays every time the sun warms the glass. Hang it slightly off-center on a side window for a collected, European-market feel rather than dead-center like everyone else.
🍊
Store-bought
$15 to $25, ready to hang
🧵
DIY version
$8 to $12, one afternoon
🪝
Hanging
suction cup or adhesive hook
One practical note. Dried fruit fades in strong direct sun, so this wreath lasts longest on north-facing windows or inside the glass rather than outside. When January comes, lift the suction cup tab and compost the whole thing. Nothing to store, nothing to throw away guilty.
5. Weave Battery Fairy Lights Into an Eucalyptus Wreath
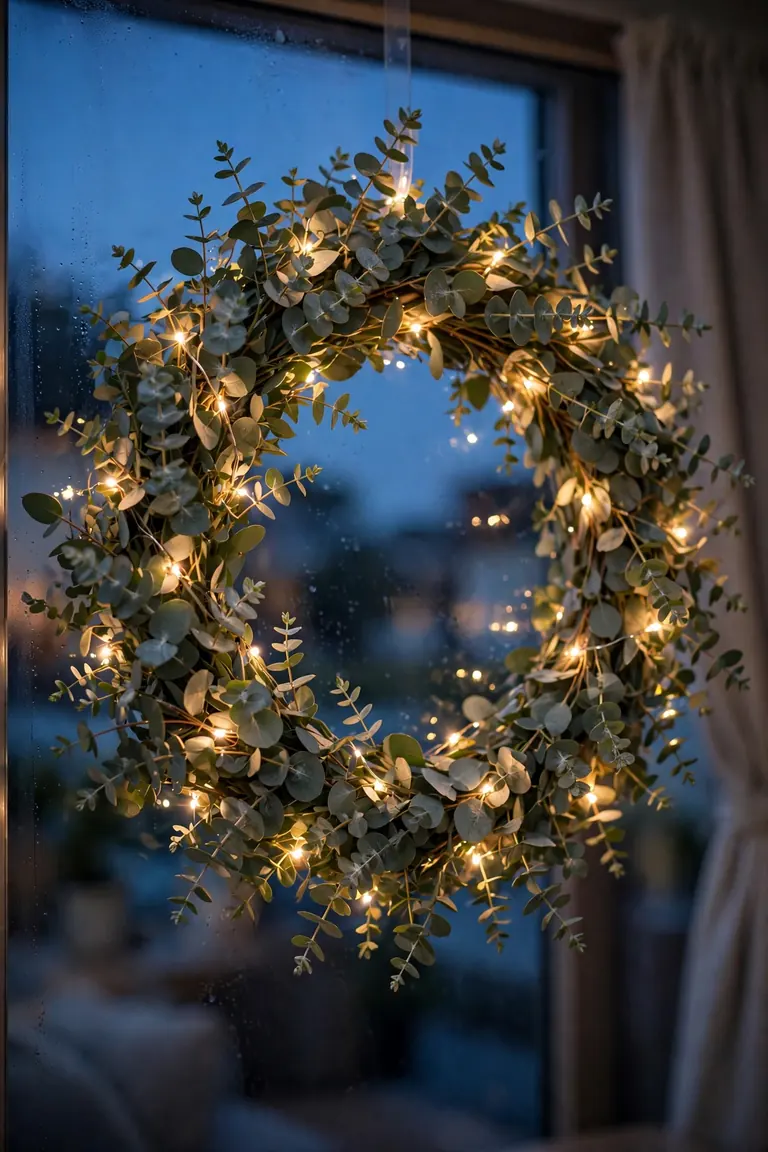
A plain green wreath is nice. A green wreath dotted with fifty tiny warm lights is the thing neighbors slow down to look at. Buy a simple eucalyptus or pine wreath and one strand of battery-operated fairy lights on thin copper wire, then weave the wire loosely through the branches. The whole upgrade takes ten minutes.
Pick warm white lights, not cool white. Cool white reads like a hospital hallway against green, while warm white glows like candlelight. Tuck the small battery box behind the wreath or tape it flat to the glass with a removable adhesive strip, and set the timer function if yours has one. Six hours on, eighteen off means you never touch it all month and the batteries last the whole season.
1
Weave the fairy light wire through the wreath, spacing lights evenly. Cost: $6 to $10 for the strand.
2
Hide the battery box behind the wreath with a removable adhesive strip.
3
Hang the finished wreath with a suction cup hook and switch on the timer mode.
Total spend lands around $18 to $35, and removal is two motions: pop the suction cup, peel the battery box strip. No cords to the outlet, no landlord conversations, just glow.
GROUP 2 OF 6
Garland Without Drilling: frame every window, hole-free
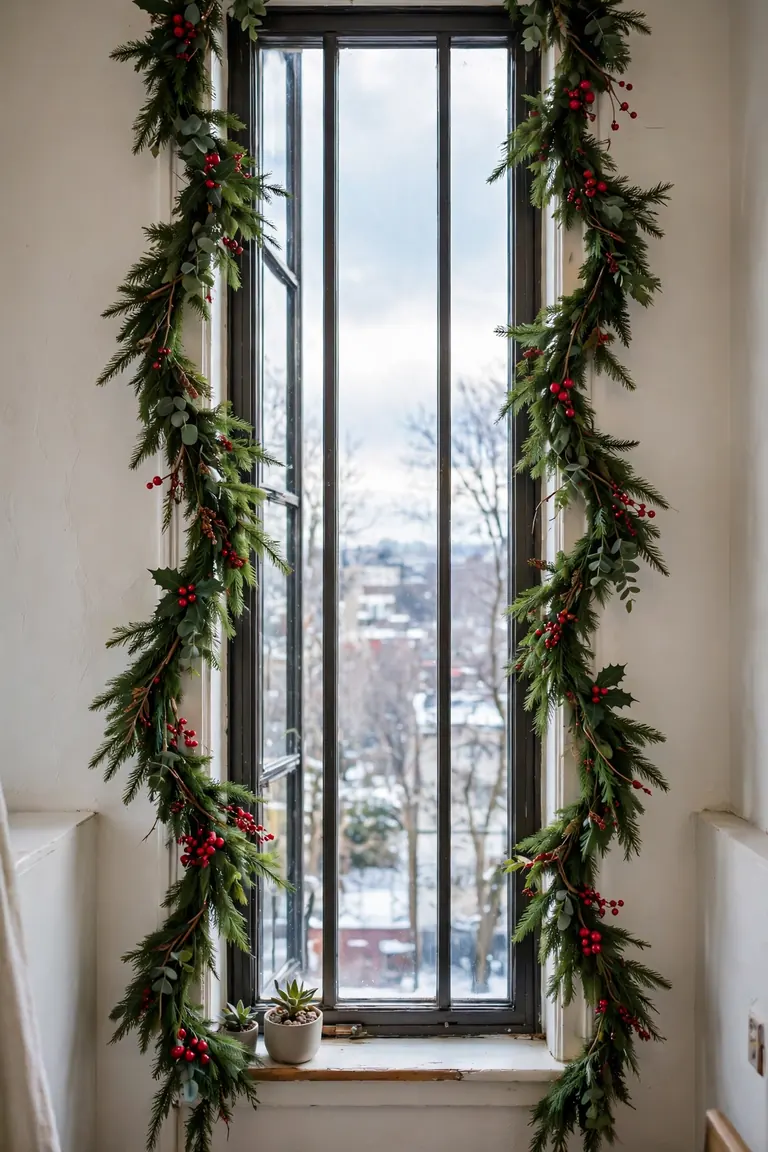
6. Frame Your Window With Faux Pine Garland and Adhesive Clips
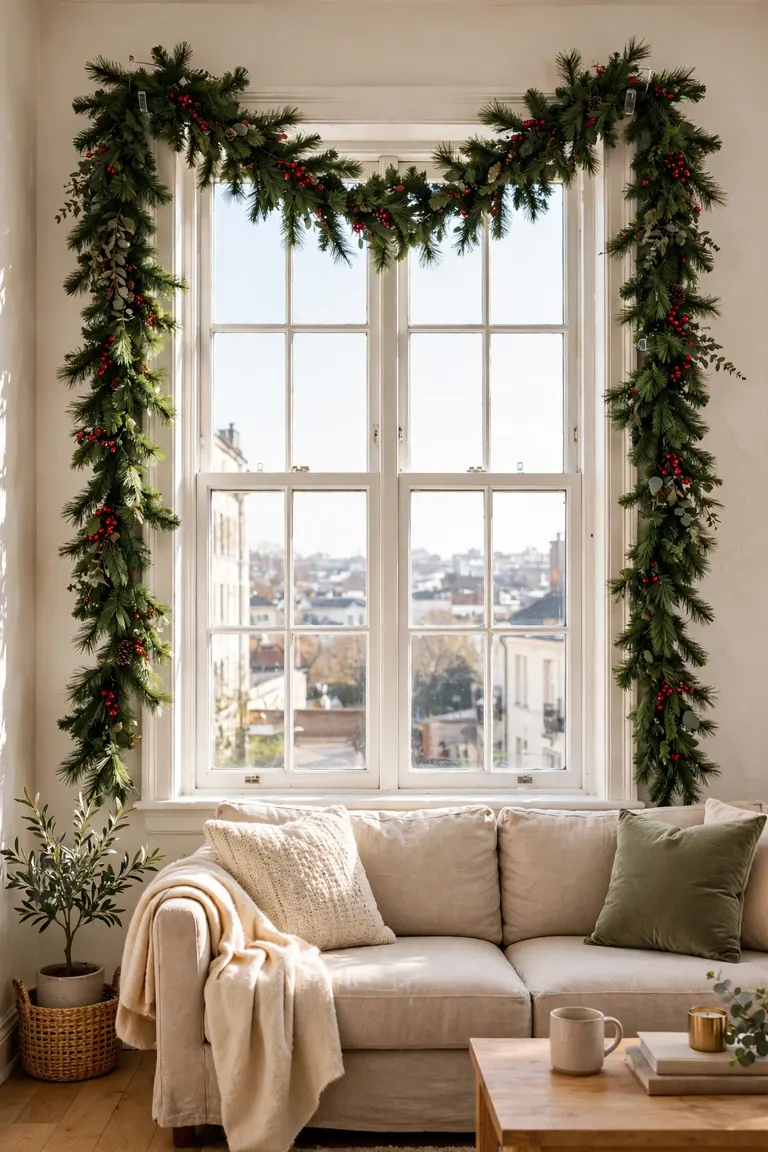
Nothing says Christmas like a window outlined in green. Homeowner guides tell you to staple garland to the trim, which is exactly what your lease forbids. The renter version uses small removable adhesive clips pressed along the top and sides of the frame, and the garland simply rests in them. From the sidewalk, no one can tell the difference.
Buy a 9-foot faux pine garland, which fits most standard windows with a little drape left over. Press adhesive clips every 12 to 18 inches along the top of the frame and down both sides, following the window shape. Lay the garland into the clips and let the middle sag just slightly. That gentle swoop is what makes it look styled instead of stuck on. Fluff the branches outward so the garland looks twice as full as it is.
Expect to spend $12 to $25 on the garland and about $5 on clips. At takedown, warm each clip with a hair dryer for 20 seconds and pull the tab straight down. The clips release clean and the garland coils into a bag for next year. This is the classic christmas garland around window no nails move, and it works on every window in the apartment.
✅ Do this
Space clips 12 to 18 inches apart so the garland cannot sag between them.
Fluff branches outward after hanging for a fuller look.
🚫 Skip this
Staples, tacks, or tiny nails in the trim, even if you plan to fill them later.
Hanging garland on freshly painted trim less than a month old.
7. The Tension Rod Christmas Garland Window Hack That Takes 5 Minutes
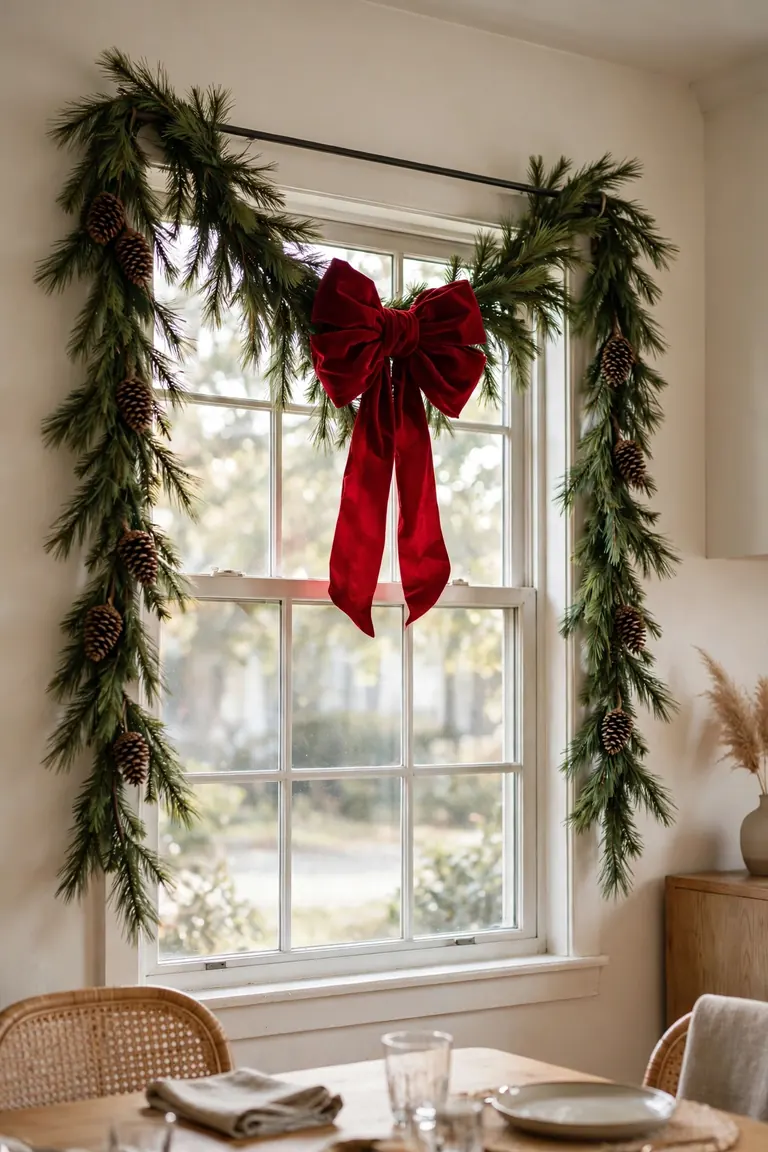
If adhesive clips make you nervous, skip them entirely. A tension rod twisted inside the window frame holds a swag of garland with pure friction, and there is nothing to peel off in January. Drape a 6-foot garland over the rod so it hangs in a soft U shape, and you have an instant holiday valance.
This is the tension rod christmas garland window hack in its simplest form. The rod sits high inside the frame, the garland folds over it, and the two hanging ends frame the glass like curtains. Add a bow at the center where the garland bends over the rod to hide the fold. Because the rod is already holding your wreath from idea 3 on another window, buying a two-pack of rods covers half this list.
Tension rod swag
Adhesive clip frame
5 minutes, zero adhesive
15 minutes, clips to place
Best for one statement window
Best for outlining full frames
Removal: twist and slide out
Removal: warm and peel each clip
Cost runs $15 to $28 for the rod and garland together. To take it down, twist the rod loose and lift the garland off. The whole thing fits in a grocery bag, and your window frame never knew it was there.
8. Run Garland Up Both Sides With Removable Hooks
A full frame of garland can feel like a lot on a small window. Running it up just the two sides gives you the vertical drama without crowding the glass. Press three removable hooks up each side of the frame, then weave the garland through them in a loose spiral so it climbs like a vine.
The trick here is hook placement. Put the first hook about 6 inches from the sill, then space the rest evenly up to the top corners. Weave the garland in front of one hook and behind the next so it zigzags naturally instead of hanging straight. Tuck a few pinecones or red berry picks into the garland at each hook point to hide the hardware. Red berry picks cost about $1 each at craft stores and make the whole thing look expensive.
Budget $12 to $22 total. When the season ends, each hook peels off with the warm-and-pull method, and the berry picks go back in the craft box. This side-only style also leaves the center of the window clear, which matters if it is the window you actually open for air.
BEFORE
Bare window frame, flat and forgettable, blending into every other apartment on the block.
AFTER ✨
Green garland climbing both sides with red berries tucked in, framing the glass like a picture.
9. String a Lightweight Beaded Wooden Garland Across the Top
Not every window wants a full pine explosion. A simple strand of wooden beads in natural or painted red, draped in a shallow swag across the top of the frame, gives you holiday warmth in a Scandinavian-minimal way. It weighs almost nothing, which means two tiny suction cups or adhesive clips hold the whole thing.
Buy a 6-foot beaded garland or make one by stringing large wooden beads on jute twine, alternating red beads with natural ones. Drape it so the center dips about 8 inches lower than the ends. That dip is the whole design. Hang a single brass bell or small ornament at the lowest point for a finishing touch. This is the idea for the design-conscious renter who finds tinsel visually loud.
THE ONE THING TO REMEMBER
The lighter the garland, the simpler the hanging. Under one pound, even basic suction cups hold all season.
Cost is $6 to $15, and takedown is instant. Unclip both ends, coil the beads, and drop them in a drawer. They weigh nothing and store flat, so this is the garland you will actually reuse for years.
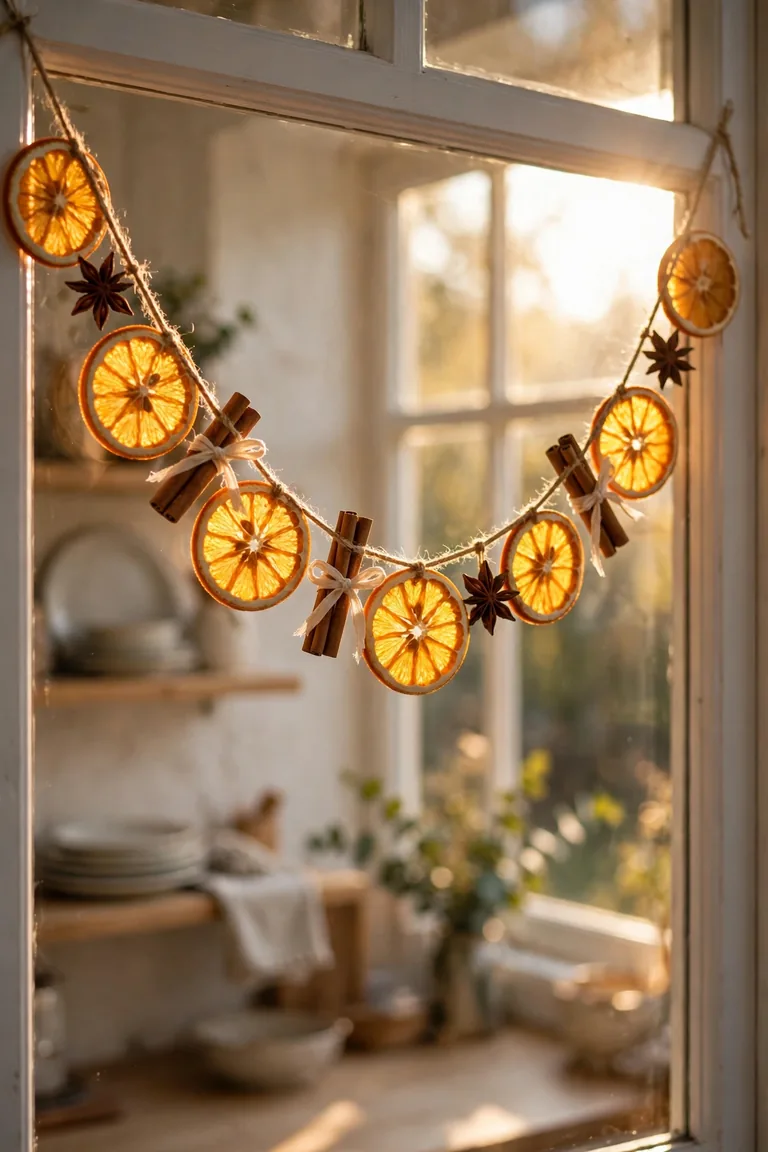
10. Make a Dried Citrus and Cinnamon Garland That Smells Like December
Here is the idea guests always ask about. A string of dried orange slices, cinnamon sticks, and star anise hung across the window looks like a holiday market stall and smells faintly of mulled everything whenever the sun hits it. It costs almost nothing if you dry the oranges yourself.
Slice oranges a quarter inch thick, bake at 200 degrees for about 3 hours, flipping once, and let them cool fully. Thread them on jute twine with a large needle, alternating with bundles of two cinnamon sticks tied with thin ribbon. Hang the finished string from small adhesive clips across the top of the frame, letting it dip gently in the middle. The whole project takes an afternoon, most of it waiting on the oven.
▸Oranges, cinnamon sticks, star anise, jute twine: $8 to $14 total.
▸Adhesive clips: about $4 for a multi-pack you will reuse.
▸Keep it out of direct rain if the window opens. Indoor side of the glass is best.
When the season ends, the whole garland composts. No storage bin, no plastic, nothing your landlord could possibly object to. That is about as renter-friendly as decor gets.
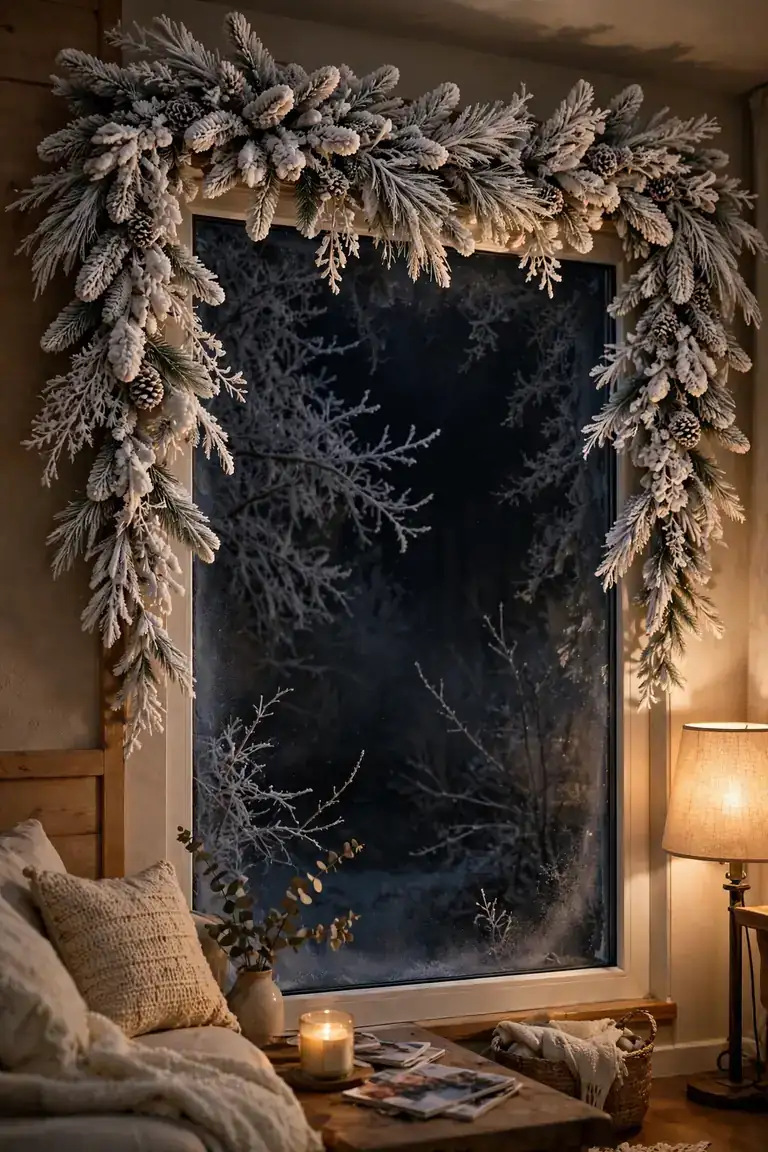
11. Fake a Frosted Forest With Flocked Snowy Garland
Some renters want Christmas to look like Christmas, which means snow, even if they live somewhere it never snows. Flocked garland, the kind dusted white to look frosted, gives you that snowy forest frame around your window without a single real pine needle on the floor.
Drape a 9-foot flocked garland along the top of the frame and let the ends trail down both sides a foot or two. The white dusting catches lamplight beautifully at night, which is when this idea earns its keep. Pair it with warm white fairy lights woven through for the full winter cabin effect. One honest tradeoff: flocking sheds a little white dust, so put a towel on the sill during setup and shake the garland outside first.
⚠️ Watch Out
Flocked garland plus a curious cat equals white paw prints everywhere. Hang it high or skip this one if your cat climbs.
Cost runs $15 to $30, hung with adhesive clips or a tension rod. Removal is the standard peel, plus a quick vacuum of the sill. Store it in a garbage bag, not a box, so the flocking does not get crushed.
GROUP 3 OF 6
Renter-Safe Window Lights: glow without a single outlet nearby
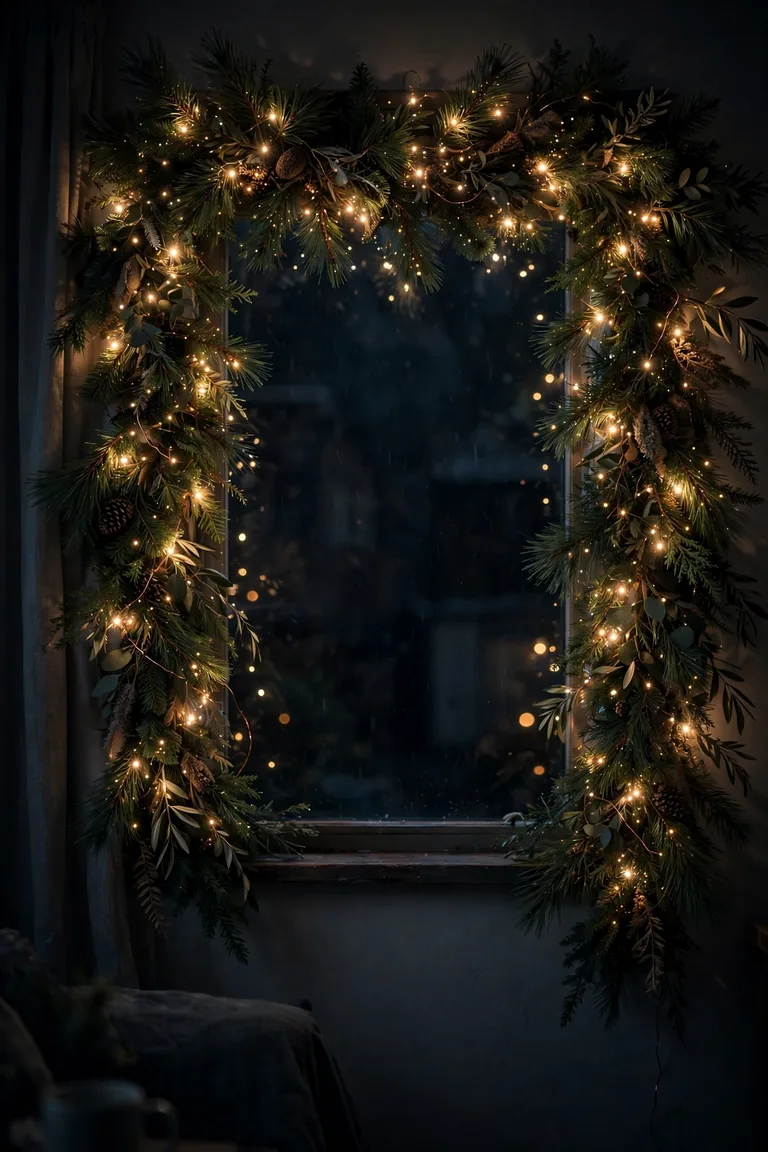
12. Christmas Window Lights for Apartments: Weave Battery Fairy Lights Through Garland
Lights make the window. Everything else is garnish. The renter problem is outlets, because windows rarely sit near one, and running an extension cord across the room is ugly and a trip hazard. Battery-operated fairy lights on hair-thin copper wire solve it completely. No plug, no cord, no problem.
Weave one 33-foot strand through the garland already framing your window, spacing the lights every few inches. The copper wire disappears against the green, and the tiny warm bulbs look like fireflies caught in pine. Use the timer mode, six hours on and eighteen off, so the lights switch themselves on at dusk every evening. Two strands cover a large window; one handles a standard one.
Each strand costs $6 to $10, and a set of batteries lasts the whole season on timer mode. When January arrives, unwind the wire and coil it around a piece of cardboard. There is nothing plugged in anywhere, which means there is nothing for a landlord to notice and nothing for a pet to chew.
⏱️
Time
20 minutes
💰
Cost
$6 to $20
🔌
Outlets needed
zero
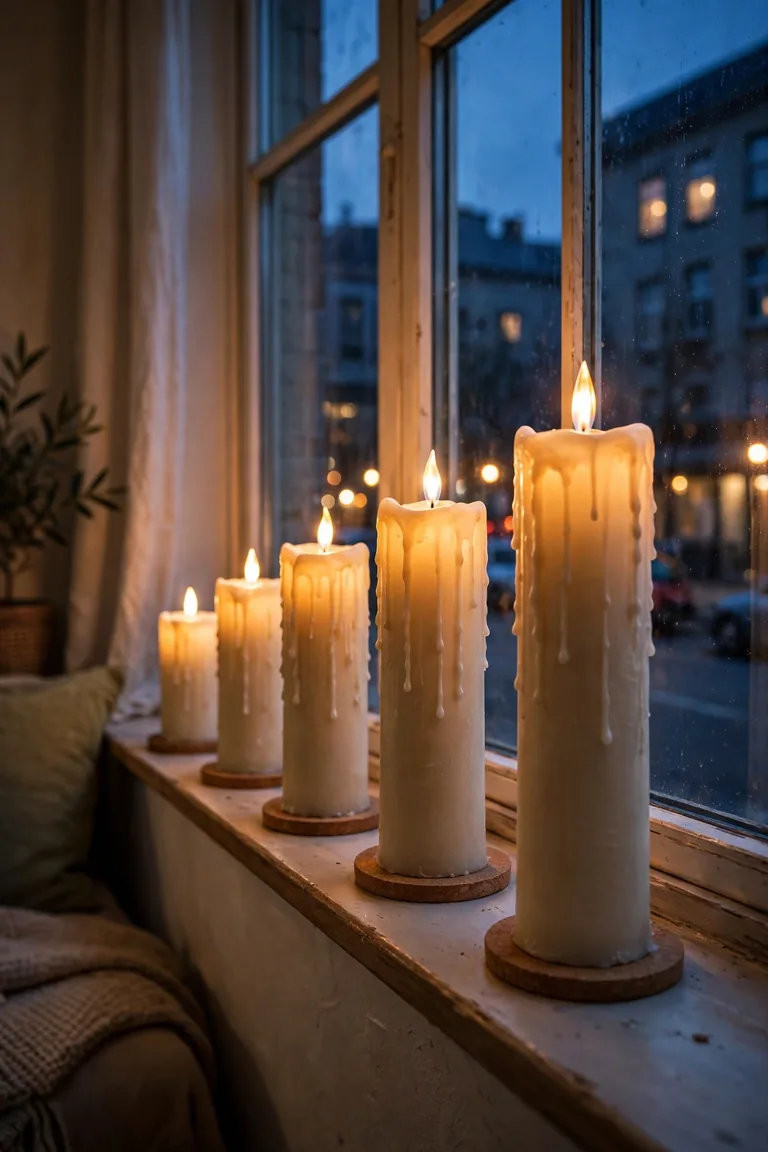
13. Line the Sill With Battery-Operated LED Candles
There is a reason every holiday movie puts candles in the window. A row of glowing candles on the sill reads as Christmas from a block away, and the battery versions give you the look with none of the fire risk your lease definitely bans. Buy flameless pillar candles in graduated heights, three to five of them, and line them along the sill.
The wax-dipped LED ones look the most real, with a slightly melted top edge and a flickering warm bulb inside. Set them on small cork coasters so they do not wobble on narrow sills, and use the built-in timer so they glow every evening without you touching them. From outside, the staggered heights look like a real mantel display.
What to grab first
✅3 to 5 flameless LED pillar candles in mixed heights, $12 to $25 for a set
✅Cork coasters or small trays to steady them on the sill
✅Fresh batteries, since timer mode runs them nightly
No hanging method needed at all, which makes this the lowest-effort idea on the list. Removal means picking them up and putting them in a closet. If your windows face the street, this single idea might be all you need.
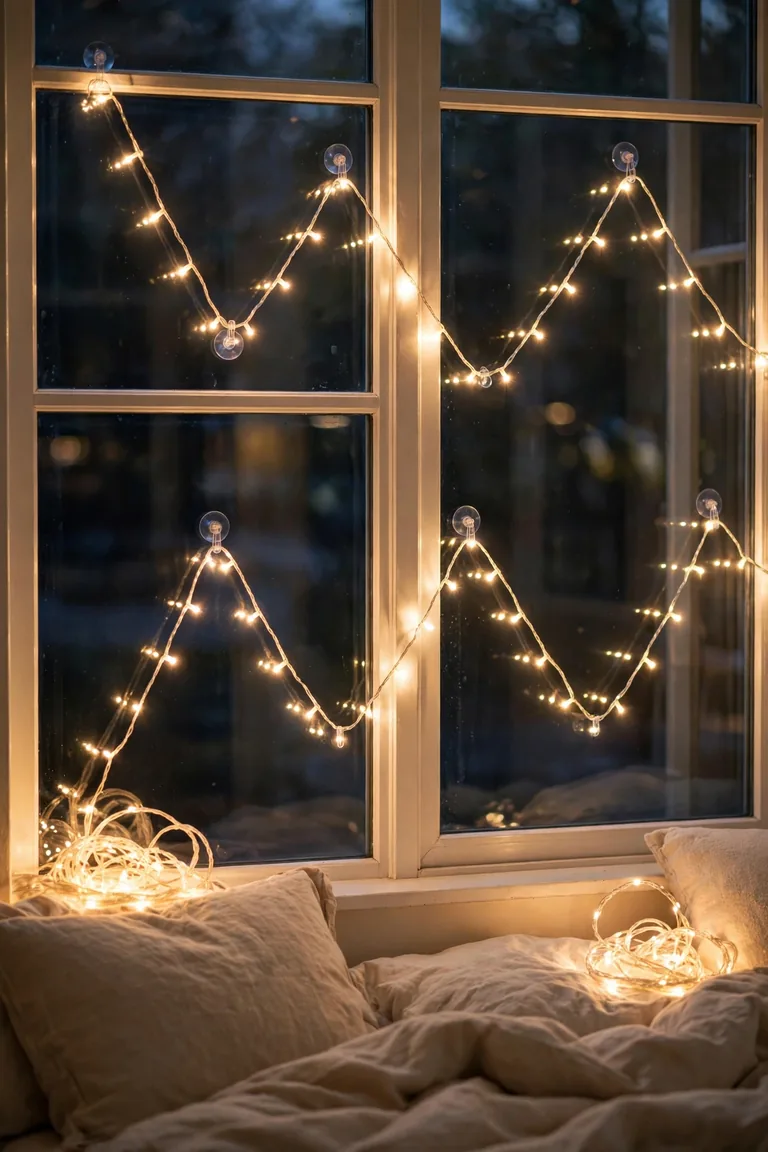
14. Zigzag String Lights Across the Glass With Suction Cup Hooks
A curtain of lights looks magical, but the hanging part scares renters off. Suction cup hooks with a small clip built in make it simple. Press five or six of them across the top of the window glass, then drape a strand of warm white string lights in a zigzag, catching the wire on each hook as you go.
The zigzag matters. Straight lines of lights look flat, but the up-and-down pattern catches the eye and fills the glass with glow. Let the ends of the strand puddle slightly at the bottom corners for a relaxed, abundant feel. Battery-operated strands keep the whole thing cord-free, though a plug-in strand works too if you have an outlet within reach of the sill.
🪝
5 to 6 hooks
suction cups with clips, $5 to $8
💡
1 strand
warm white lights, $8 to $15
✨
The pattern
zigzag, ends puddled softly
Total cost stays under $25. To remove, unhook the strand and pop each suction cup with its release tab. The glass wipes clean in seconds, and the lights coil away for next December.
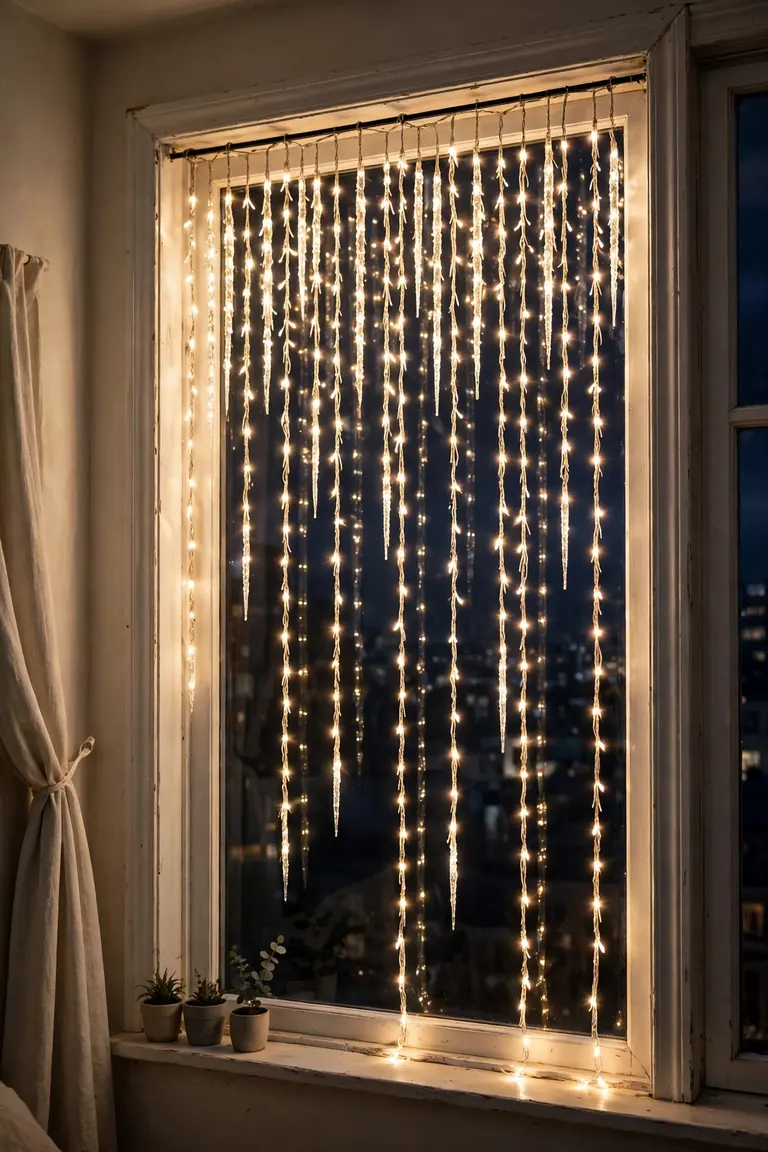
15. Hang a Curtain of Lights From a Tension Rod
Icicle lights and light curtains look incredible in windows, but every box shows them stapled to a roofline. Renters can get the same waterfall of light with a tension rod and a curtain-style LED strand. Clip the top of the light curtain to the rod with its built-in loops or small curtain rings, and let the strands fall.
Choose a curtain where the strands vary in length. The uneven bottom edge looks like real icicles and catches light at different depths, which reads as expensive. Hang the rod high inside the frame so the longest strands just brush the sill. From outside at night, your window becomes the glowing one on the street.
1
Twist the tension rod tight high inside the window frame.
2
Clip the light curtain across the rod with rings or built-in loops.
3
Plug in or switch on batteries, then step outside to admire your work.
Light curtains run $12 to $25, plus the rod if you do not already own one. Takedown is unclipping and coiling. Fold the curtain, do not wad it, or next year you will spend an hour untangling.
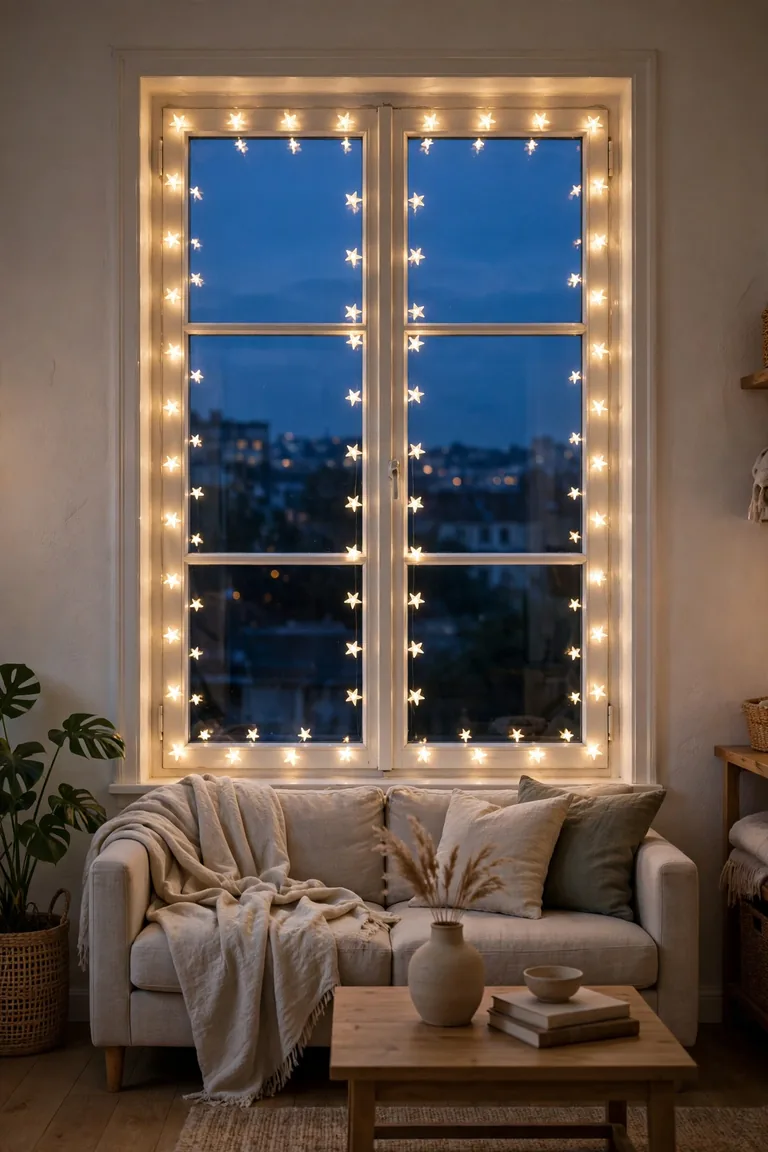
16. Outline the Window With Star-Shaped String Lights
Round bulbs are classic, but star-shaped lights make a window look like it was decorated on purpose rather than by default. A 20-foot strand of small warm stars, pressed into adhesive clips around the frame, turns an ordinary window into a constellation.
Outline just the inside edge of the frame, following the rectangle of the glass. The stars sit flat enough that the shape reads clearly from both inside and outside. This is the idea that photographs best for holiday cards, because the star shapes stay sharp in pictures while round bulbs blur into blobs. Kids love this one, and it takes about ten minutes to install.
✅ Do this
Use warm white stars for a cozy glow that suits every decor style.
Follow the inner frame edge so the shape stays crisp.
🚫 Skip this
Multicolor stars on every window. One window is charming, five is a carnival.
Cheap strands with no timer. You will forget to turn them off.
Strands cost $10 to $18, clips about $5. Peel the clips in January with the warm-and-pull trick, and the frame is untouched. Save the strand with your other lights and it will last for years.
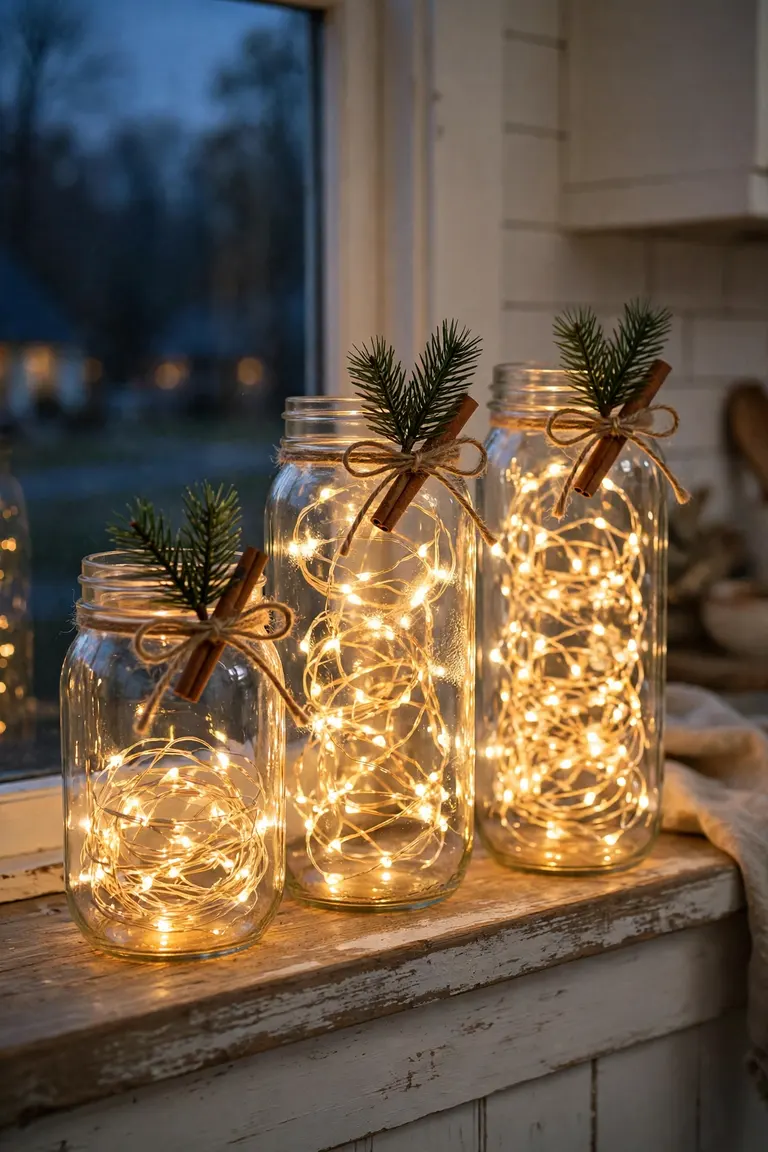
17. Set Out Mason Jar Lanterns With Fairy Lights on the Sill
Some windowsills are too narrow for a row of candles but just right for something with more texture. Drop a coiled strand of battery fairy lights into two or three mason jars, screw the lids on loosely or leave them off, and line the jars along the sill. The glass softens the bulbs into a warm honeyed glow.
This is the crafty-cozy corner of the list. Tie a bit of twine around each jar neck with a sprig of faux pine or a cinnamon stick tucked in, and suddenly a $3 jar looks like a boutique candle. Vary the jar heights for a collected look. The light bouncing through glass reads beautifully from the street, softer and more interesting than bare bulbs.
Mason jar lanterns
LED pillar candles
Textured, crafty glow through glass
Clean, classic candlelight look
$3 to $6 per jar all-in
$4 to $8 per candle
Best for: farmhouse and rustic rooms
Best for: elegant and minimal rooms
Three jars with lights run about $12 to $20 total. There is no hanging and no adhesive involved at all. In January, unscrew the lids, pull out the light strands, and the jars go back to the kitchen. For more no-damage holiday ideas around the apartment, see our renter-friendly ways to make a rental feel like yours.
GROUP 4 OF 6
Window Clings & Decals: press on, peel off, done
18. Stick Up Christmas Window Clings for Renters in Under 10 Minutes
If you only do one idea from this entire list, make it this one. Static window clings press onto glass with nothing but a spritz of water, and they peel off in January without a trace. No adhesive, no hooks, no hardware of any kind. A sheet of snowflakes costs $4 and covers a full window.
Here is the method that actually works. Spray the glass lightly with water from a spray bottle, press the cling on, and smooth out bubbles with a credit card wrapped in a soft cloth. The water lets you slide the cling into position before it grabs. Layer large snowflakes in the corners and smaller ones drifting toward the center for a natural snowfall look instead of a random scatter.
Buy two packs if your window is large, because running out halfway looks worse than not starting. Total cost is $4 to $10, and removal is a fingernail under one corner. They even survive being saved: stick used clings back on their original backing sheet and they work again next year. These christmas window clings for renters are the definition of deposit-safe decorating.
BEFORE
Plain glass showing the parking lot, zero holiday spirit, and a lease that bans everything fun.
AFTER ✨
Snowflakes drifting across the glass, catching the light, installed in minutes with just water.
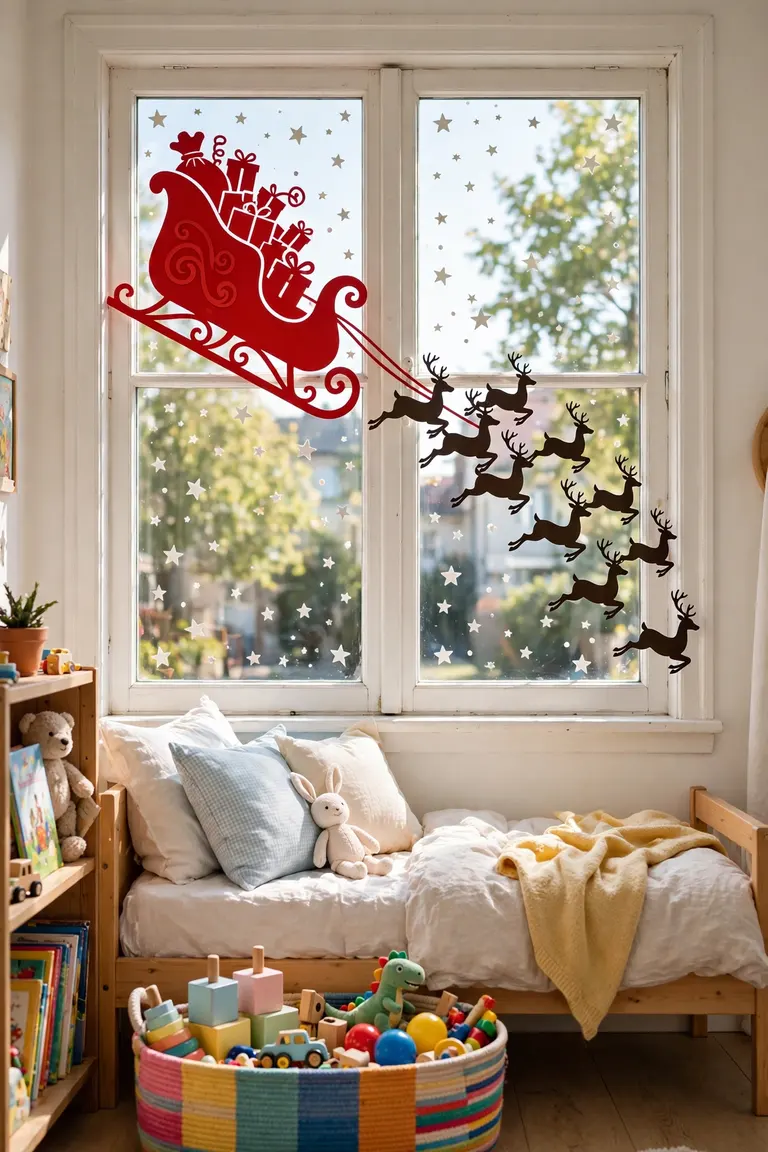
19. Add Santa and Reindeer Silhouettes for the Kids’ Room Window
Adult windows get elegant snowflakes. Kids’ windows get Santa’s sleigh flying across the glass with eight tiny reindeer. Silhouette clings in solid red or black read clearly from far away, which is exactly what you want for a child’s room, and they cost about the same as the snowflakes.
Place the sleigh high on the glass, toward one corner, with the reindeer strung out behind it in a gentle arc. That diagonal flight path looks dynamic, like the scene is actually moving. Let your kids place the smaller stars and dots wherever they want. The clings reposition with another spritz of water, so there is no wrong answer and no wasted sheets.
THE ONE THING TO REMEMBER
Static clings use zero adhesive. If it sticks with water alone, it cannot damage anything.
Cost is $5 to $12, and the whole scene takes fifteen minutes with little helpers. In January, peel them off together in one sheet and save them on the backing paper. Kids will ask for the same scene next year, and you will be glad you kept it.
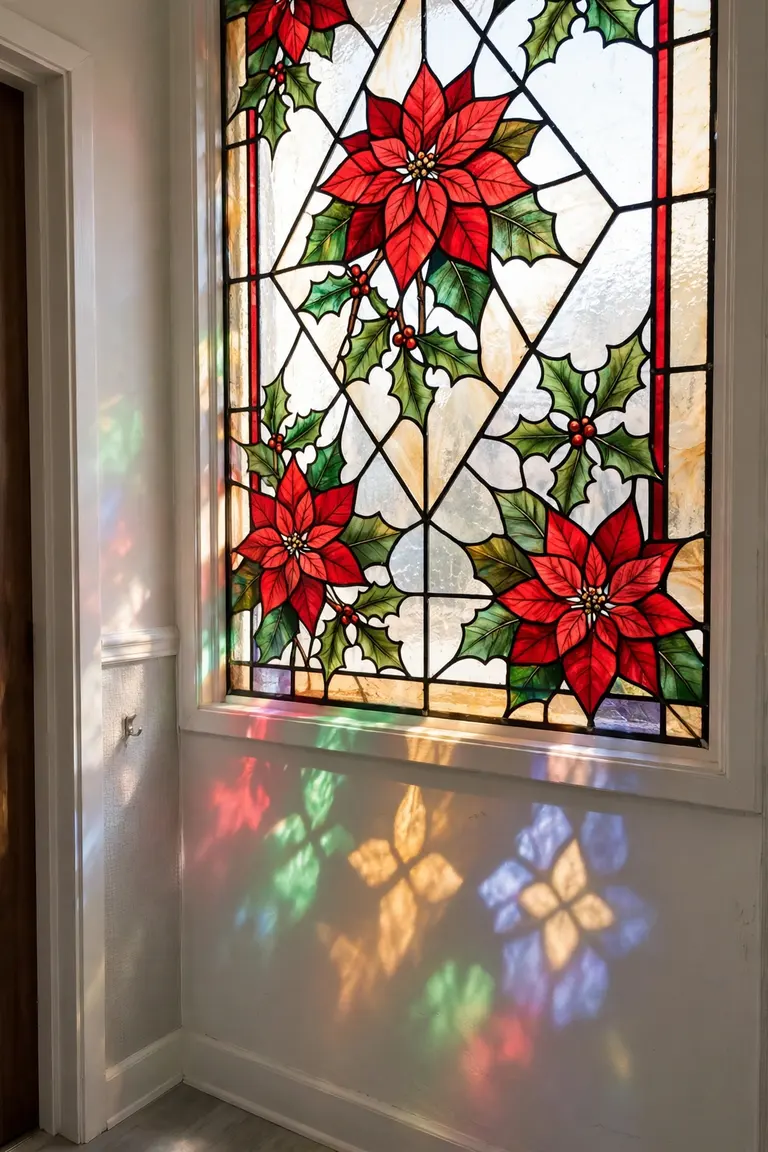
20. Press On Stained-Glass Style Cling Panels
Here is the grown-up version of window clings. Stained-glass style static panels come in poinsettia, holly, and winter village designs, printed in rich reds and greens that glow when daylight shines through. From the sidewalk, your window looks like a chapel window. From inside, the room fills with colored light.
These panels come in larger sheets than snowflake clings, so measure your panes before buying. Trim the panel a quarter inch smaller than the glass on all sides with sharp scissors, because edges that overlap the frame peel up and collect dust. Apply with the same water spritz method, working from the center outward to push air bubbles to the edges.
▸One large panel per pane, $8 to $15 each.
▸Trim slightly smaller than the glass for clean edges.
▸Peels off whole in January. Save on backing paper for next year.
This is the highest-impact cling idea on the list, and it still costs less than lunch. It works especially well on bathroom and hallway windows that need privacy anyway, because the printed panel obscures the view while looking intentional.
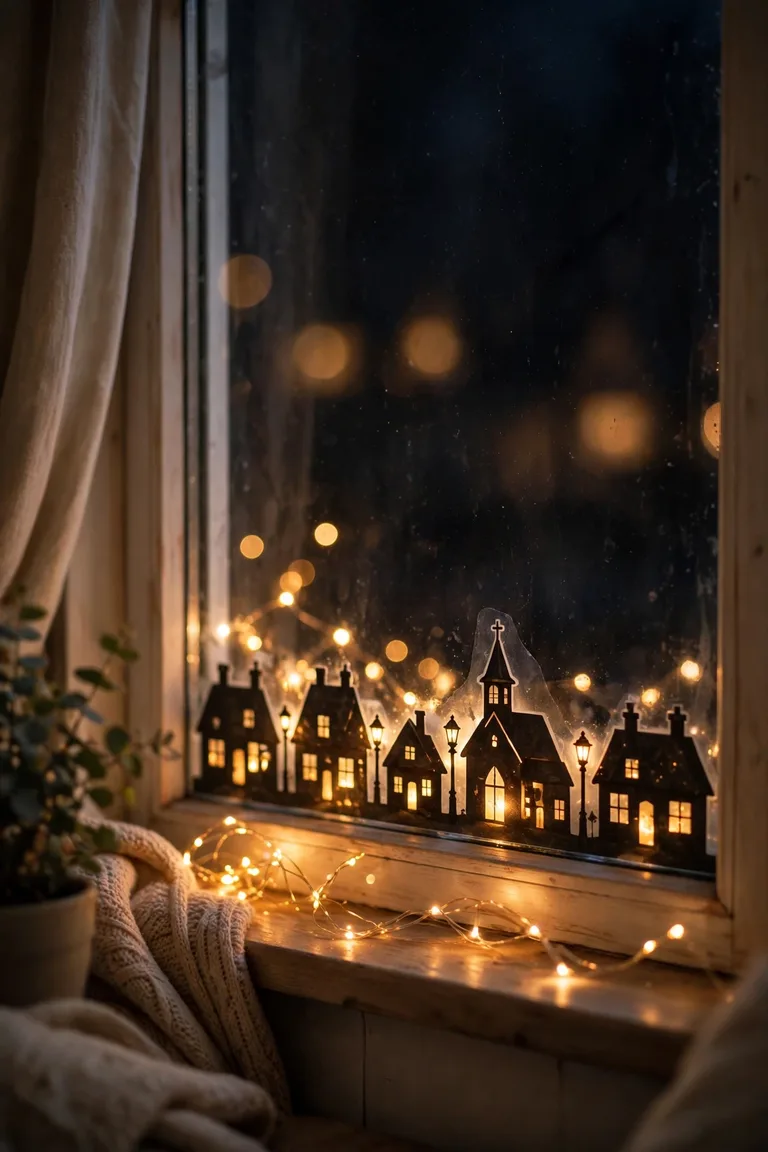
21. Line the Bottom of the Window With a Christmas Village Skyline
A row of little glowing houses along the bottom of your window is pure nostalgia. Village skyline decals come as long static-cling strips printed with cottages, churches, and lampposts, and when you back them with a strand of fairy lights, the windows of the printed houses seem to glow.
Press the strip along the bottom third of the glass, then lay a battery fairy light strand on the sill directly behind it. At night, the light shines through the lighter parts of the print and the whole village lights up. It is a two-dollar trick that looks like a hundred-dollar decoration. Kids press their noses to the glass for this one, and honestly so do adults.
💡 Quick Tip
Put the fairy lights on the sill behind the decal, not in front of it. Light from behind is what makes the printed windows glow.
The decal strip costs $6 to $12, the lights $6 to $10 if you do not already own a strand. Removal is a peel, and the strip stores flat between sheets of tissue paper. This is the coziest ten dollars you will spend all season.
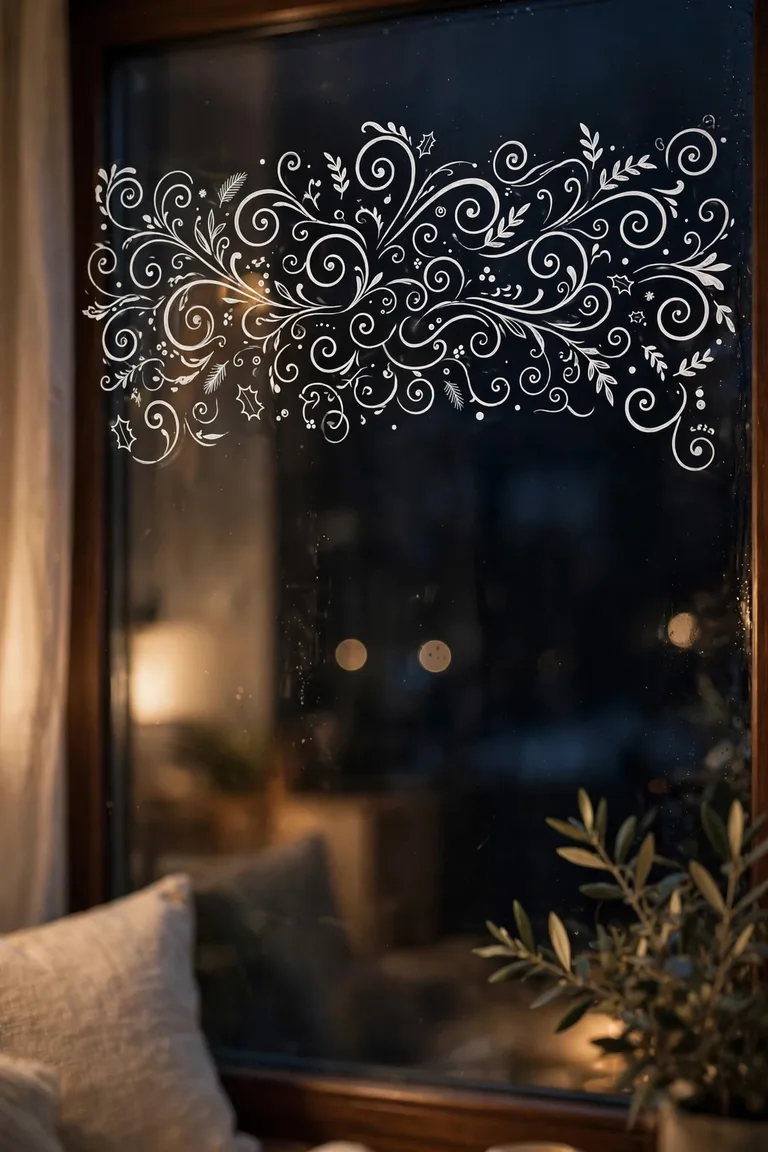
22. Spell It Out With Removable Chalk-Style Lettering
Sometimes the window just needs words. Removable vinyl lettering in a chalkboard-style script, spelling Merry Christmas or Joy or Let It Snow across the glass, gives you a hand-lettered look with none of the hand-lettering skill required. The letters come pre-spaced on transfer tape, so alignment is foolproof.
Center the phrase in the upper third of the window, where the eye lands first. White lettering reads best on dark evening glass, while red pops in daylight. Smooth each letter down with the credit card trick, then peel the transfer tape back slowly at a sharp angle. If a letter wrinkles, lift it gently and re-lay it. The vinyl forgives mistakes.
⏱️
Time
20 minutes
💰
Cost
$7 to $14
🧽
Removal
peel, no residue
Use only vinyl marked removable, not permanent. Permanent vinyl is a lease violation waiting to happen, while removable vinyl lifts clean with a fingernail. In January, peel letter by letter and the glass looks brand new.
GROUP 5 OF 6
Paper Stars & Hanging Decor: Scandinavian charm, renter approved
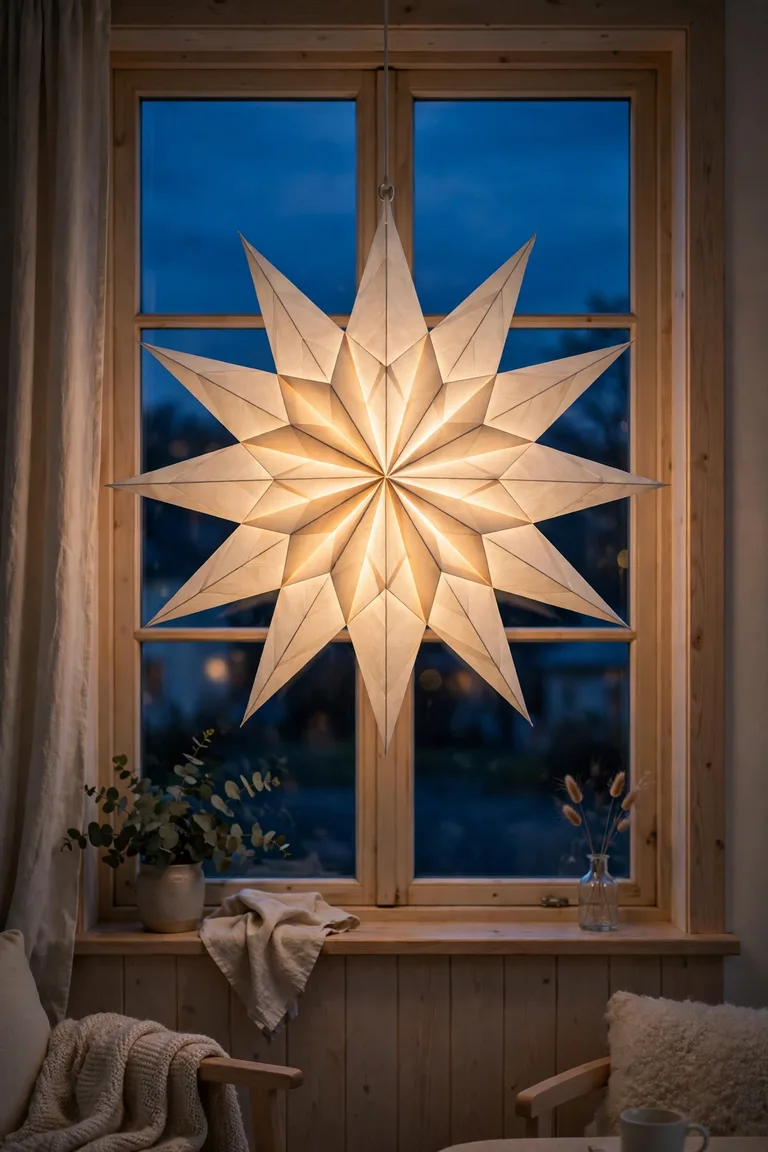
23. Hang Oversized Paper Stars for Classic Paper Stars Christmas Window Decor
Walk through any Scandinavian neighborhood in December and you will see them: big glowing paper stars hanging in every window. The look is timeless, the stars cost $8 to $15 each, and they hang from a single adhesive hook or a loop over your tension rod. This is the paper stars christmas window decor idea that started the whole trend.
Buy stars at least 20 inches across. Small ones get lost in the glass, while big ones read from the street. Hang one centered in the window, or three at staggered heights for a fuller display. The paper diffuses the small bulb inside into a soft warm glow that looks handmade and expensive at the same time.
What to grab first
✅Paper star lantern, 20 inches or larger, $8 to $15
✅One adhesive hook or a ribbon loop over the tension rod
✅Battery tea light or the bulb the star ships with
Use only LED or battery lights inside paper stars, never real candles and never hot incandescent bulbs. Paper and heat do not mix. At takedown, the star folds flat and the hook peels off, and you have decor that packs smaller than a magazine.
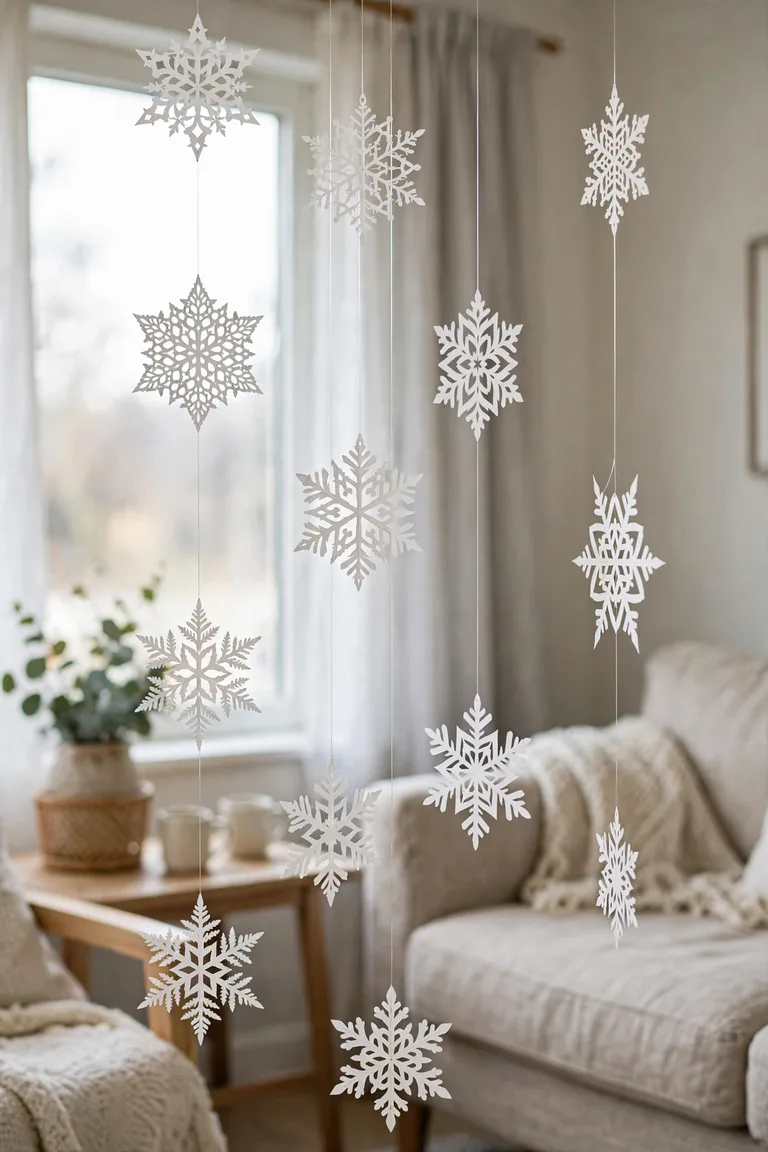
24. Float Paper Snowflakes at Different Heights With Fishing Line
Cut-paper snowflakes are the craft you already know how to make, and they look genuinely beautiful when they float. Hang a dozen white snowflakes from the top of the window frame on nearly invisible fishing line, staggering the lengths so they drift at different heights like real snowfall.
Tape the fishing line to the top of the frame with small pieces of removable mounting tape, or tie the lines to your tension rod if one is already up. Vary the drops between 6 and 18 inches so the arrangement has depth. When the furnace kicks on and the air moves, the snowflakes turn slowly, and the whole window feels alive. Kids can cut the snowflakes, which makes this the best family-craft idea on the list.
✂️
The craft
paper, scissors, one afternoon
🎣
The hang
fishing line, nearly invisible
💰
The cost
under $5 total
Total cost is basically the price of paper. In January, snip the lines and recycle the snowflakes, or flatten them between book pages to reuse. Nothing touched the walls, the glass, or the lease.
25. String Origami Stars Along a Single Line
If flat snowflakes feel too simple, fold your way up a level. Small three-dimensional origami stars, strung along a single length of twine, make a garland with real shadows and depth. Gold and white paper looks elegant, red and white looks festive, and mixing both looks like a craft fair in the best way.
Fold twelve to fifteen stars, which takes about an hour once you learn the pattern, then thread them on twine with a large needle, spacing them 4 inches apart. Hang the finished string across the top of the window from two adhesive hooks, letting it dip slightly in the center. The 3D folds catch lamplight from every angle, so this garland looks different and interesting all evening.
1
Fold 12 to 15 origami stars from gold, white, or red paper. Cost: $3 to $6 for paper.
2
Thread stars on twine with 4 inches between each one.
3
Hang from two adhesive hooks with a gentle center dip.
Under $10 all-in, and the hooks peel off clean in January. Coil the star string carefully and it survives for next year, getting slightly more charming with age.
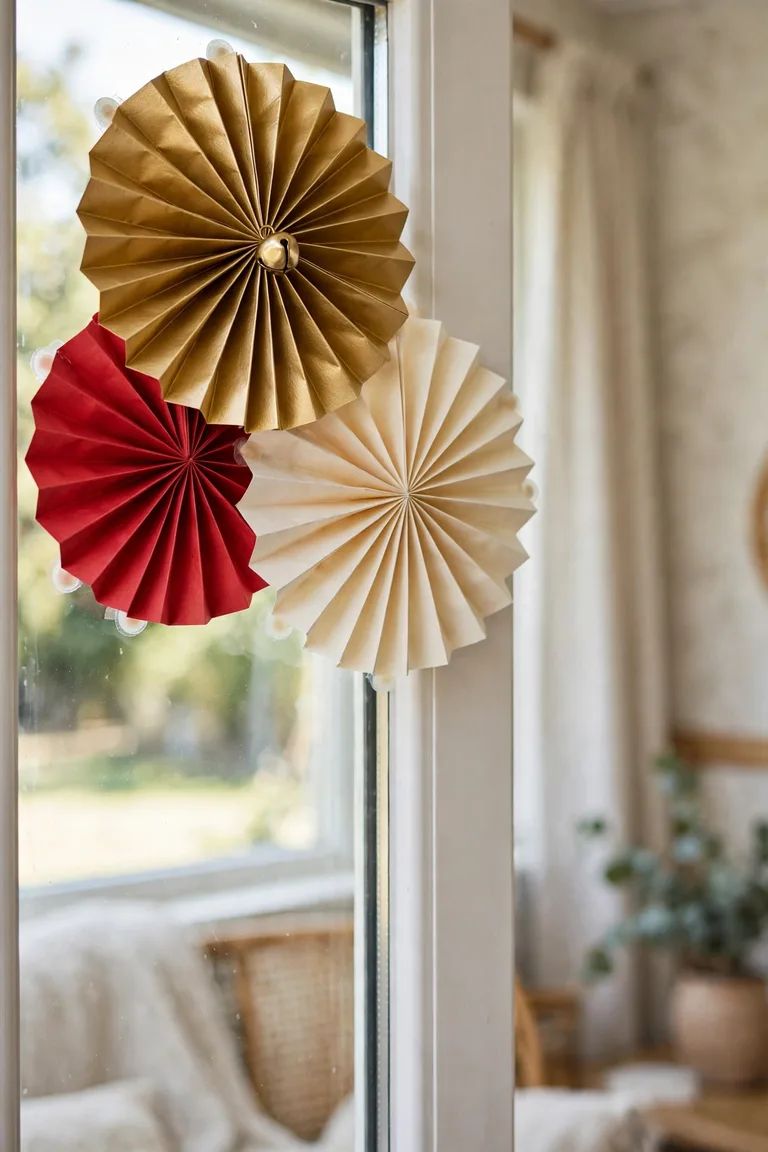
26. Fan Out Red and Gold Paper Rosettes
Paper rosettes, those accordion-folded fans, are the secret weapon of event stylists, and they work just as well on a rental window. Buy a pack of pre-folded rosettes in red, gold, and cream, or fold your own from scrapbook paper in an evening. Cluster three of different sizes in one upper corner of the window.
The corner cluster is the key. One rosette alone looks lonely, but three overlapping at different sizes look like a designed installation. Attach them to the glass with small removable adhesive dots, which hold paper perfectly and peel off without a mark. Add a tiny jingle bell at the center of the largest rosette for a bit of shine and a soft sound when the window opens.
✅ Do this
Cluster three rosettes in one corner at different sizes for a styled look.
Use removable adhesive dots made for paper and posters.
🚫 Skip this
Spacing single rosettes evenly across the glass. It reads as sparse, not styled.
Tape, which yellows and leaves residue on glass over a month.
A pack of rosettes costs $8 to $14. In January, pop the adhesive dots off and flatten the rosettes for storage. They take up no space and look brand new next year.
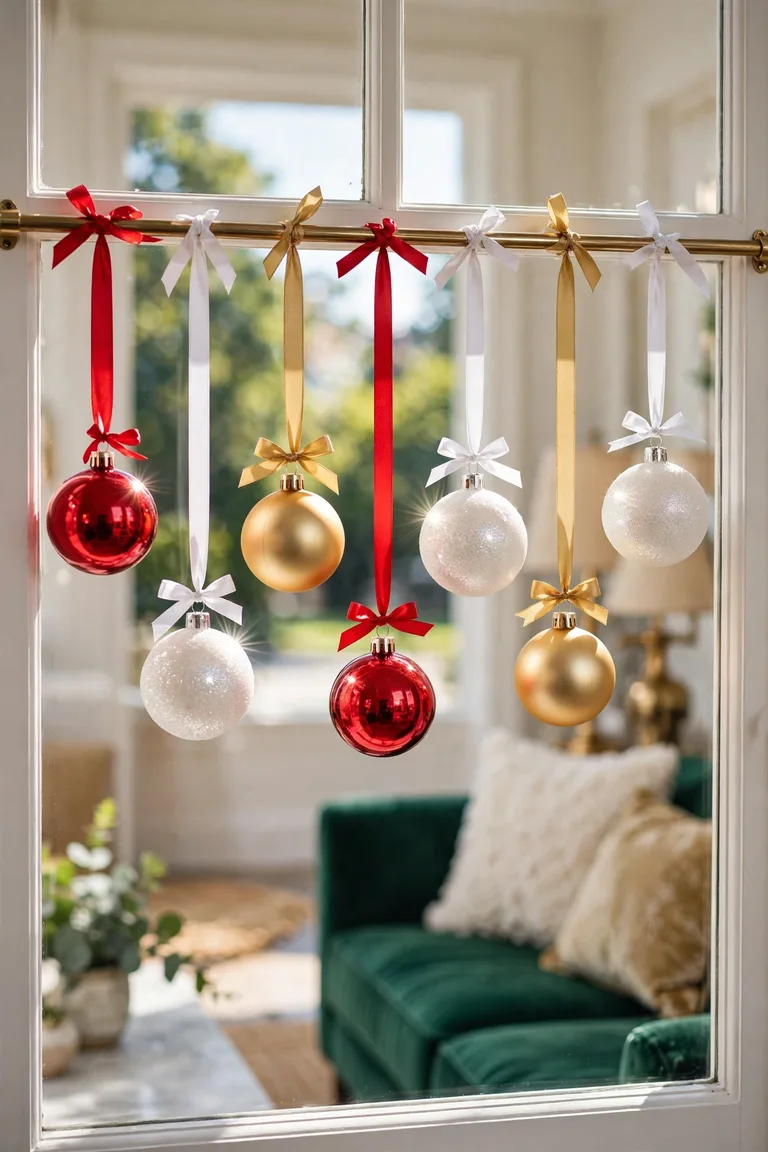
27. Dangle Shatterproof Ornaments From a Tension Rod on Ribbons
Ornaments do not belong only on trees. A row of shatterproof ornaments dangling at different lengths from your tension rod turns the window into a jewelry box. Use plastic or otherwise unbreakable ornaments, because glass ones over a hard sill are an accident waiting to happen in a rental.
Tie each ornament to a ribbon of a different length, from 6 to 16 inches, and loop the ribbons over the rod. Mix finishes: shiny red, matte gold, glittery white. The staggered lengths catch light at different depths, and the tiniest air current sets them swaying gently. This is the most glamorous idea on the list, and it costs less than a takeout dinner.
Shatterproof ornaments
Glass ornaments
Bounce, do not break, on hard sills
One fall equals shards and a bad day
Safe around kids, cats, and clumsy adults
Pretty but risky in a rental
$8 to $15 for a mixed box
$15 to $30 for a comparable set
A mixed box of ornaments plus ribbon runs $10 to $18. Takedown is untying ribbons and twisting out the rod. The ornaments go straight onto the tree next year or back in their box, and the window never knew they were there.
GROUP 6 OF 6
Sill & Tension-Rod Styling: the finishing layer
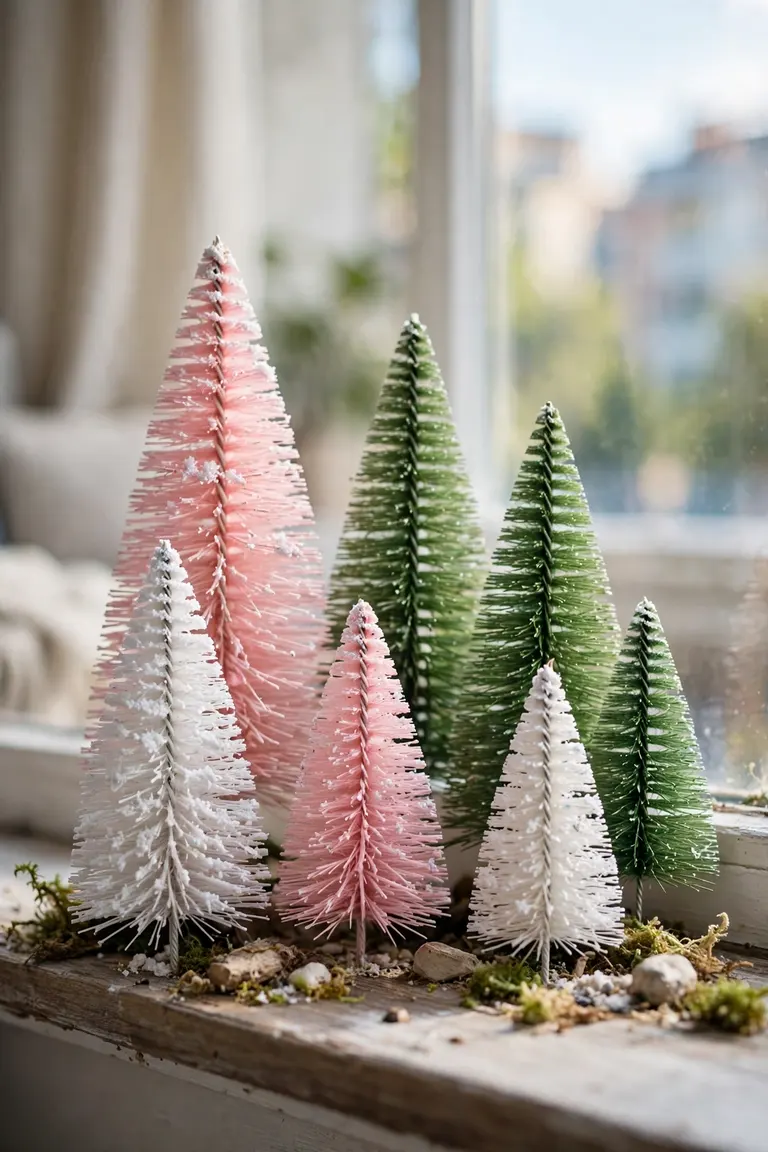
28. Plant a Forest of Bottle-Brush Trees on the Sill
Those little bottle-brush trees in every shade of green, white, and pastel pink are the easiest holiday decor ever made. Buy five to seven in different heights, cluster them on the windowsill like a tiny forest, and you are done. No hanging, no adhesive, no tools of any kind.
The trick is varying the heights and colors. Three tall green trees in back, two medium white ones in front, one tiny pink one off to the side like it wandered in. That uneven grouping looks like a real forest edge instead of a store display. Dust the white ones with a pinch of fake snow from a shaker can for a frosted finish that costs pennies.
▸5 to 7 bottle-brush trees in mixed heights: $8 to $18 total.
▸Fake snow shaker for frosting: about $3, lasts for years.
▸Removal: pick them up. That is the entire removal process.
This is the idea for the renter who wants Christmas with zero installation energy. It also photographs beautifully for holiday cards, with the real outdoors blurred behind your tiny forest.
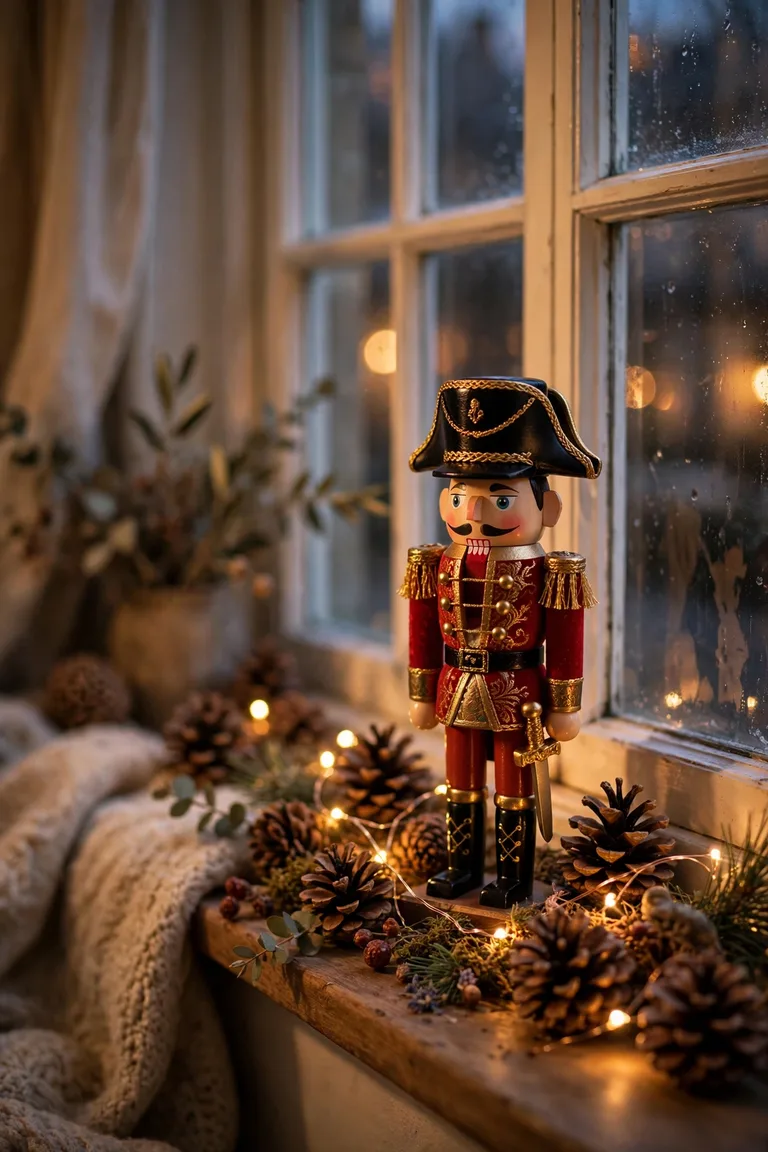
29. Build a Nutcracker and Pinecone Vignette on the Sill
Every holiday movie has the shot: a nutcracker standing guard on the windowsill with pinecones scattered around him. You can build that exact scene for under $20. One small nutcracker figure, a handful of real or faux pinecones, and a short strand of battery fairy lights woven through the pinecones.
Place the nutcracker slightly off-center, because centered objects look stiff. Scatter five to seven pinecones around his base at different angles, tuck the fairy light wire between them, and let a few bulbs peek out. The pinecones catch the light and throw soft shadows on the glass behind. It is a whole story in twelve inches of sill.
BEFORE
Empty sill collecting dust, dead remotes, and one sad succulent.
AFTER ✨
A nutcracker on duty among glowing pinecones, telling a whole holiday story.
Nutcrackers run $8 to $15, pinecones are free from any park or $4 a bag at craft stores. Nothing attaches to anything, so January cleanup is thirty seconds. This vignette also works on bookshelves and mantels if your sill is too narrow.
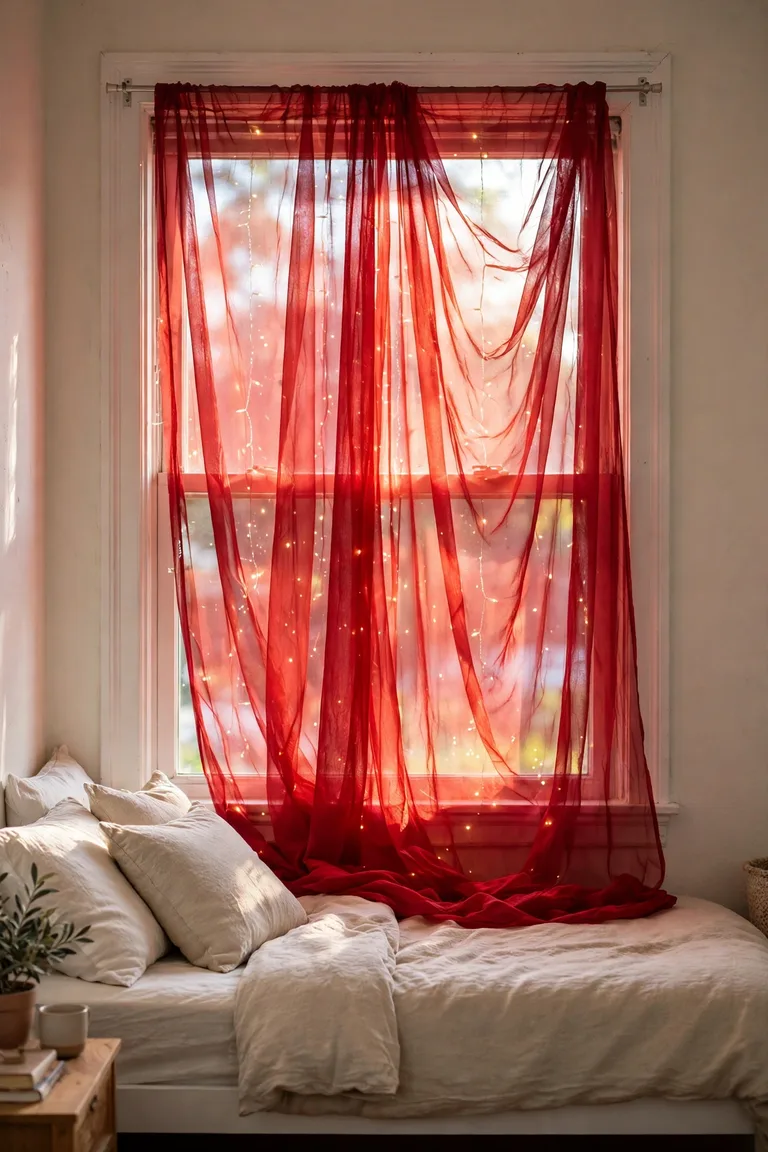
30. Add a Sheer Red Curtain Panel on a Tension Rod
Sometimes the window needs color more than objects. A single sheer red curtain panel, hung on a tension rod inside the frame, washes the whole window in holiday red while still letting daylight through. It is dramatic, it is simple, and it takes four minutes.
Choose sheer or semi-sheer fabric, not blackout. The point is the glow when light passes through, turning the panel into a red lantern. Let the panel hang just past the sill for a relaxed drape. Pair it with the white fairy lights from idea 12 behind the fabric for a layered look that stops traffic.
THE ONE THING TO REMEMBER
Sheer fabric plus backlight equals instant atmosphere. It is the cheapest dramatic effect in decorating.
A panel costs $8 to $15, the tension rod $8 to $12 if you need one. Twist the rod out in January and fold the panel into a drawer. Your landlord will never know December happened.
31. Hang Mini Stockings From the Sill With Adhesive Hooks
Stockings usually fight for fireplace space that renters do not have. The windowsill is the better spot anyway, because stockings hung in a row across the sill are visible from the street and from the sofa. Stick small adhesive hooks under the front edge of the sill, one per stocking, and hang mini stockings in a cheerful row.
Use mini stockings, 6 to 8 inches long, not full-size ones. Full-size stockings drag and look heavy, while minis look like bunting and stay put. Alternate colors or patterns: red, cream, green, repeat. Fill each with a candy cane on Christmas morning for the full effect, then eat the evidence.
▸Mini stockings: $1 to $3 each at discount and craft stores.
▸Small adhesive hooks: about $4 for a pack, rated for at least 1 pound each.
▸Keep stockings light. They are decor, not storage. Heavy gifts go under the tree.
Five stockings and hooks run $10 to $20 total. Peel the hooks in January with the warm-and-pull method. If your lease is strict about adhesive on painted wood, stick the hooks to the glass just above the sill instead.
32. Style a Pinecone and Berry Tray as a Sill Centerpiece
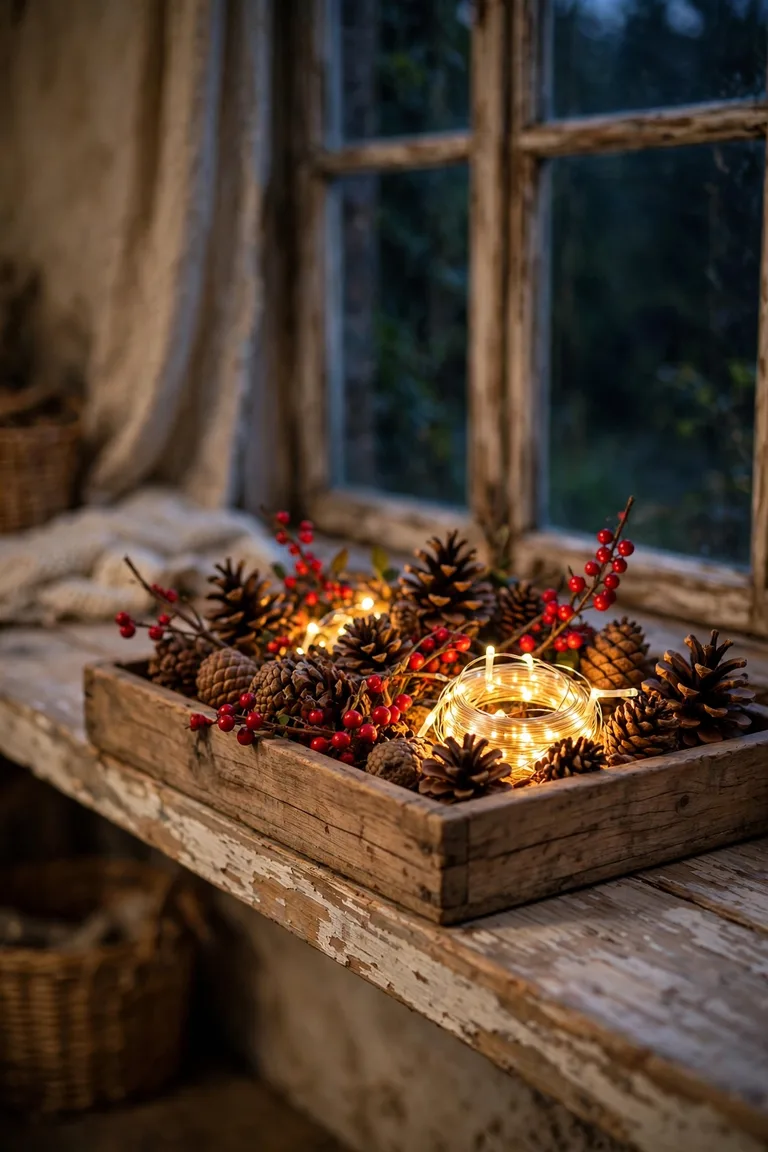
End with the easiest centerpiece on the list. Fill a shallow wooden tray or basket with pinecones, red berry picks, and a short coil of battery fairy lights. Set it in the middle of the sill. Done. It looks like a magazine styling shot and took six minutes.
The tray is what makes it work. Loose pinecones scattered on a sill look like clutter, but the same pinecones inside a tray look like a deliberate arrangement. The tray also contains the fairy light battery box and any shed needles, keeping the sill clean. Choose a tray in wood or galvanized metal for a rustic feel that suits every decor style.
⏱️
Time
6 minutes
💰
Cost
$10 to $20
🧰
Skill
none needed
Tray, pinecones, berries, and lights run $10 to $20 if you buy everything new, less if you forage the pinecones. Lift the tray off in January and the sill is exactly as you found it. For more peel-and-stick holiday tricks, browse our peel-and-stick decor ideas for renters.
Christmas Window Decor FAQs
Can you hang Christmas lights in apartment windows?
Yes, and you have several renter-safe options. Battery-operated fairy lights need no outlet at all, which solves the biggest apartment problem. For plug-in strands, use suction cup hooks on the glass or adhesive clips on the frame, and keep cords tidy along the sill with removable cord clips. Avoid anything that requires staples or nails in the trim.
How do you hang Christmas lights around windows without drilling?
The three best methods are suction cup hooks on the glass, removable adhesive clips on the frame, and tension rods wedged inside the frame for hanging light curtains. Suction cups work best on smooth clean glass. Adhesive clips hold the most weight on frames. Tension rods need no adhesive at all. Pick based on your window type and the weight of your lights.
How do you hang a Christmas wreath on a window in an apartment?
A heavy-duty suction cup hook on clean glass holds most wreaths and takes three minutes to install. For heavier wreaths, loop a wide ribbon over a tension rod wedged inside the frame and tie the wreath to it. Small adhesive hooks also work for lightweight wreaths. All three methods come down clean with no marks.
Do window clings leave residue on the glass?
Static clings leave zero residue because they use no adhesive at all, just water and static. They peel off clean every time. Removable vinyl decals can leave a slight residue if left up for many months, but it wipes off with warm soapy water or a little rubbing alcohol. Avoid anything labeled permanent vinyl, which is not renter-safe.
That is all 32 ideas, and not one of them asks your landlord for permission. The window is the renter’s secret holiday weapon: glass takes suction cups, frames take tension rods and removable clips, and sills hold entire glowing villages. Start with the one idea that made you smile, then add a second next weekend. These christmas window decor renters ideas work because every single one comes down clean in January, leaving your deposit exactly where it belongs. Save this list for next December too, and pin your favorite idea to try first.
hello, i'm
Elora Vania
I’m the founder and Senior Editor of Home Aure. With years of experience in interior styling and home decor, I created this site to bring thoughtful, practical design advice to real homes, helping you create spaces that feel warm, personal, and beautifully lived-in.