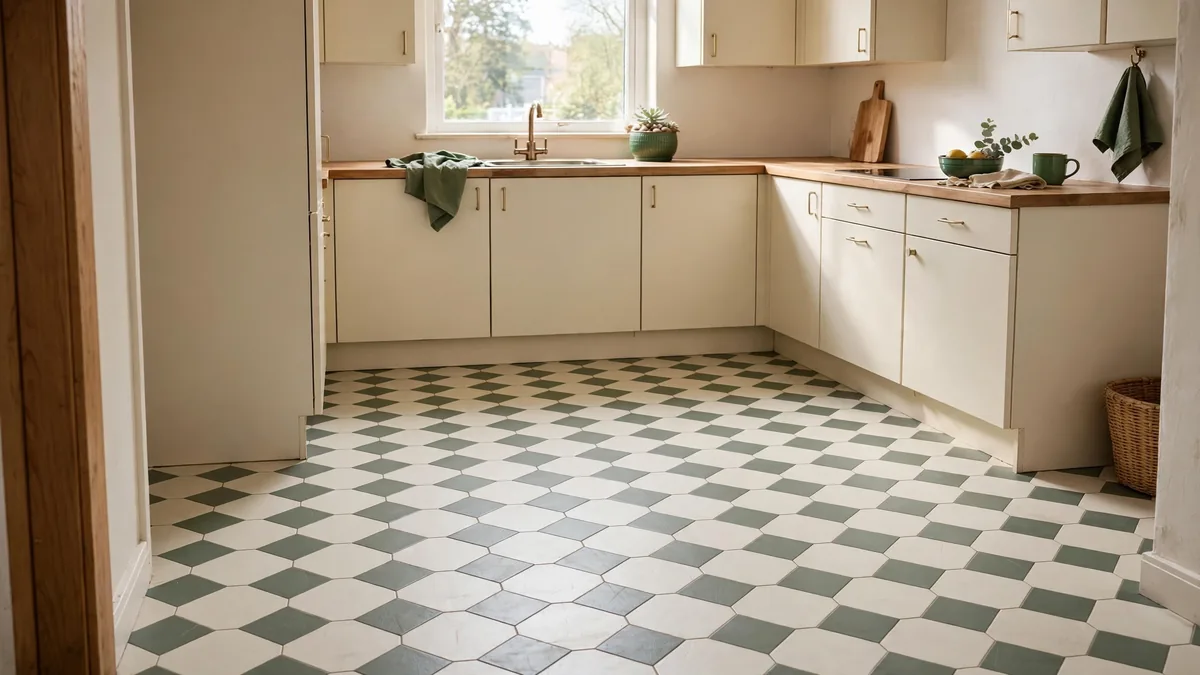
You can sometimes install peel and stick tile over an existing resilient floor, but only when the tile manufacturer approves that exact surface. The old floor must also meet its requirements for firmness, smoothness, cleanliness, and moisture. If your floor is true linoleum, do not assume instructions for sheet vinyl apply to it.
That distinction can save you a room full of lifting corners. For example, WallPops says FloorPops should not be installed over linoleum. A different product may allow an existing vinyl floor under specific conditions. A convincing makeover photo does not change the instructions on your box.
The appeal is understandable. You want a better kitchen or bathroom floor without pulling apart the room. Yet a new pattern cannot fix a loose base, a plumbing leak, or a surface the adhesive cannot bond to.
This guide helps you decide whether an overlay makes sense, calculate the quantity you need, plan the work, and avoid the repairs that a rushed installation can create. The installation sequence applies only after your floor and chosen product have been confirmed as compatible. For renters, permission and eventual removal belong in that decision too.
Plan the project
Active work
4 to 8 hours
Planning estimate for a sound, straightforward 120-square-foot room.
Elapsed time
Several days
Allow for acclimation, preparation, and product-specific waiting periods.
Difficulty
Moderate
Fixture work, damaged bases, and uncertain materials need separate assessment.
These are planning estimates, not a tested installation time. Your product instructions and room condition control the schedule.
Gather what the approved system needs
Your flooring kit
Measure and plan
- Tape measure
- Pencil and room sketch
- Carpenter’s square
- Approved marking tool or chalk line
- Paper for templates
Cut and protect
- Utility knife and spare blades
- Metal straightedge
- Cutting board or mat
- Knee pads
- Label-required protective equipment
Prepare and install
- Compatible tiles
- Approved cleaning products
- Specified patch or embossing leveler
- Specified primer, if required
- Required roller and finish details
Buy preparation products from the approved installation system. Extra glue, a power sander, and improvised underlays are not default supplies.
Check What Your Old Floor Is Before Buying Tiles
People often call any older, flexible kitchen floor linoleum. The material may actually be sheet vinyl. Those names are not interchangeable when you are choosing an adhesive flooring system.
Forbo explains the difference between linoleum and vinyl: linoleum uses ingredients such as linseed oil, while vinyl is made using PVC. Both belong to the wider resilient-flooring family. That family name does not make every surface an approved base for every tile.
Look for an old invoice, installation record, spare labeled material, or information from the owner. A photograph can help a flooring supplier start the conversation. It cannot establish the material or identify every layer below it.
Do not lift a corner, cut a sample, or scrape the backing to identify an unknown old floor. Resolve the material question without disturbing it, using professional help where needed.
Once you know what you have, open the installation sheet for the exact tile you want. Read the sections headed existing flooring, suitable substrates, limitations, and surface preparation. A listing that says suitable for kitchens is answering a different question from suitable over this particular floor.
If linoleum is not named, ask the manufacturer to confirm compatibility in writing. Give the product number and describe the existing material, finish, condition, room, and layers. Silence about a surface is not approval.
Keep that answer with your receipt. It gives you a clear basis for the project and a useful reference if someone later recommends a different primer or shortcut.
Inspect the Floor Without Disturbing It
Start with what you can see during ordinary use. Look for raised seams, bubbles, curled edges, discoloration, torn areas, and changes around sinks, toilets, or appliances. Notice whether the floor feels soft or moves when walked on normally.
An overlay needs a dependable base. When the old layer shifts, the new tile moves with it. Pressing harder on the top tile cannot repair the attachment below.
Smoothness matters too. A raised imitation grout line may feel minor under your hand but remain visible through a thin tile. This is called telegraphing. A bold new print can distract your eye from it; the print does not remove the ridge.
Separate a cosmetic problem from a floor problem. An unfashionable color is cosmetic. A damp patch beside the dishwasher is a floor problem until its cause is found. Repeatedly damp areas, unexplained softness, and loose flooring need assessment before decorating continues.
TrafficMaster’s published vinyl-tile instructions illustrate how specific the rules can be: the approved existing vinyl is a single layer, firmly bonded and without cushion backing. That document also prohibits sanding the existing vinyl. Use the current instructions for your own product rather than treating this example as permission for another brand.
Do not rely on a tapping or knock test to certify the floor. It does not tell you whether hidden moisture, cushioning, or an unsuitable layer is present.
Infographic 01 · Before you buy
Can your floor support this project?
01
Identify the material
Establish whether the existing floor is linoleum, sheet vinyl, or another material without disturbing it.
02
Get product approval
The exact tile manufacturer must approve that material and the existing floor assembly.
03
Check the base
Meet the product’s requirements for attachment, smoothness, cleanliness, and dryness.
04
Plan the full project
Check finished height, appliance access, approved preparation, and written rental permission.
Proceed only when every check passes. Otherwise, resolve the issue or choose another approach.
Stop Before Disturbing an Old or Unknown Floor
Older resilient flooring, backing, or adhesive may contain asbestos. Age, color, and tile size cannot confirm or rule it out.
The EPA’s homeowner guidance on asbestos advises leaving intact, undisturbed material alone and using a trained, accredited professional when assessment or sampling is needed. Do not sand, scrape, drill, or cut suspect material. Do not sweep or vacuum suspect debris with household equipment.
Covering an existing floor may sometimes be part of an appropriate plan. It is not automatic permission for a DIY adhesive overlay. Safety assessment and product compatibility are separate decisions. Prep or later removal could still disturb the old material.
Decide Whether an Overlay Is Worth Doing
An adhesive tile project can be a sensible cosmetic update when the existing surface is suitable and preparation stays modest. It becomes less appealing when you need extensive repairs before you can begin.
Write down the problem you want to solve. Is the floor sound but visually dated? Are you trying to coordinate mismatched cabinets? Or are you hoping to hide cracks, softness, and a leak? The first two are decorating goals. The last one needs a different starting point.
Consider the shape of the room as well as its area. A square utility room with open edges may take less work than a smaller bathroom with a toilet, pedestal basin, several door trims, and pipes. Each obstruction creates measuring and cutting work. Square footage alone is a poor guide to difficulty.
Think about access during the project. If this is your only bathroom, you need a plan for the installation period and any restrictions afterward. In a kitchen, food preparation, appliance access, and a safe walking route may affect when the work is practical.
Check the finished height before committing. Even a thin finish adds something at doorways. A door that already brushes the floor, a tight threshold, or an appliance fitted closely under a counter deserves attention now.
There is also a reasonable point to walk away. If the approved prep system, tools, and repair work push the total near an alternative you prefer, compare complete projects rather than comparing the tile prices alone.
For a rental that needs personality more than construction, our ideas for making a rental feel like yours when you cannot paint offer other places to start.
Get Written Permission Before Changing a Rental Floor
Peel and stick describes installation. It does not promise a damage-free exit.
Flooring adhesive has to withstand shoes, chairs, cleaning, and everyday movement. That purpose is different from a removable wall decoration. WallPops, for example, warns that its floor tiles can leave adhesive residue and may lift paint when removed. Treat any claim of temporary flooring carefully.
Send the owner a clear proposal before buying. Include the exact product, the manufacturer’s answer about the existing floor, the preparation materials, and what will happen when you move out. Ask whether the approved finish should stay or be removed.
Photograph the current floor in good light. Include thresholds, existing marks, damaged edges, and the areas beside appliances. Keep those photographs with the written agreement so the starting condition is clear.
An approved sample test may reveal an immediate adhesion problem or visible finish damage. It cannot guarantee how a whole floor will behave after years of use. Do not perform a removal test on an unidentified or suspect older surface.
Avoid improvised barrier layers such as contact paper beneath the tiles. The tile then depends on that extra layer remaining attached, and the assembly may fall outside the manufacturer’s instructions. A shortcut that makes installation feel reversible can make performance less predictable.
If permission is uncertain, put your budget into items you own. A suitable rug, freestanding furniture, or a change to the wall behind the dining table may serve the room better. For another surface to explore, see our peel and stick wallpaper ideas, with the same attention to surface suitability and removal.
Calculate the Tile Quantity Before Ordering
Measure the floor you will actually cover. For a rectangular area, multiply length by width using the same unit. Sketch an irregular room as smaller rectangles, calculate each area, and add them together. Include an alcove or closet only if it is part of the project.
Keep the sketch. You will need more than the total area when planning border cuts and deciding where the pattern should start.
Here is a worked example for a 10-foot by 12-foot room using 12-inch square tiles:
| Calculation | Result |
|---|---|
| Room area: 10 × 12 | 120 square feet |
| Chosen planning allowance: 15% | 18 square feet |
| Coverage to order: 120 + 18 | 138 square feet |
| Example carton coverage | 20 square feet |
| Cartons: 138 ÷ 20, rounded up | 7 cartons |
| Coverage purchased: 7 × 20 | 140 square feet |
The 15% allowance is a planning choice for this example, not a rule for every product. Follow the manufacturer’s allowance and increase your order when the layout creates more waste. A diagonal pattern, directional print, or many awkward cuts can use material differently from a straight grid.
Carton rounding matters. Multiplying the room area by the price per square foot would miss the extra material you must buy. Check the coverage on the actual carton; a tile count alone is not enough when tiles have different dimensions.
Order the planned quantity together where possible. Check the batch or run numbers on arrival, and inspect the design before installing. Keep labels and reserve suitable leftovers for future repairs.
Build a Budget That Includes the Preparation
Use the following figures as an illustrative budget, not current store prices or a contractor quote. Each amount is a chosen assumption so you can see how the calculation works.
| Example expense | Assumed amount |
|---|---|
| 140 square feet of tile at $2.50 per square foot | $350 |
| Compatible cleaner and preparation products | $55 |
| Blades, marking supplies, and small tools | $25 |
| Roller rental, if required | $40 |
| Trim or doorway transition allowance | $30 |
| Illustrative total | $500 |
This example excludes tax, shipping, deposits, professional assessment, repairs to the base, plumbing work, and appliance handling. Add the items your room needs. Remove a rental allowance only if you already have the specified tool or your instructions genuinely permit an alternative.
A useful shopping list has three columns: required item, actual price, and reason. That last column catches unnecessary purchases. You might need a manufacturer-approved primer, for example. You do not automatically need a tub of extra adhesive because someone used it in a video.
Ask for a separate repair estimate if the floor has problems. Mixing cosmetic materials and unknown repair costs into one optimistic total makes it harder to judge whether the project is worthwhile.
Infographic 02 · Worked example
120 square feet does not mean buying 120 tiles
ADD THE ALLOWANCE
120 + 18 = 138 sq ft
Using a chosen 15% planning allowance.
ROUND TO FULL CARTONS
7 × 20 = 140 sq ft
Example cartons contain 20 square feet each.
ILLUSTRATIVE PROJECT TOTAL
$500
Tiles$350
Preparation$55
Small tools$25
Roller rental$40
Trim allowance$30
Chosen assumptions, not current prices. Excludes tax, delivery, assessment, base repairs, plumbing, and appliance handling.
Choose a Pattern That Works With the Room
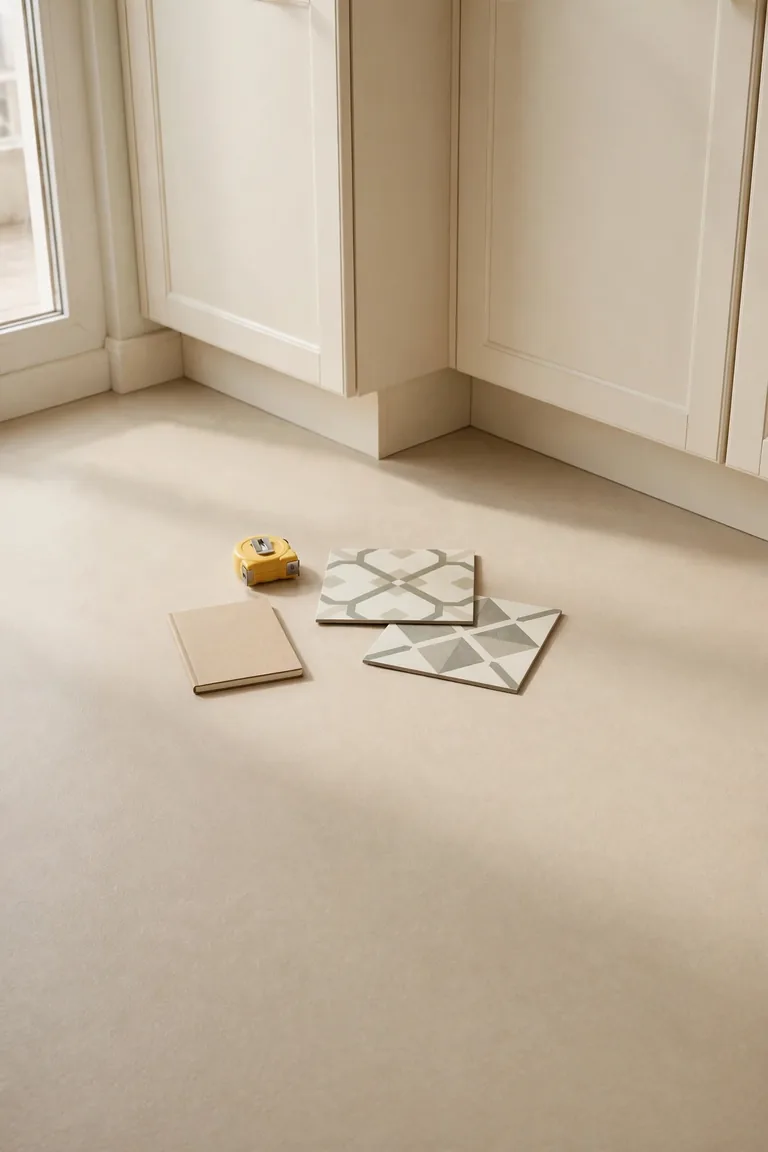
Bring a sample into the room before ordering the full quantity. Look at it beside the cabinets, wall paint, and adjoining floor in daylight and under your evening lights. The same ivory tile can look warm beside one cabinet finish and unexpectedly yellow beside another.
Start with the fixed elements you intend to keep. If the cabinets are a strong wood tone, a quiet floor may give them more room. If the room is plain, a restrained geometric pattern can provide a focal point without adding objects to the counters.
For a softer palette, consider warm ivory with sage or muted gray-green. For a sharper scheme, pair cream with charcoal. These are styling directions, not technical recommendations. A beautiful tile still has to pass the compatibility check.
Lay out several samples together. One tile cannot show how a repeat looks across a narrow walkway. Look from the doorway, where you will usually see the whole floor, and from beside the busiest work area.
Notice how the pattern ends. A detailed medallion sliced into tiny pieces along a visible threshold may bother you more than a slightly off-center layout. Decide which sightline matters before the adhesive is exposed.
If the aim is a calmer small room, examine the layout and visible floor space too. Our guide to making a small room look bigger without buying anything new can help you assess changes that do not require a new floor.
Infographic 03 · Follow the sequence
Prepare first. Peel later.
- Record product requirements.
- Acclimate the tiles.
- Clear the work area.
- Remove approved residues.
- Allow the surface to dry.
- Smooth approved imperfections.
- Apply specified primer if needed.
- Mark square reference lines.
- Dry-lay the border layout.
- Cut new pieces on a board.
- Place tiles to the layout.
- Roll using the specified tool.
- Finish approved edges and trim.
- Follow return-to-use times.
Use this sequence only after the exact product and existing floor are confirmed compatible. The product guide controls preparation, tools, and waiting periods.
1. Record the Requirements for Your Exact Tile
Make a project sheet from the current installation guide. Note the accepted base, preparation products, room conditions, roller, perimeter detail, and waiting times. Keep the product number on the page. Resolve conflicting advice with the manufacturer before work starts, and attach any written clarification.
2. Acclimate the Tiles as Directed
The boxes need time in the installation environment when the product requires it. Armstrong’s vinyl-tile guide specifies 48 hours at room temperature. Your tile may have a different range or handling instruction.
Store the cartons in the position the guide specifies, away from wet work and direct heat. Start the clock after the room is within the required conditions, rather than counting time spent in a cold delivery area. Write the earliest installation date on your project sheet. Keep the instructions accessible instead of leaving them inside a carton you may discard.
3. Clear the Planned Work Area
Arrange a separate cutting area and a bin for backing paper. Remove furniture that interrupts your layout. Plan appliance movement before touching connections; use qualified help for gas, electrical, or plumbing work. Check future servicing access at the new floor height. Keep a clear route out of the room.
4. Remove Approved Surface Residues
Use the cleaning or stripping method accepted by both the existing floor and the new flooring system. Follow the label for dilution, contact time, rinsing, ventilation, and protective equipment.
A shiny surface may contain a maintenance coating rather than ordinary dirt. A general-purpose degreaser is not automatically a suitable wax remover. Avoid oil soaps or products that leave a film, and keep cleaning liquids out of open seams and damaged areas.

5. Let the Prepared Surface Dry
A dry-looking surface is not proof that the base is ready. Follow the preparation products’ drying periods and any required moisture test. Record the result.
If dampness returns, investigate its source before proceeding; an arbitrary overnight wait cannot establish that a moisture problem has been resolved.
6. Smooth Only the Approved Imperfections
If the manufacturer permits the existing surface but requires its texture to be filled, use the specified embossing leveler or patch system. Check its compatibility with the existing finish and tile adhesive.
Measure the mixing water according to the label rather than judging the consistency by eye. Work within the stated working time and permitted thickness. Wall filler, general-purpose caulk, and a thicker top tile are not substitutes for approved floor preparation.
Let the material reach its stated readiness before moving on. If the required correction exceeds the product’s limits, pause for a revised plan.
7. Apply Primer Only When the System Requires It
Check primer compatibility with both the base and the tiles. HENRY 336’s technical information, for example, lists its intended uses and application requirements.
Follow the accepted product’s coverage and drying instructions. A primer cannot make a prohibited base suitable, and an unapproved coating adds another uncertain bond to the assembly.
8. Mark Square Reference Lines
Walls can be out of square, so do not assume the first wall gives you a reliable grid. Establish reference lines using the method in your tile guide. A carpenter’s square helps check the intersection.
Armstrong’s installation guidance highlights room layout and irregular walls as details to review before installing. Make marks that remain visible without leaving loose chalk where the adhesive needs to bond.
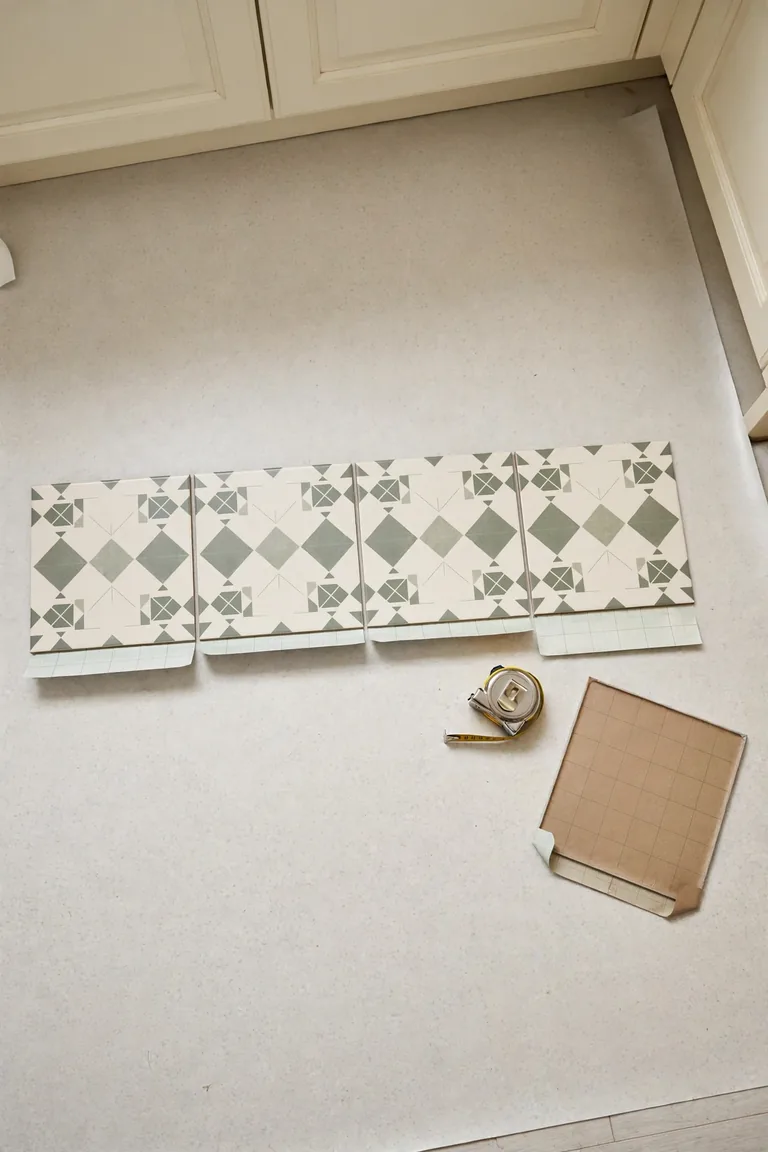
9. Dry-Lay Rows to Check the Borders
With the backing intact, arrange trial rows in both directions. Check wall pieces, the doorway, and pattern matches. Shift the starting position if it creates narrow strips in visible areas.
Photograph the chosen layout. Include your product’s perimeter clearance in every measurement rather than borrowing a gap size from another flooring type.
10. Cut the New Edge Pieces Off the Floor
A spare board or suitable cutting mat protects the existing surface from the blade. Mark each new tile with its backing intact and check the orientation before cutting. Use the cutting method allowed for its thickness.
A metal straightedge helps guide a straight cut, with your free hand kept clear of the blade path. Replace a dull blade rather than pushing harder. Check the fit before removing the liner.
Label fitted pieces on their backing so they return to the right position. Keep offcuts separate from uncut pieces to avoid confusing a short piece with a full tile.
11. Place Each Tile Against the Reference Layout
Follow the direction arrows and joint instructions when positioning each tile. Check alignment as you work; a small drift becomes obvious across several rows.
Discard the slippery backing immediately. Do not leave decorative gaps in a non-groutable product or drag exposed adhesive across the prepared base.
12. Roll the Installed Tiles as Specified
Pressure is part of the bonding process. Armstrong’s flooring FAQs explain why rolling matters for pressure-sensitive self-stick adhesive. Use the tool, weight, timing, and directions required by your tile.
Some systems specify a substantial floor roller; others give different instructions. Plan the rental before installation day so the required tool is available at the right time.
Kneeling on a tile or sliding furniture over it does not provide a controlled substitute. Check the edges while they remain accessible, and note any section that does not sit correctly.
13. Finish the Perimeter Using the Required Detail
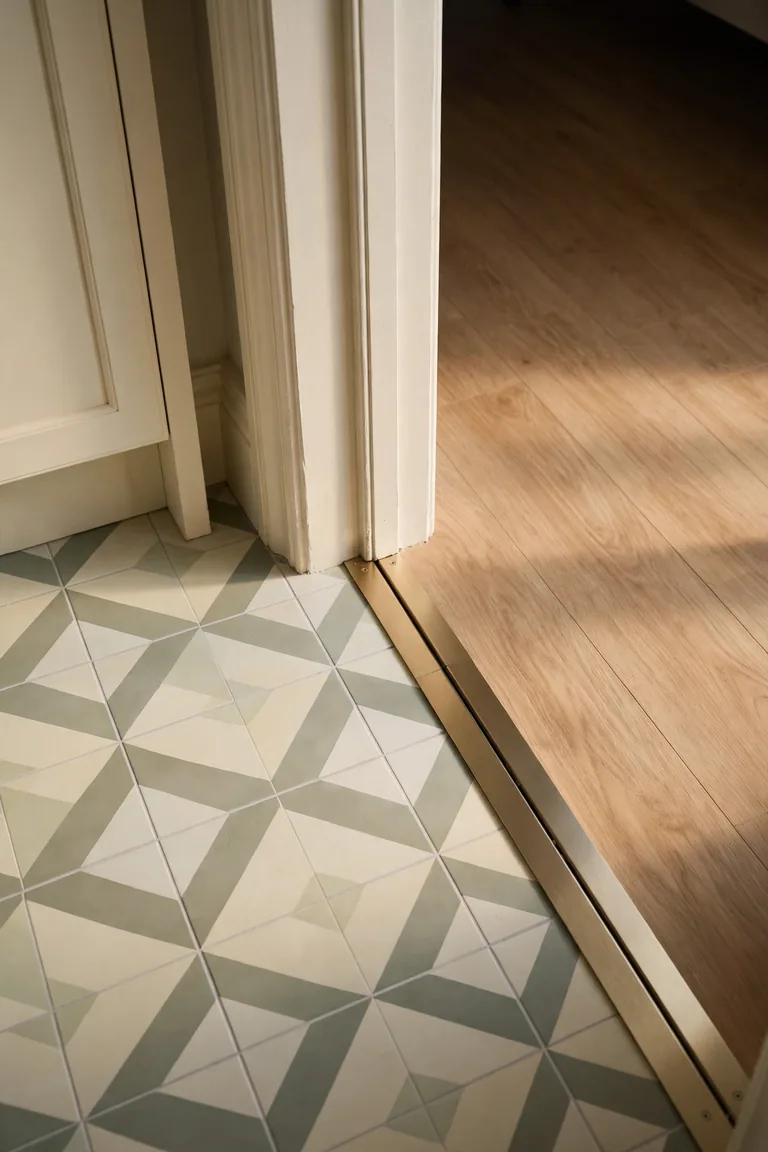
Follow the installation guide for walls, thresholds, trim, and any sealant. Avoid forcing pieces into a tight space to hide an inaccurate cut. Fit a transition that suits the finished height and remains secure underfoot.
Decorative caulk cannot correct a loose base or turn an ordinary tiled assembly into a wet-room system. If grout is part of the design, proceed only with a tile labeled groutable and the specified grout, spacing, and timing.
14. Restore Normal Use on the Product’s Schedule
Look up separate permissions for walking, moving furniture, replacing appliances, and wet cleaning. They may not share one waiting time.
As an example of the variation, Armstrong’s luxury-vinyl installation guidance says to avoid wet mopping for at least 5 days after a self-adhesive or glue-down installation. Use your product’s schedule, maintain its required room conditions, and protect the surface during any approved furniture move.
Plan the Awkward Cuts Before They Interrupt the Job
Make Paper Templates for Irregular Shapes
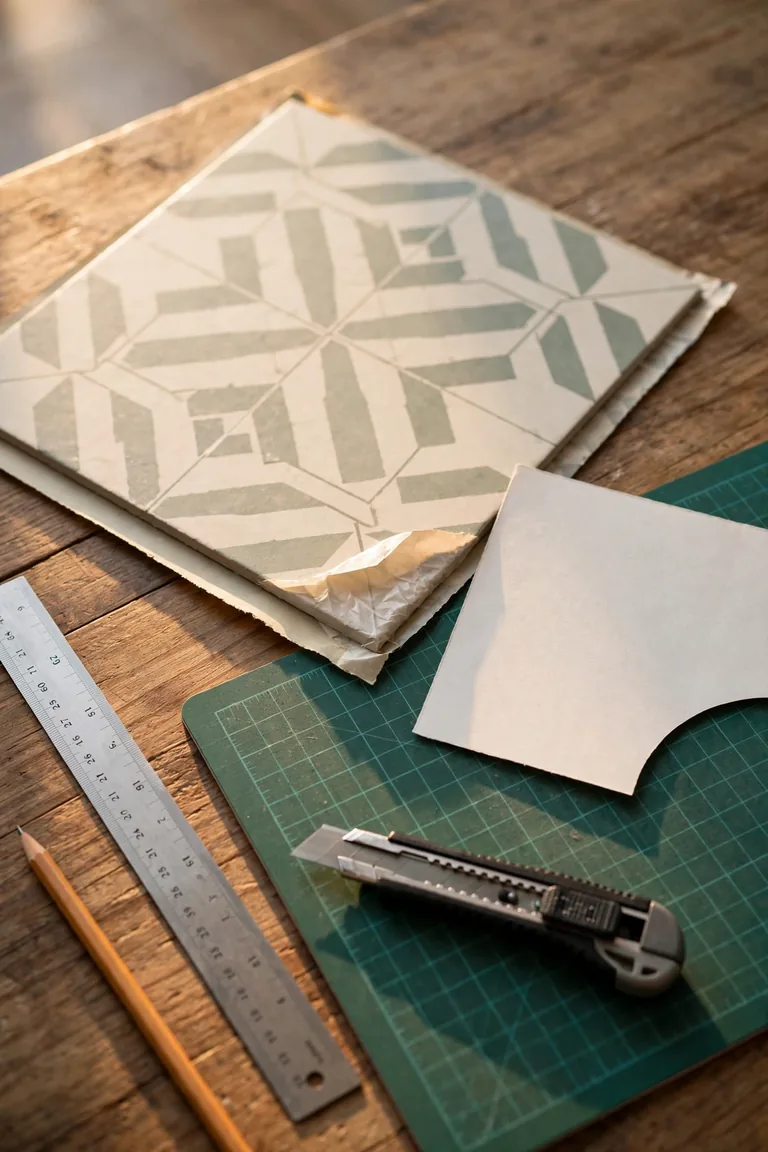
A template lets you work out a shape before risking a new tile. Use paper that holds its shape, fit it around the obstruction without disturbing the old floor, and mark which side faces up. Copy the approved clearance into the template rather than tracing a tight fit.
Lay the template over the backed tile and check how the printed pattern will face. A shape can fit the corner yet be rotated the wrong way in the finished design. Make the cut on your cutting board, then check the piece before exposing its adhesive.
Check Doorway and Register Details
At a doorway, decide where one finish ends and the next begins. Look at the join with the door both open and closed. A transition placed casually can leave an untidy strip visible from the adjoining room.
For an accessible removable floor register, plan the new pieces around the opening and keep the required clearance. Do not cover the opening, trap the removable cover, or allow a cut edge to interfere with its fit. Check that the cover sits correctly at the new height.
Avoid automatic advice to undercut old door trim. Cutting unknown old building materials introduces a separate assessment question. Choose a compatible finishing detail with the installer or manufacturer when existing trim cannot be disturbed.
Decide How to Handle Toilets and Pedestal Fixtures
A toilet base presents two different tasks: shaping the finish and maintaining a sound plumbing installation. Cutting carefully around the visible base may leave a conspicuous joint. Removing and resetting the toilet creates plumbing work and a possible change in the relationship between the floor and flange.
Discuss that detail with a qualified plumber before the tile goes down. Do not bury a leak, cover the flange, or improvise the seal because the new flooring looks thin. The same planning applies around a pedestal basin that is secured through the floor.
When an obstacle makes the job exceed your skills, treat that as a project cost. A room with several specialist details may still be worth doing, but the installation is no longer represented by the price on the tile carton.
Troubleshoot Problems by Finding Their Cause
If something changes after installation, photograph it and note when it appears. A problem beside one doorway suggests a different investigation from lifting across the whole room.
Do not apply a general-purpose adhesive to every loose corner. First check the installation record, room conditions, and base. A repair should follow the product maker’s directions and address the reason the bond failed.
Find the cause before the repair
If this happens, check this
| If this happens | Possible cause | Next action |
|---|---|---|
| A corner lifts | Contamination, poor contact, movement, or incompatibility. | Check the base and installation record. Use the manufacturer’s approved repair. |
| A raised area appears | Texture, debris, movement, or another problem below. | Establish the cause before lifting or puncturing anything. |
| Joints open | Layout drift, room conditions, movement, or product fit. | Check the guide and seek assessment. Do not default to caulk. |
| Old texture shows through | The base texture was not adequately addressed. | Ask about an approved correction. A new print will not flatten it. |
| The floor crunches | Possible grit, movement, or incomplete attachment. | Locate and record it. Do not assume a universal settling period. |
One recurring question is whether a crunching sound means the floor needs a week to settle. There is no reliable universal rule for that. Grit, movement, or incomplete attachment can sound similar from above. If the sound persists or a tile moves, document the location and ask the manufacturer or installer to assess it.
Also avoid puncturing a bubble as a default repair. It may not be trapped air, and a hole adds damage before you understand the cause. Keep spare tiles available so a manufacturer-approved replacement remains an option.
If a problem spreads, pause cosmetic fixes. More glue, more weight, or more caulk can make later assessment harder while leaving the original issue in place.
Set Realistic Expectations for Durability
There is no honest universal promise that peel and stick tile over old linoleum will last a particular number of years. Product construction, the approved base, preparation, traffic, room conditions, cleaning, and installation all affect the result.
Treat a warranty as a set of written terms. Check what it covers, the exclusions, the remedy offered, and whether labor is included. A long warranty name is not a prediction that every overlay will remain trouble-free for that length of time.
Think in terms of the floor’s job. A lightly used room and a busy kitchen have different demands. Narrow chair legs, an appliance move, or repeated moisture at one doorway can create concentrated stress even when the rest of the room sees little wear.
Keep a few matching tiles, the carton label, the receipt, and the installation guide. Store leftovers as the manufacturer directs. A spare from the same purchase may be more useful than trying to match a discontinued pattern later.
Inspect the busy spots during routine cleaning. An edge that begins to catch a shoe deserves attention before it becomes a larger damaged area. Early reporting also gives the manufacturer clearer evidence than a heavily altered repair.
Keep the expectations realistic
A new finish, on a suitable base
BEFORE
A sound, approved floor with an unwanted color or pattern.
Project goal: change the visible finish.
AFTER
A new pattern with product-specific care and use requirements.
Still necessary: a stable base, leak control, and maintenance.
An overlay does not repair a moving floor, solve water damage, or guarantee damage-free removal.
Clean and Protect the Finished Floor
Build your care routine around the specific floor’s maintenance sheet. Remove loose grit with the approved method, wipe spills promptly, and use the recommended cleaner at its stated dilution. More cleaner is not a better cleaning method when it leaves residue behind.
Avoid flooding the floor. Water-resistant tile material does not, by itself, make every seam, edge, and penetration waterproof. Keep plumbing problems separate from cleaning decisions and deal with leaks promptly.
Check furniture feet before bringing pieces back. Remove trapped grit and use protectors accepted for the floor. Heavy items should be moved using the manufacturer’s protection method rather than dragged across the finish.
Ask about mat backing too. A mat being soft does not prove its backing is suitable for vinyl. Check the floor and mat makers’ compatibility guidance before placing one at the sink or doorway.
Use a steam cleaner only if your exact floor explicitly permits it. Do not add polish, wax, a seam coating, or a household solvent because it is recommended for a different kind of floor. Keep one approved care sheet near your cleaning supplies so routine maintenance stays consistent.
Answer the Questions That Affect the Decision
Do I Have to Remove the Old Linoleum First?
Not automatically. First identify the existing material and check your new tile’s accepted substrates. If direct installation is not approved, ask a flooring professional about a suitable alternative assembly or replacement plan. Do not begin lifting an old floor merely to find out what is underneath it.
Do Peel and Stick Tiles Stick to Linoleum Without Extra Glue?
An immediate bond is not the same as an approved installation. Self-stick tiles already have adhesive, and Armstrong says extra glue is not required for its self-stick vinyl tiles. Check your own product before adding anything. A primer or adhesive cannot overrule a prohibited base.
Will the Old Pattern Show Through?
A printed color and a physical texture are different issues. A suitable opaque finish may hide the color while raised lines or depressions remain visible in the surface. Inspect the texture and follow the approved smoothing method. Do not assume a thicker tile will resolve every uneven area.
Can I Use Peel and Stick Tile in a Bathroom?
Use a product approved for that room and base, with the specified details around edges and fixtures. A bathroom label does not make it a shower-floor or wet-room product. Plan for splashes, plumbing access, cleaning restrictions, and any toilet work before installation starts.
Can I Grout Peel and Stick Floor Tiles?
Only if the exact product is intended to be grouted. The instructions must provide the joint spacing, accepted grout, application method, and waiting periods. Do not add gaps to a non-groutable tile to imitate ceramic. If the product has tight joints, grout is not a repair for poor alignment.
Is Peel and Stick Flooring Removable for Renters?
It may be physically removable, but clean removal without residue or damage is not guaranteed. Get the owner’s written agreement about installation and the end of the tenancy. Keep records of the original floor and the approved work. Do not treat the words peel and stick as a promise about your deposit.
Make the Final Decision Before Opening the Backing
Can you install peel and stick tile over linoleum? Only proceed when the exact material, chosen product, and floor condition support an approved installation. A suitable base and a clear plan matter more than the speed of the makeover.
If the checks pass, measure carefully and follow the product’s sequence. If they do not, choose another finish or another way to improve the room.
Save the reference card below to Pinterest so the compatibility checks stay with the design inspiration.
Infographic 04 · Save this card
Before the backing comes off
Approve the project
- Identify the old material.
- Confirm exact-product compatibility.
- Resolve safety and base concerns.
- Get rental permission in writing.
Prepare for the work
- Measure and allow for cuts.
- Round up to full cartons.
- Follow the approved prep system.
- Have the specified roller ready.
Protect the result
- Check the layout before bonding.
- Follow the edge details.
- Use product-specific waiting times.
- Keep spare tiles and records.
Your exact product guide controls the method. No blanket sanding, extra-glue, curing-time, or removal promise applies to every floor.