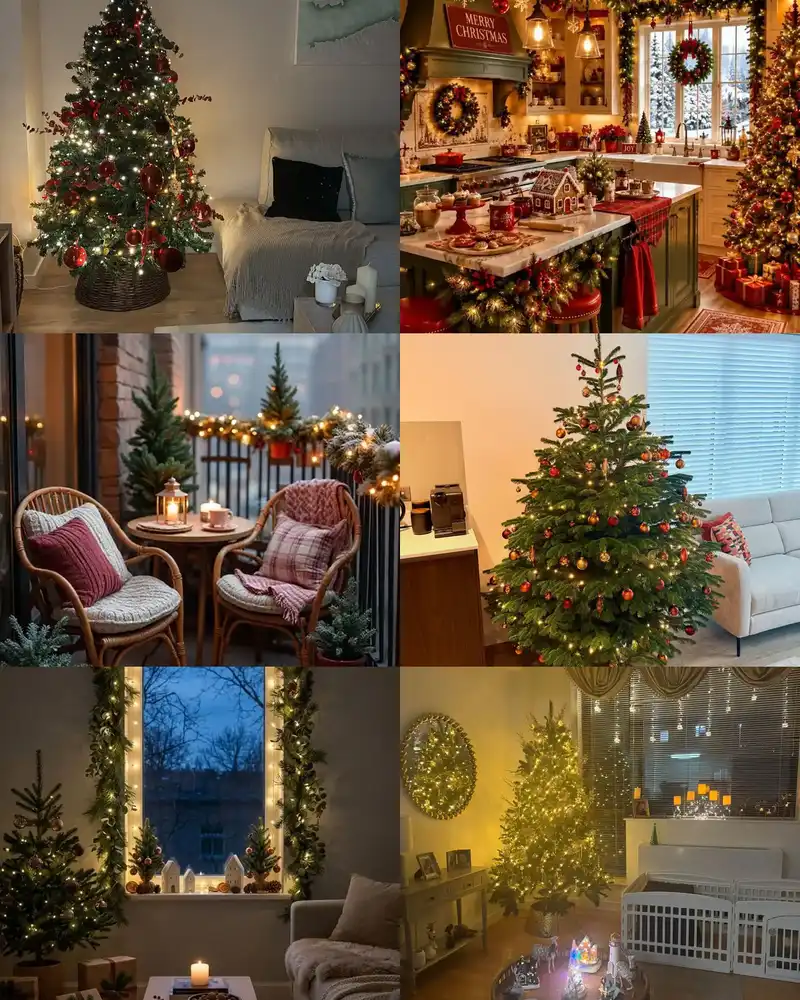
Apartment holiday decor has one problem house decor never faces: every item you add takes floor, shelf or counter space you actually need. A tree that is too wide eats the walkway. A garland in the wrong spot blocks a cabinet. By the second week, the pretty setup starts to feel like storage.
This post solves it with sizes first. Every one of these 25 ideas comes from a real apartment room, and each one tells you the working details: how wide the tree is, where the garland sits so doors still open, how many mini trees make a group, and which fixings leave no mark when January comes. Most ideas carry a budget level and a renter note. Start with the five rules below, then work room by room.

Table of Contents
- Holiday Apartment Basics: The Five Rules
- 1. Fit the Tree to the Room, Not the Other Way Round
- 2. Claim the Corner Beside the TV
- 3. In a Studio, Let the Tree Split Sleep and Sit
- 4. Hang a Branch Tree When Floor Space Is Zero
- 5. Use a Pencil Tree in a Tight Corner
- 6. Let a Flocked Tree Do the Decorating
- 7. Build a Tabletop Tree Scene on a Sideboard
- 8. Keep a Small Tree in a Pot and Move It Around
- 9. Group Mini Trees in Threes on a Console
- 10. Decorate the Windowsill and Add Snowflake Decals
- 11. Frame the Window With Garland and Lights
- 12. Run Lights Around the Curtains
- 13. Dress the Fireplace and Hang Stockings Low
- 14. Pair the Tree With a Screen Fireplace
- 15. Give the Bedroom Its Own Small Tree
- 16. Run Garland Over the Kitchen Cabinets
- 17. Make the Island or Table the Centerpiece
- 18. Decorate a Galley Kitchen Without Blocking It
- 19. Small Kitchen, Small Touches: One Wreath and Fresh Towels
- 20. Take the Holidays Onto the Balcony
- 21. Layer String Lights Where You Sit, Not Where You Store
- 22. Pick One Ornament Color and Repeat It
- 23. Use Bows and Ribbon as the Whole Theme
- 24. Wrap Early and Let the Gifts Do the Decorating
- 25. Put the Tree Against the Night Window
- 5 Holiday Apartment Mistakes That Waste Space and Money
- Holiday Apartment Questions, Answered
- Final Thoughts
Holiday Apartment Basics: The Five Rules
Small-space holiday decor works when five things stay true, whatever your style. Every room in this post follows them.
1. Pick one color story. Two or three colors, repeated everywhere: for example red and gold, silver and white, or green with warm wood. A single story is what makes a small apartment feel decorated instead of crowded with random red things.
2. Light in layers, low down. Tree lights, candles or LED candles, and one string of fairy lights. Apartments are lived in after dark in winter, and low warm light is what makes the same room feel festive at 7 pm.
3. Repeat greenery in every room. A garland in the living room, a small wreath in the kitchen, a mini tree in the bedroom. The repeat is what connects the rooms and makes the whole apartment feel done, not just one corner.
4. Fix nothing permanently. Command hooks, tension rods, over-door hangers and clips. Every idea in this post can come down in January without a single hole to fill, which is the renter rule that matters most.
5. Buy for storage, not just for December. Flat, foldable and nestable wins. If your whole holiday setup does not fit in one storage box or one under-bed bag, it is too much for an apartment, and next year you will not want to unpack it.
Budget order that works: lights first (they change the most), greenery second, textiles third (throws and cushion covers), tree fourth, ornaments last. Follow that order and even a small spend looks planned.
1. Fit the Tree to the Room, Not the Other Way Round
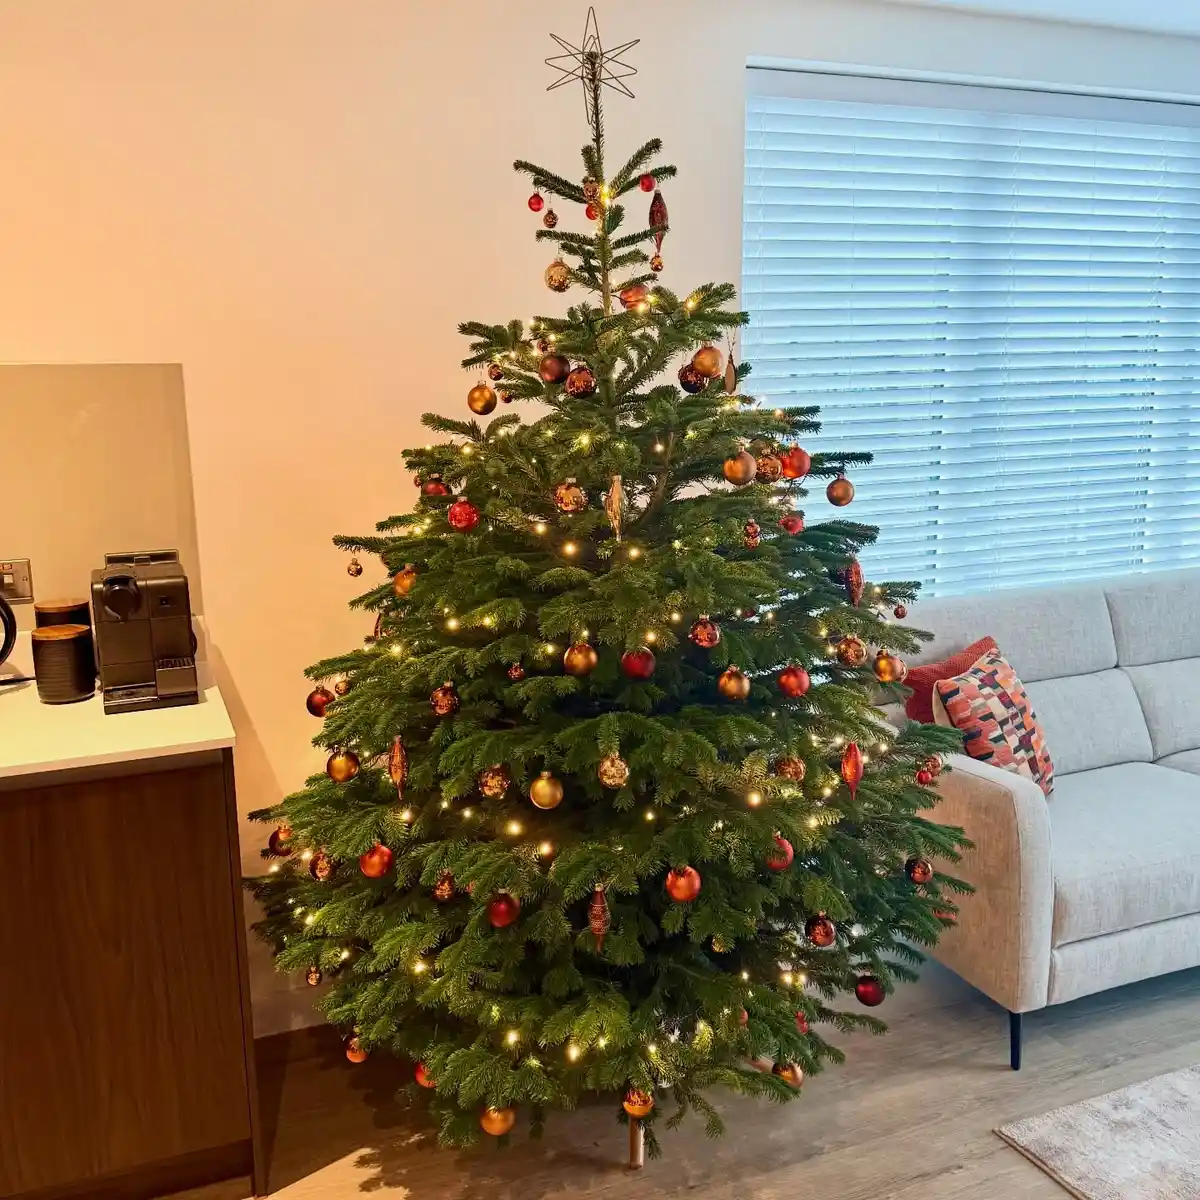
This living room keeps a full, classic tree, and it works because the size is honest. The tree stands beside the sofa, not in front of the walkway, and its widest branches still leave the seating clear. Red and gold ornaments repeat the colors in the cushions, so the tree looks like part of the room’s plan.
Measure before you buy, in this order. Ceiling height first: leave 15 to 20 cm between the tree top and the ceiling for the topper. Floor width second: in a small living room, a tree wider than 100 to 110 cm at the base starts eating seats. The safe apartment range is a 150 to 180 cm tree with a slim-to-medium profile. A shorter, fuller tree almost always looks better in a small room than a tall, thin one squeezed into a corner.
Test the spot with a taped outline on the floor for a day. If you keep stepping around the tape, the tree is too big or the spot is wrong. Move the tape, not your habits.
2. Claim the Corner Beside the TV

Most apartment living rooms have one dead corner, usually beside the TV stand or next to the balcony door. This room puts the tree exactly there. The corner gives the tree two walls of backdrop, keeps it out of the walkway, and puts it in view from every seat. The TV, playing a fireplace video, becomes part of the scene instead of a black box competing with it.
Corner placement has one rule: pull the tree 10 to 15 cm out from the walls so the branches keep their shape, and turn the best side toward the sofa. Nobody sees the back of a corner tree, so put the sparse side to the wall and save your best ornaments for the front half. That alone makes a budget tree look fuller.
Power check before you decorate: the tree lights, the TV and a lamp often share one corner outlet. Run one short extension lead with a switch behind the stand, so the whole corner turns on and off in one click, and no cable crosses the floor.
☐ Tree 10-15 cm out from both walls
☐ Best side and best ornaments facing the sofa
☐ One switched extension lead behind the stand
☐ Walkway fully clear, balcony door still opens wide
3. In a Studio, Let the Tree Split Sleep and Sit
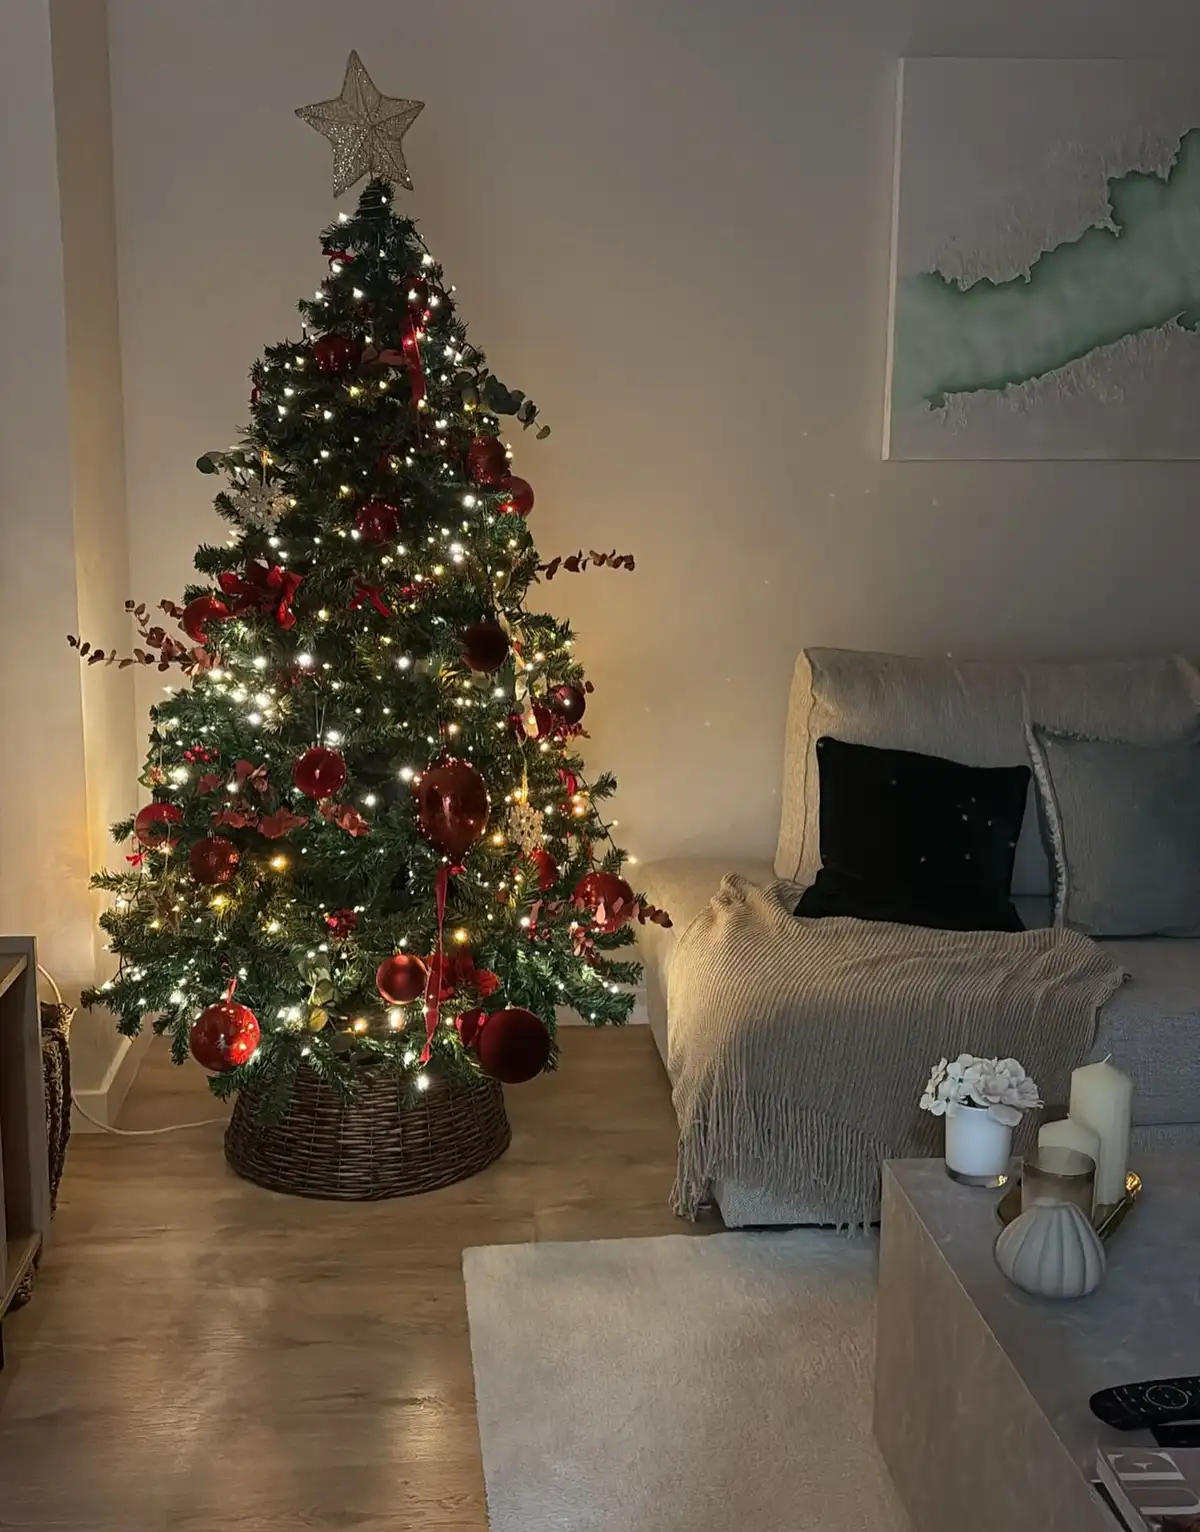
A studio apartment has one room doing three jobs, and this photo shows the smart move: the tree sits in a woven basket at the point where the bed zone meets the sitting zone. It works as a soft divider, and because it stands on the boundary, neither area loses its own floor space. At night the tree lights do the job of a bedside lamp.
The basket is doing real work here. A bare tree stand looks temporary; a basket or a fabric wrap makes the base look like furniture, and it hides the stand and the cable in one move. Any wide basket, crate or even a folded throw around the base gives the same result.
Scale for studios: stay at or under 150 cm for the tree, and decorate one side fully rather than the whole tree lightly. The side facing your sofa and bed is the only side you live with.
1. Stand the tree on the border between bed and sofa zones.
2. Hide the stand in a basket, crate or wrapped throw.
3. Decorate the living side fully, the wall side lightly.
4. Let tree lights replace one lamp at night.
4. Hang a Branch Tree When Floor Space Is Zero
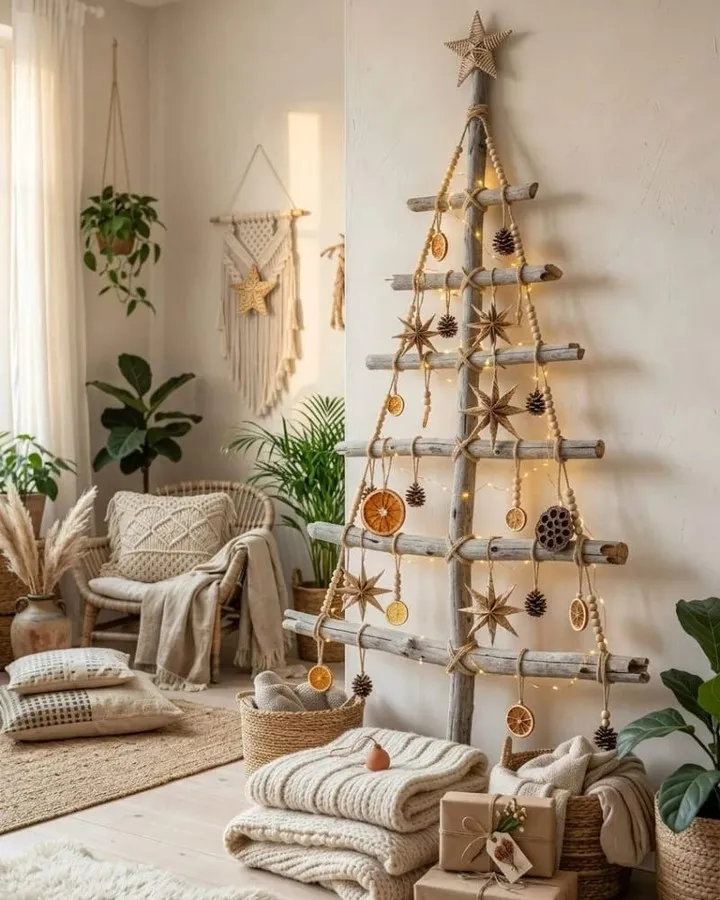
No floor to spare at all? This corner hangs the tree on the wall. Branches fixed in a triangle shape hold ornaments and lights, and the floor below stays free for cushions and a chair. It is the one tree style that fits a hallway, a tiny studio or the wall above a desk.
Build it from five to seven branches or wooden dowels, each one shorter than the one above, tied or screwed to two vertical cords or a simple frame. Hang ornaments on the branch ends where they catch light. A small battery light string is the right weight; mains strings are heavier and pull the shape down.
Renter fix: the whole piece hangs from one or two removable hooks at the top point. Total weight with ornaments stays under 2 kg for a branch version, so one strong hook can hold it. Take a photo of your ornament layout before you pack it away, and next year it goes back up in ten minutes.
Use battery lights (light and safe)
Hang from one or two removable hooks
Put floor cushions or a chair under it
Hang heavy glass ornaments on the tips
Use a mains light string (too heavy)
Fix branches straight into the wall
5. Use a Pencil Tree in a Tight Corner
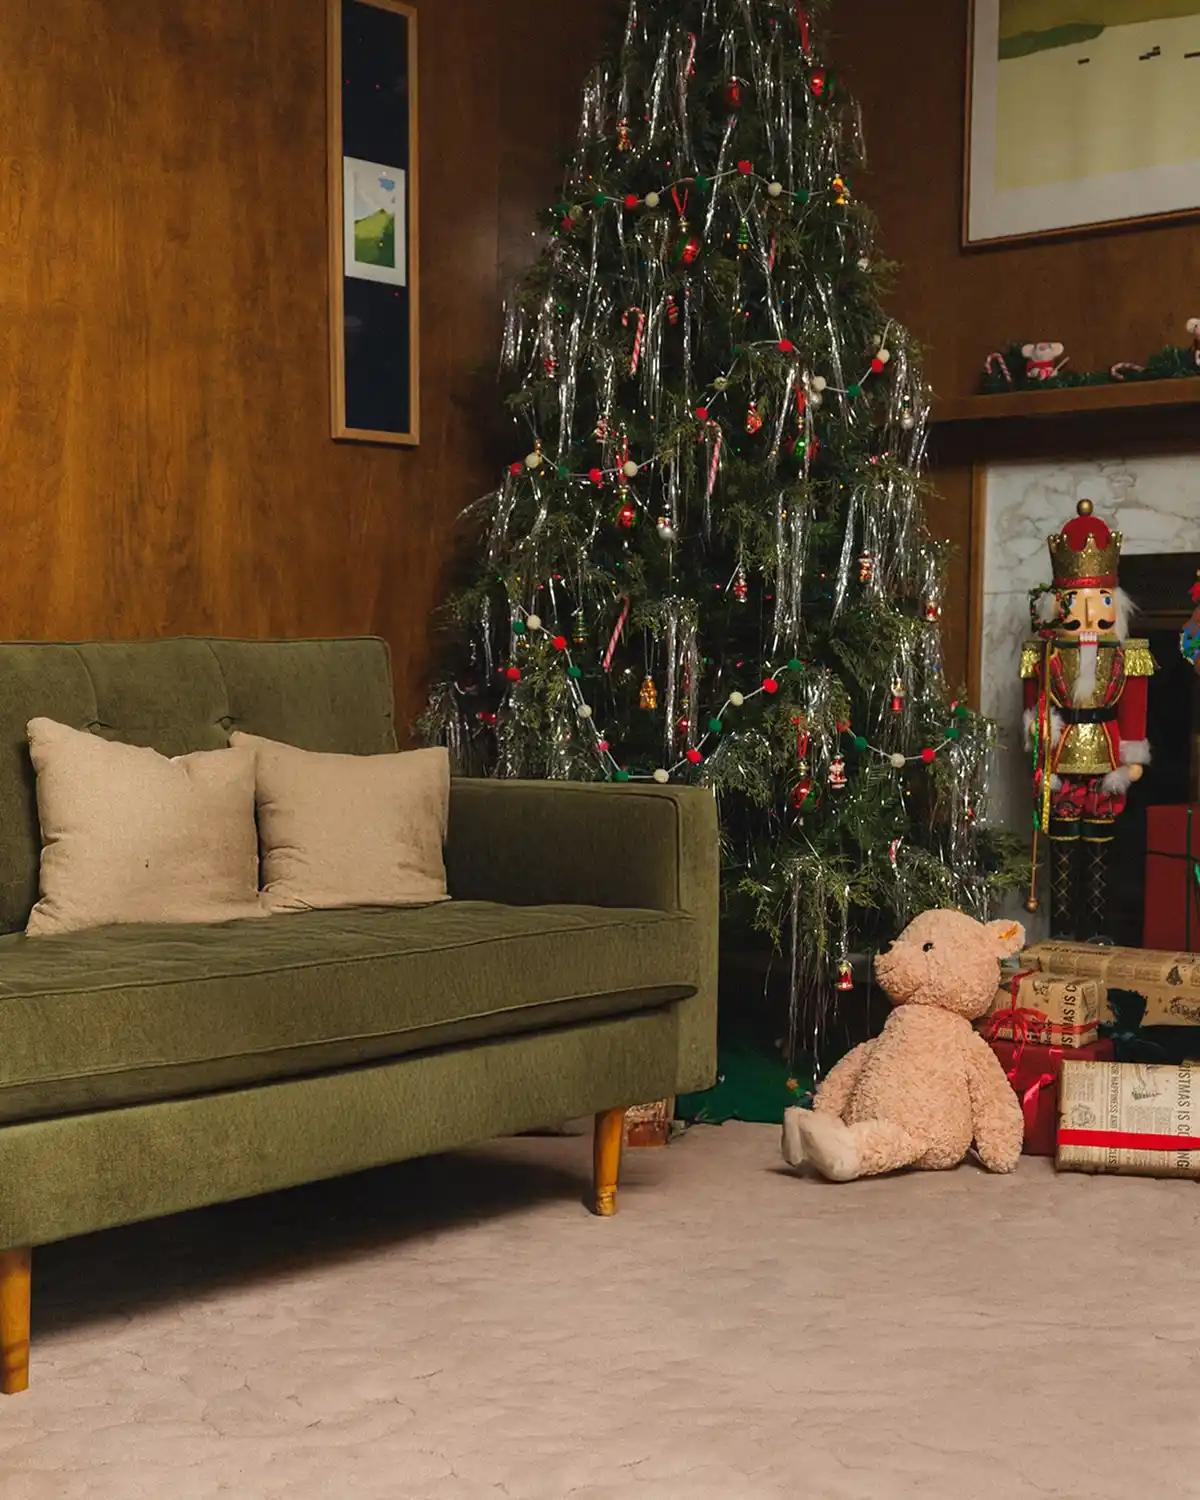
Some corners cannot take a normal tree at all: the gap beside a sofa, the end of a hallway, the space by a bookcase. This room answers with a pencil tree, tall and narrow, standing in a wood-panelled corner with gifts and a nutcracker at its base. The footprint is closer to a floor lamp than to a tree.
Pencil trees run about 30 to 45 cm wide even at 180 cm tall, which is why they fit where nothing else does. The trade is fullness: decorate with more lights than usual (they sit closer to the trunk and give the glow the branches would), and choose small ornaments that match the scale.
Base note: a slim tree in a busy corner gets bumped. Use the heaviest stand you can, or set the base inside a basket or pot like idea 3, so a knock does not become a fall.
| Tree Type | Base Width | Best Apartment Spot |
|---|---|---|
| Full tree | 100-110 cm | Living room, beside the sofa |
| Pencil tree | 30-45 cm | Tight corners, hall ends |
| Tabletop tree | 25-40 cm | Sideboards, desks, shelves |
| Wall/branch tree | 0 cm floor | Studios, hallways, above desks |
6. Let a Flocked Tree Do the Decorating

A flocked tree, the kind dusted white like snow, carries its own decoration before a single ornament goes on. In this bright corner it stands with just lights and a star, and the room still reads fully festive. For a small apartment that means fewer ornaments to buy, hang and store.
Flocking also changes the light. White branches bounce the tree lights back into the room, so a flocked tree glows more on fewer bulbs, and it stands out against plain rental walls without any wall decor behind it. If your apartment has one strong corner, this is the lowest-effort way to fill it.
Two honest warnings. Flocking sheds a little when you set up and pack down, so dress the tree where it will stand, not in another room. And keep flocked branches away from real candle flames; LED candles only near this tree.
7. Build a Tabletop Tree Scene on a Sideboard

Not every tree needs the floor. This tabletop tree stands on a wooden table against a dark wall, with small figurines grouped at its base, and it gives a full holiday scene in about half a meter of surface. Sideboards, desks, kitchen counters and the top of a bookshelf all take this size.
The scene is the point. A small tree alone can look like a compromise; a small tree with two or three figures, a tiny house or a short garland at its base looks like a choice. Keep the group in odd numbers (tree plus two or tree plus four items) and in your one color story, and it reads as a display, not clutter.
Height rule for tabletop trees: 45 to 60 cm is the sweet spot. Taller than that and it crowds shelves above; shorter and it disappears behind everyday objects. Battery lights again, so the scene can live on any surface without hunting for an outlet.
8. Keep a Small Tree in a Pot and Move It Around

This slim little tree stands in a pot beside the sofa, wrapped in nothing but fairy lights, and it is the most flexible decor in the whole post. A potted mini tree can start by the sofa, move to the hallway for a party, and sit on the dining table on the day itself. One purchase, three spots.
A real potted spruce or a good fake both work. Real trees in pots need a saucer under the pot and a weekly water check indoors, since heated rooms dry them fast. Fake ones need nothing, and the pot hides the plain plastic base that gives cheap minis away.
Ornament rule at this size: lights only, or lights plus five to eight small ornaments. A mini tree covered in full-size ornaments tips over visually and sometimes in real life too.
☐ Pot or basket hides the base, saucer under real trees
☐ Fairy lights first, ornaments second (5-8 small ones max)
☐ One planned home spot, freedom to move for events
☐ Weekly water check for real potted trees
9. Group Mini Trees in Threes on a Console

One mini tree looks like an afterthought. Three make a forest. This console by the windows holds a small group of trees in different heights, and it turns a plain table against the glass into the room’s second display after the main tree. Dining consoles, entry tables and wide windowsills all take this idea.
Copy the heights: tall, medium and small, roughly 45, 30 and 20 cm. Same style tree in three sizes reads as a set; three different styles read as leftovers. Set them close enough to overlap in view (5 to 10 cm apart) and add one shared element at the base: a short garland, a row of LED candles, or fake snow on a tray that catches the whole group.
Tray trick for renters and neat freaks: build the whole group on a tray or a flat basket. The display moves in one lift for cleaning, and comes down in January in one lift too.
Tall, about 45 cm, at the back
Medium, about 30 cm, front left or right
Small, about 20 cm, front, offset
10. Decorate the Windowsill and Add Snowflake Decals

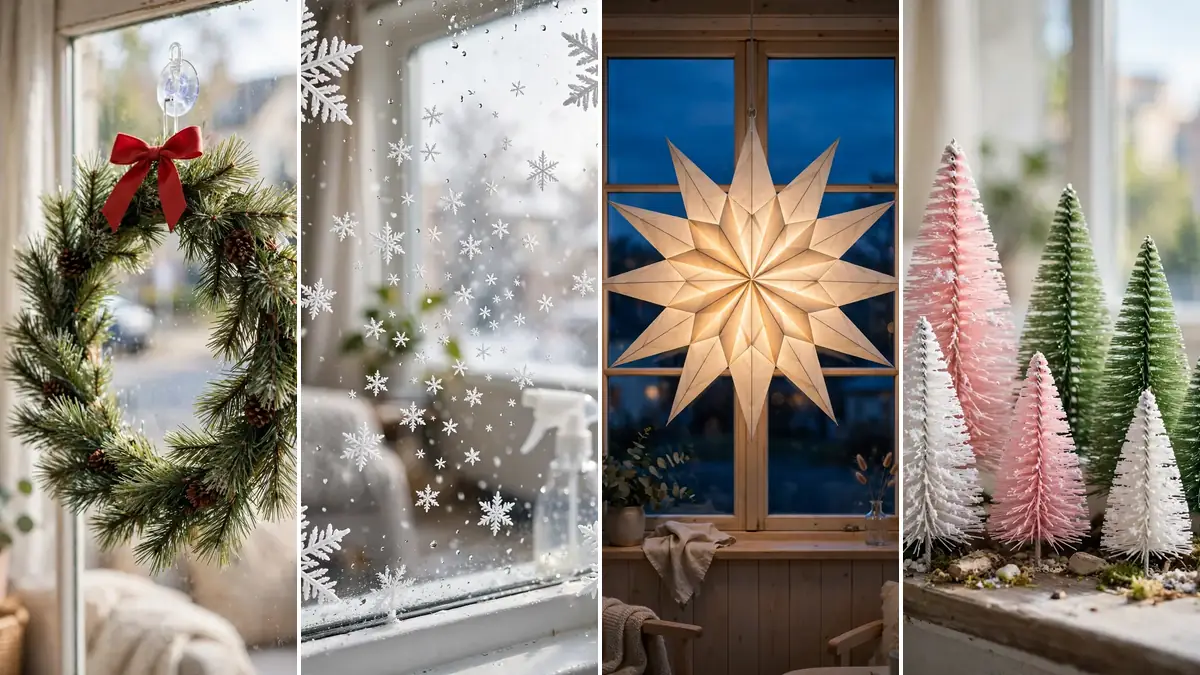
The windowsill is free display space in every apartment, and this one uses all of it: a small white tree, snowflake decals on the glass, and the everyday houseplants pulled into the scene. Nothing here needs a nail or a hook, and the whole setup is visible from inside and outside.
Decals are the renter hero of this idea. Static-cling snowflakes and stars press onto glass, hold all season, peel off in January and store flat in an envelope for next year. Space them like falling snow: closer together at the top corners, spreading out as they drop. Random even spacing looks like a sticker sheet; a drift pattern looks like weather.
For more ways to dress rental windows, our christmas window decor ideas for renters post goes deeper on sills, frames and glass.
11. Frame the Window With Garland and Lights

A window framed in garland becomes the room’s picture. This frame runs garland and lights around the whole window, with mini trees on the sill and wrapped gifts under it, and the plain rental window turns into the spot every other piece of furniture faces. It works day and night: green frame by day, glowing frame after dark.
Fixing is the question everyone asks. The answer is small clear command hooks at the corners and one at the top center, with the garland resting in the hooks, never taped to paint. A 2.7 m garland frames most apartment windows once round; measure your window’s three sides and buy that length plus a little drop at the ends.
Leave the bottom of the frame open if the window opens inward, and keep lights on the room side of the glass so condensation never reaches them.
1. Hooks at both top corners and top center.
2. Drape the garland, ends dropping 20-30 cm.
3. Weave lights through after the garland sits right.
4. Mini trees or houses on the sill to finish the base.
12. Run Lights Around the Curtains

Curtains already frame the window, so lights around them double the effect for almost no money. This corner runs a string of lights around the curtain edge, and the whole window wall glows in the evening. It is the fastest idea in this post: one string, ten minutes, no tools.
Clip the string to the curtain rod or the curtain rings rather than pinning the fabric. Small clear clips every 30 to 40 cm keep the line neat and let the curtains still open and close. Warm white is the calm choice; the multi-color strings in this photo suit a fun, family room. Match the light color to your color story and the effect doubles.
Safety: LED strings only near fabric, and never leave any string light running overnight or while you are out. A plug-in timer that switches off at midnight makes this rule automatic.
Clip to the rod or rings, not the fabric
LED strings only, on a timer
Match light color to your color story
Pin through curtain fabric
Use old hot-bulb strings near cloth
Leave lights on overnight
13. Dress the Fireplace and Hang Stockings Low

Apartments with a fireplace, working or not, get a ready-made center. This one keeps it simple: stockings on the mantel, a small lit tree standing beside the hearth, a lantern and low light. Nothing covers the mantel top to edge, and the restraint is what makes it look rich.
Stocking fixing without nails: stocking holders that sit on the mantel edge by weight, or a garland laid along the mantel with the stockings tied into it. Both hold fine and both leave in January without a mark. If the fireplace is decorative only, the firebox itself is display space: a basket of logs, a group of LED candles or wrapped gifts stack neatly inside it.
For full living-room setups built around the tree and fireplace together, see our christmas living room decor ideas after this post.
| Mantel Layer | This Room | No-Fireplace Swap |
|---|---|---|
| Top | Garland and stockings | Same, on a shelf or console |
| Side | Small lit tree | Mini tree trio (idea 9) |
| Base | Lantern on the hearth | LED candles on a tray |
14. Pair the Tree With a Screen Fireplace
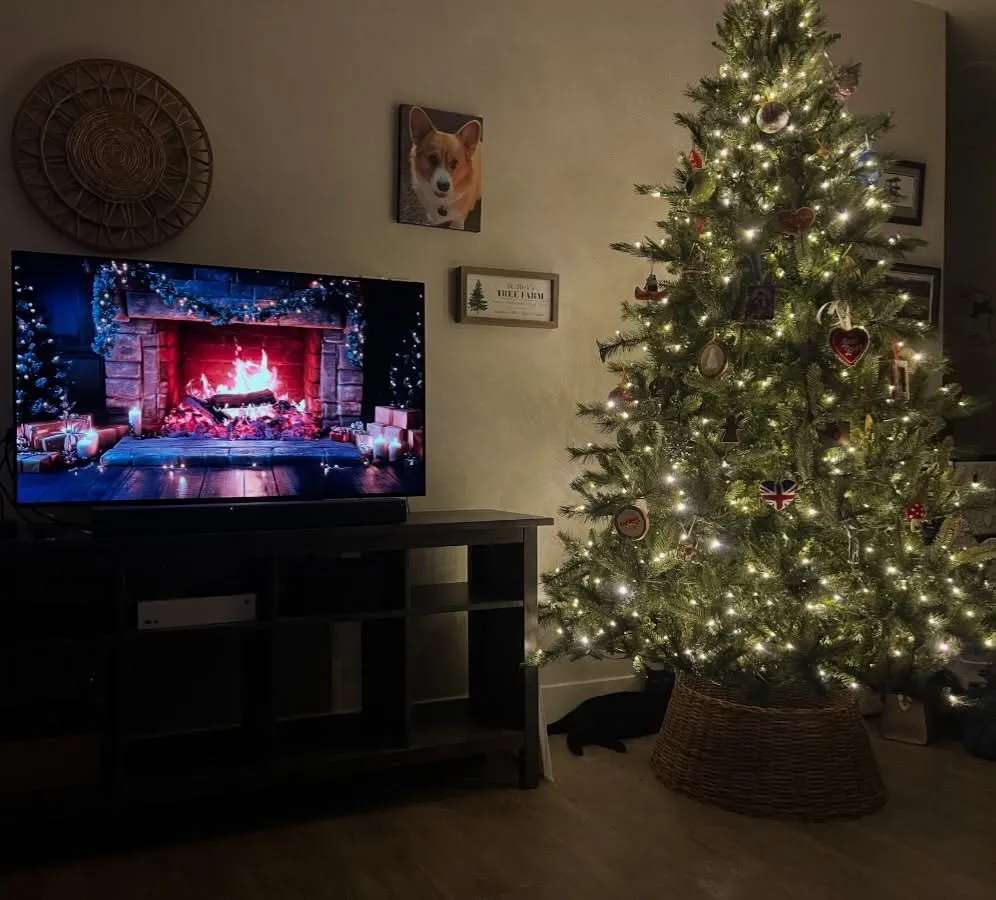
No fireplace is no longer a problem. This room plays a fireplace video on the TV and stands the tree right beside it, in a basket like idea 3. The eye reads the two together as one hearth scene, and the TV, normally the enemy of cozy, becomes part of the decor.
Set it up in the right order. Tree first, fully dressed. Then choose a fireplace video with a dark background and steady flames, no bright logos or text banners. Screen brightness down two or three steps from your movie setting; a glowing screen that is too bright flattens the tree lights beside it.
Sound is the hidden half. Crackle audio at low volume does more for the room’s feel than any object you could buy. Most fireplace videos include it; keep it just loud enough to hear from the sofa.
15. Give the Bedroom Its Own Small Tree

Bedrooms get skipped in holiday decor, which is a shame, because a small tree glowing by the bedroom window is the first and last thing you see each day of the season. This room uses a gold-lit tree at the window, a wreath on the round mirror, and candles on the table. Three touches, and the bedroom joins the rest of the apartment.
Keep the bedroom version calmer than the living room one. One ornament color (gold here), warm lights, and nothing flashing. If the tree lights keep you awake, put them on the same timer as idea 12, off at bedtime, on again before you wake if the timer allows two programs.
Space note: a bedroom tree takes the spot of the laundry basket or the plant stand for one month. Move that item to a closet rather than crowding the tree beside it. A tree with breathing room looks twice its price.
16. Run Garland Over the Kitchen Cabinets

Kitchens have the best free decor line in the apartment: the top of the cabinets. This kitchen runs garland along the cabinet tops and the island edge, hangs wreaths at the windows, and tucks a tree into the corner. The counters stay clear for cooking, which is the mistake most kitchen decorating makes.
The gap between cabinet tops and ceiling in most apartments is 30 to 45 cm, and a garland laid flat along the top edge fills it without touching a single door. Lay it, then weave a battery light string through it. Battery, because kitchen cabinet tops rarely have an outlet, and a cord down the wall ruins the line.
Grease warning, honestly: garland above a stove collects cooking film over a season. Keep the run over the stove section plain or skip that stretch, and shake the whole garland outside before storing it. Faux garland wipes clean; real greenery in a kitchen lasts about a week before it dries.
☐ Garland on cabinet tops, doors open fully to test
☐ Battery lights only (no cord down the wall)
☐ Skip or keep plain the stretch above the stove
☐ Counters stay clear, decor lives above eye level
17. Make the Island or Table the Centerpiece
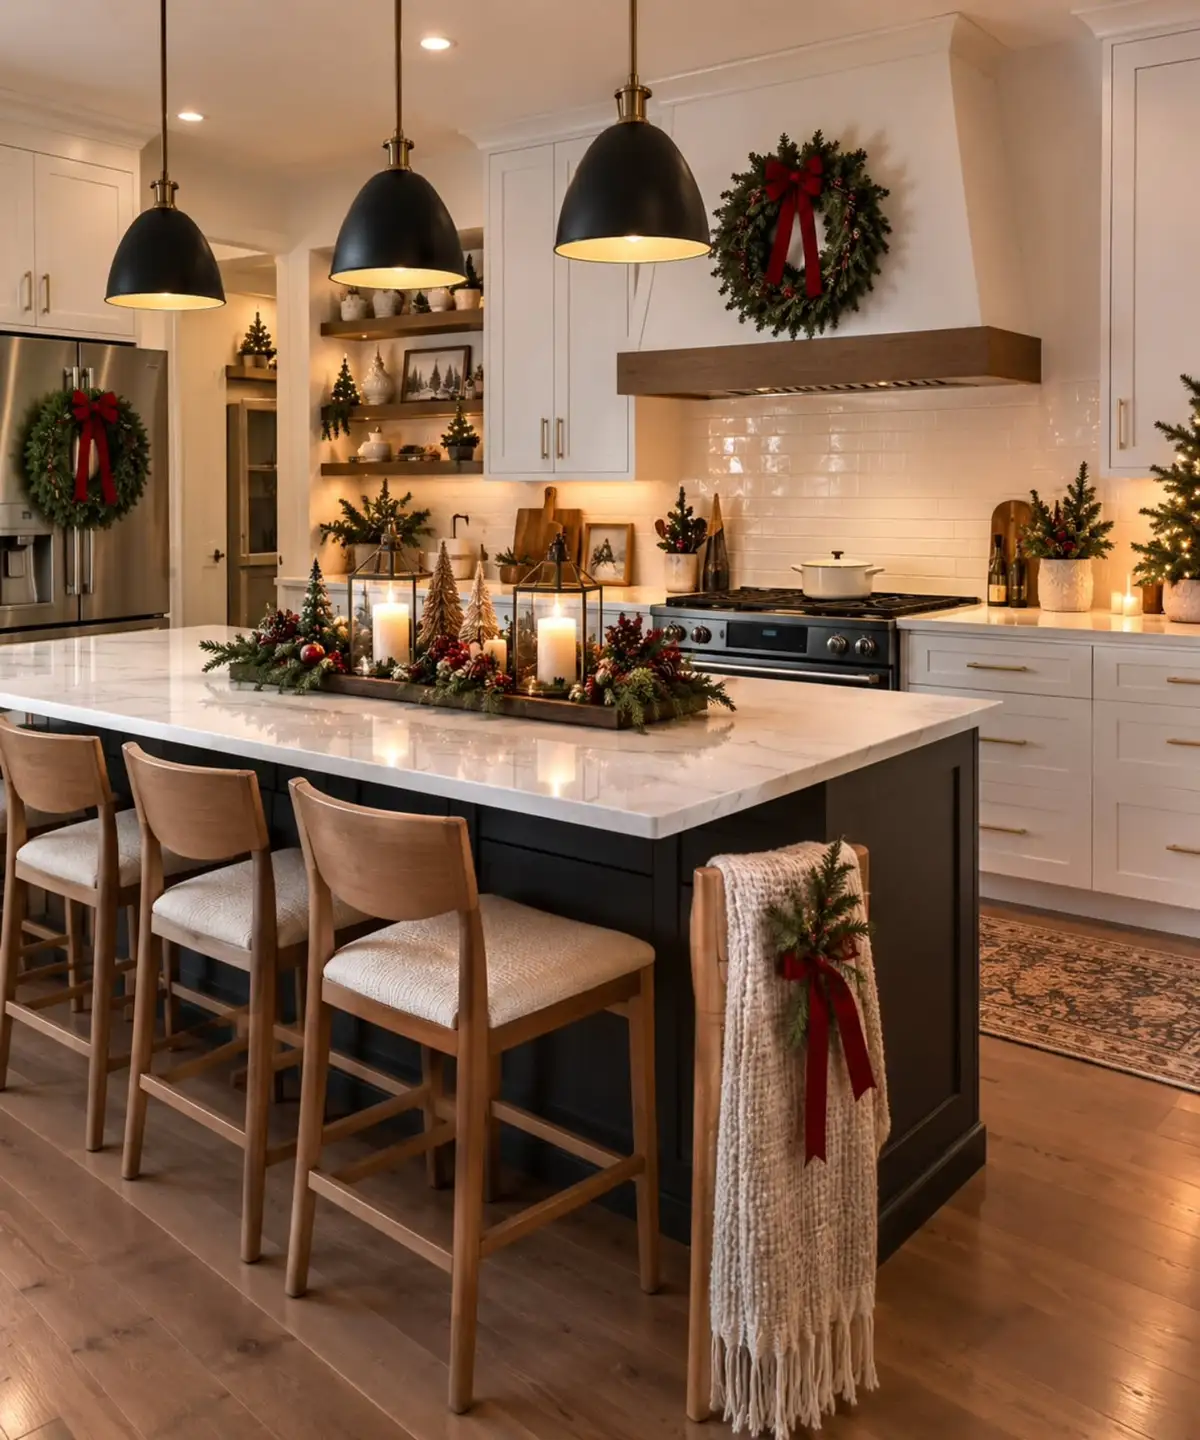
An open-plan apartment usually has one surface everyone sees from everywhere: the island or the dining table. This kitchen dresses that surface with a low garland runner and candles down its middle, then wreaths on the hood and cabinet door. One strong center, everything else quiet.
Build the runner to survive daily use. Keep it under 30 cm wide on an island so plates and boards still land on both sides, and build it on a tray or a strip of fabric so the whole piece lifts off in one move when the surface is needed. Candles inside glass jars only on a working island; open flame and cooking traffic do not mix.
Height rule: nothing in the centerpiece taller than a seated person’s eye line across the table. Conversation matters more than the display, and low garland with candles passes the test.
1. Tray or fabric strip down the middle, under 30 cm wide.
2. Garland laid along it, ends tucked under.
3. Candles in glass jars, grouped in threes.
4. One or two ornaments from your color story, nothing tall.
18. Decorate a Galley Kitchen Without Blocking It

A galley kitchen gives you about a meter of width and no spare counter, and this one still gets the full treatment: garland high along the cabinets, red bows at the joins, and a seasonal runner on the floor. The rule for narrow kitchens is simple: decorate the top and the floor, never the middle where hands and doors work.
Everything here sits above head height or underfoot. Cabinet-top garland as in idea 16, bows pinned to the garland itself (not glued to doors), and a washable runner that trades places with the everyday one for a month. The walking line and every handle stay untouched, so the kitchen works exactly as before.
Bows are the budget secret of this whole post. A roll of wide ribbon makes ten to fifteen bows, and bows on garland, chair backs, wreaths and the tree tie the whole apartment’s color story together for the price of one ornament set.
Decorate above the cabinets and on the floor
Tie bows to garland, not to doors
Use a washable runner for the season
Put anything on the work counters
Hang items at handle or head height
Block a cabinet door’s swing for decor
19. Small Kitchen, Small Touches: One Wreath and Fresh Towels

Some kitchens cannot take garland at all: no cabinet gap, no island, no spare inch. This bright kitchen does it with three swaps instead. A small wreath on the pantry door, holiday towels on the oven handle, and one tiny tree on the counter corner. Ten minutes, almost no money, and the room is in the season.
Swap thinking is the skill here. Towels, the soap dispenser, the fruit bowl, the rug: each has a holiday version, and swapping four everyday items changes the room more than adding one big piece that has nowhere to live. Everything you swap out goes in the holiday storage box, so January swaps straight back.
The tiny counter tree has one rule: it lives in the corner you never cook from, usually beside the wall or by the fruit bowl, and it stays under 30 cm so it never competes with a chopping board for space.
20. Take the Holidays Onto the Balcony

A balcony is the apartment’s extra room, and this one is fully in the season: two chairs with cushions, mini trees in the corners, a garland with lights along the railing, and a lantern on the table. Neighbors see a glow, you get a second living room for cold evenings with a blanket.
Railing garland fixes with cable ties or clips at four to six points, pulled snug so wind cannot work it loose. Outdoor-rated lights only out here, and the plug stays inside through the door gap or a window, never in the rain. Mini trees on a balcony should be fake or hardy real ones in heavy pots; a light pot in winter wind ends up on the floor below.
Renters: check your building rules once before lighting a balcony. Most allow lights and garland; a few restrict anything fixed to the outside of the railing. Inside-the-railing garland passes almost everywhere.
☐ Garland tied at 4-6 points, snug against wind
☐ Outdoor-rated lights, plug kept indoors
☐ Heavy pots for mini trees
☐ Building rules checked once before setup
21. Layer String Lights Where You Sit, Not Where You Store
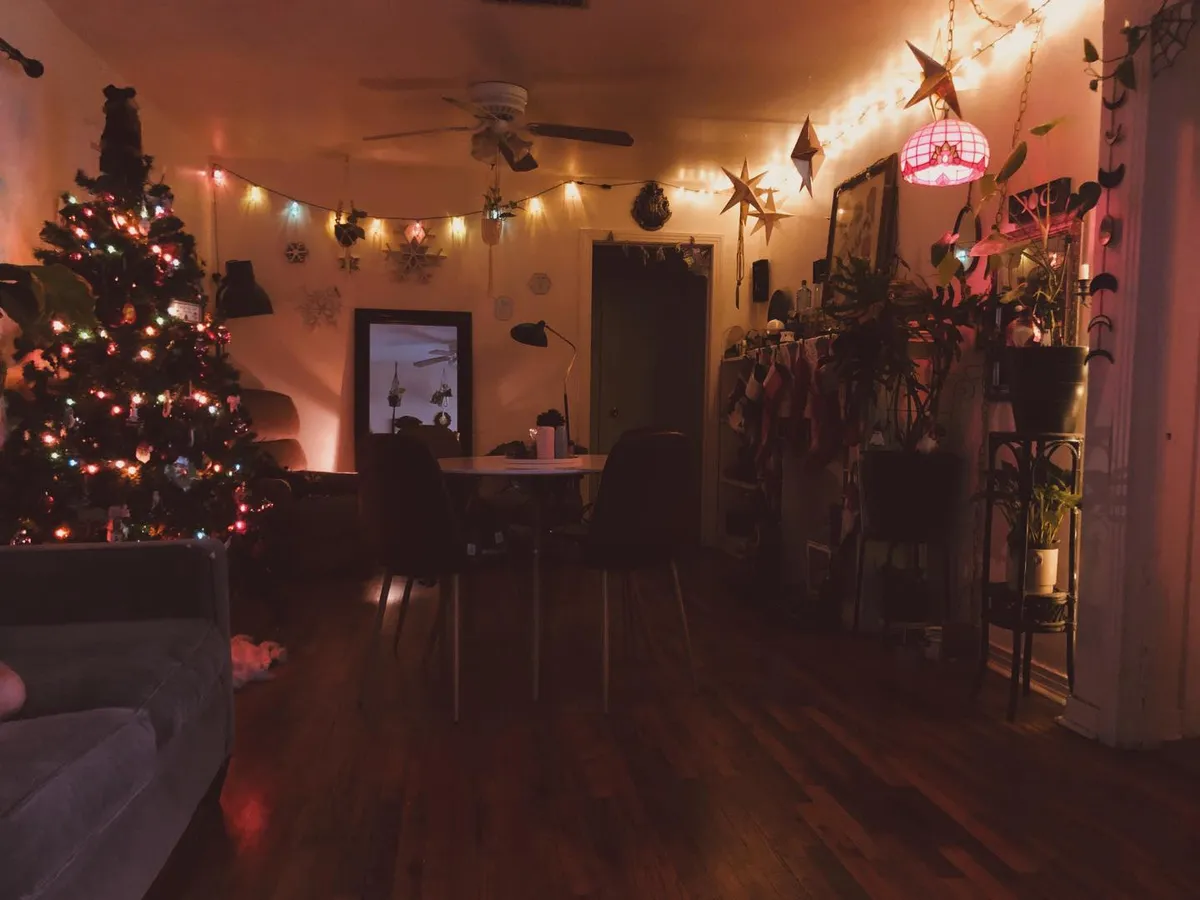
This room at night shows the whole lighting idea in one photo: string lights traced along the ceiling edge, the tree glowing in the corner, lamps low at sitting height. Three light levels, all warm, and the plain apartment room feels like a lodge. None of it is fixed; the strings hang from small clear hooks along the wall top.
Placement is the difference between glow and clutter. Run strings along edges: the top of a wall, a shelf line, a bookcase top, the headboard. Edges give the line a reason. A string draped across an open ceiling or tangled on a plant reads as mess by day, whatever it does at night.
Count for a living room: two strings of 5 to 10 m cover the main edges for most apartments. Buy warm white (2700K on the box) and buy both strings the same brand in the same trip; two whites that do not match look like a mistake every single evening.
✨ High: string lights along wall tops and shelves
🎄 Middle: the tree and its lights
🕯️ Low: lamps and LED candles at sitting height
22. Pick One Ornament Color and Repeat It

Against its dark wall, this tree carries one decision all the way through: red ornaments, warm lights, nothing else. The result looks planned and calm, and it is the cheapest styling trick in the post, because one color means one or two boxes of ornaments instead of a mixed collection built over years.
Choose the color from the room, not from the shop. Pick the color already in your cushions, rug or art, and the tree joins the room on day one. Red is the classic; gold suits warm rooms, silver and white suit cool grey rooms, and copper flatters the terracotta tones many apartments already run.
Fill order matters on a one-color tree: lights first, then the largest ornaments deep in the branches, then medium ones at the tips, then a few smallest near the top. One color in three depths looks fuller than three colors in one layer.
23. Use Bows and Ribbon as the Whole Theme

This tall-window room skips most ornaments and ties the tree with red bows instead. Bows at the branch tips, candles on the table, a few red cushions: the theme is ribbon, and it costs one or two rolls. For an apartment it has a second gift: bows store flat in an envelope and never break in a box.
Tie bows in two sizes. Large bows (10 to 12 cm of ribbon per loop pair) go on the tree’s outer tips and the wreath; small ones tie onto garland, chair backs, candlesticks and gift boxes. Same ribbon everywhere is what turns cheap into themed. Wired ribbon holds its shape and reuses for years; buy it once, buy it wide (4 to 6 cm).
Count for a full tree: 15 to 20 large bows read as a decorated tree with nothing else on it. Add warm lights under them and most people will not notice there are no ornaments at all.
24. Wrap Early and Let the Gifts Do the Decorating

In this high-rise room, the wrapped gifts under the tree are half the display: white and silver boxes stacked in groups, catching the window light. In an apartment, where decor space is precious, presents are the one decoration that was going to be in the room anyway.
Wrap as you buy, in your color story’s paper. Two papers maximum (one plain, one patterned) plus one ribbon, and any pile of boxes looks styled instead of stored. Build the arrangement like the mini trees in idea 9: tall boxes at the back, small ones front, one box on a book or stand to break the line.
Practical notes: keep wrapped gifts off the floor if you have a pet or a robot vacuum, using a low bench or the tree basket edge as the display line. And write the name on the bottom of each box in pencil; styled piles get moved, and January-you will thank December-you.
Two papers and one ribbon, in your color story
Tall boxes back, small front, one raised
Names pencilled on the bottom
Wrap everything in different papers
Pile gifts where doors or vents open
Leave price tags on display boxes
25. Put the Tree Against the Night Window

The last idea is pure placement. This tree stands against floor-to-ceiling windows at night, and the city behind it becomes its backdrop: every light on the tree doubles in the glass, and the room looks twice as deep. If your apartment has one big window, the tree belongs in front of it for the season.
By day the same spot earns its keep differently: the tree silhouettes against daylight and ornaments catch sun instead of bulb light. Either way the window does the decorating work that a wall of art would do in a bigger home.
Two checks before you commit the spot. Heat: keep the tree at least 30 cm from radiators or heat vents under the window, which dry a real tree in days and are unkind to fake ones over years. And curtains: if they close across the tree spot, either keep them open for the season or move the tree 20 cm into the room so the fabric never rests on branches or lights.
5 Holiday Apartment Mistakes That Waste Space and Money
1. A tree one size too big. The tree fits, but the room stops working: chairs crowd, doors catch branches, the walkway shrinks. The tape test in idea 1 and the size table in idea 5 exist because returning a tree in December is nobody’s plan.
2. Decor on every surface. If every shelf, sill and table holds holiday items, the eye has nowhere to rest and the apartment reads as cluttered, not festive. Decorate in scenes (ideas 7, 9, 17) and leave real gaps of plain surface between them.
3. Three color stories at once. Red-gold in the living room, blue-silver in the bedroom, pink in the kitchen: each room fine alone, the apartment a jumble. One story, repeated, is the whole trick from the basics section.
4. One bright ceiling light at night. You paid for tree lights, fairy lights and candles, then the ceiling light washes them all out. Evenings run on the three light levels from idea 21, or the money spent on them is wasted.
5. Drilling and gluing in a rental. Every idea in this post hangs from hooks, clips, tension or weight. A deposit lost to twelve nail holes costs more than the entire decor budget, and January patching is a chore nobody needs.
Holiday Apartment Questions, Answered
How early should I start decorating an apartment?
The last weekend of November suits most people: the setup takes one afternoon if you follow the budget order (lights, greenery, textiles, tree, ornaments), and you get five full weeks of evenings out of it. Studios and small apartments come down fast too, about an hour.
How much does it cost to decorate a small apartment for the holidays?
A first year with a tabletop or pencil tree, two light strings, one garland and a roll of ribbon can stay in the low tens of dollars. A full setup with a 150 to 180 cm tree usually lands in the low hundreds. Lights and greenery first; they carry the look at any budget.
Real tree or fake tree in an apartment?
Fake wins for most apartments: no needles in the hallway carpet, no watering, no disposal trip, and a slim profile made for small corners. A real potted mini (idea 8) is the exception worth making if you want the smell; our fragrance layering ideas pair well with it in the final section below.
How do I decorate with no fireplace and no mantel?
Swap the mantel for the longest shelf, the TV stand top or a console. Stockings hang from the shelf edge on weighted holders, garland runs the same line, and a fireplace video (idea 14) supplies the hearth. The mantel table in idea 13 lists the swap for every layer.
What is the most renter-safe way to hang garland and lights?
Clear removable hooks at corners and edges, clips on curtain rods, cable ties on balcony rails, and weighted holders on shelves. Test one hook with the garland’s weight for an hour before the full run if your paint is old or delicate.
How do I store everything in a small apartment afterward?
One box rule from the basics section: if it does not fit in one box or one under-bed bag, edit before you store. Wrap lights around a piece of cardboard so they never tangle, keep decals in an envelope, and photograph your best scenes before packing so next year starts from your own pictures.
Final Thoughts
Decorating an apartment for the holidays is not about fitting a house-sized setup into fewer meters. It is about choosing the version that fits: a tree sized to the room, greenery repeated in small doses, light layered where you actually sit in the evening, and nothing fixed to the walls that you will have to answer for later. Pick three ideas from this list (a tree idea, a light idea and one room you have been ignoring) and your apartment will feel in the season by tonight. That is the whole secret of how to decorate your apartment for the holidays: smaller pieces, repeated colors, warm light.
When the rooms look right, add the last layer most people forget: scent. Our candle and reed diffuser ideas post shows 25 ways to make the apartment smell like the season without overpowering a small space.

Sophoronia is a Senior Home Decor Writer at Home Aure, where she writes about thoughtful decorating, cozy interiors, small-space solutions, and practical ways to make a home feel more personal. Her work focuses on approachable ideas that balance beauty with everyday living. Through Home Aure, she explores room styling, decor trends, color, texture, and simple updates that can bring more character and warmth to a space.