Your rental’s smallest surfaces can carry more personality than another blank wall. The side of a drawer, the back of a bookcase, or the inside of a cupboard door gives you somewhere to try a pattern without committing the whole room to it. Sometimes a leftover piece is enough.
These contact paper ideas for renters focus on details that are easy to overlook. There are quiet updates for storage boxes and picture mats, larger changes for furniture you own, and a few rental fixtures that need extra checks before you begin. Warm wood prints, small florals, and simple solid colors each work differently depending on where you put them.
The catch is that removable does not always mean damage-free. The condition of the surface matters, and a film that works on one cabinet may behave differently on another. Start with the product instructions, check any rental restrictions, and test an inconspicuous spot.
Use the ideas below to choose one manageable project. You do not need to wrap the whole kitchen to make a plain corner feel more like yours.
Image note: The images in this article are AI-generated styling illustrations, not photographs of tested installations.
Before You Stick: Check the Product and the Surface
For a first project, consider a small object you own. A separate tray insert or replacement picture mat gives you room to experiment without putting adhesive on a rental fixture.
Before covering anything, check:
- Permission: Confirm what your lease allows and ask about unclear restrictions on adhesives.
- Surface condition: Avoid loose paint, lifting veneer, swelling, and damaged coatings.
- Product suitability: Read the instructions for the exact film and the surface underneath.
- Removal: Test a hidden area of the same finish, following the manufacturer’s guidance.
A short test can reveal an immediate problem, but it cannot guarantee how removal will go after several years. Manufacturer d-c-fix specifically notes that removal depends on surface condition and may damage unstable paint or thin veneer.
1. Give a Plain Bookcase a Patterned Back
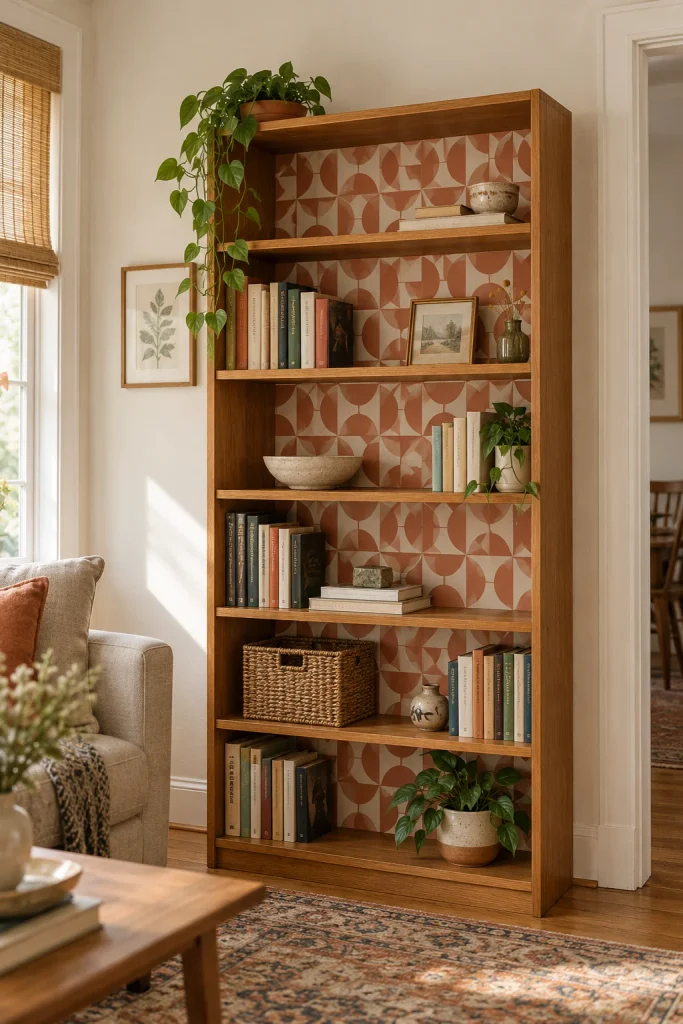
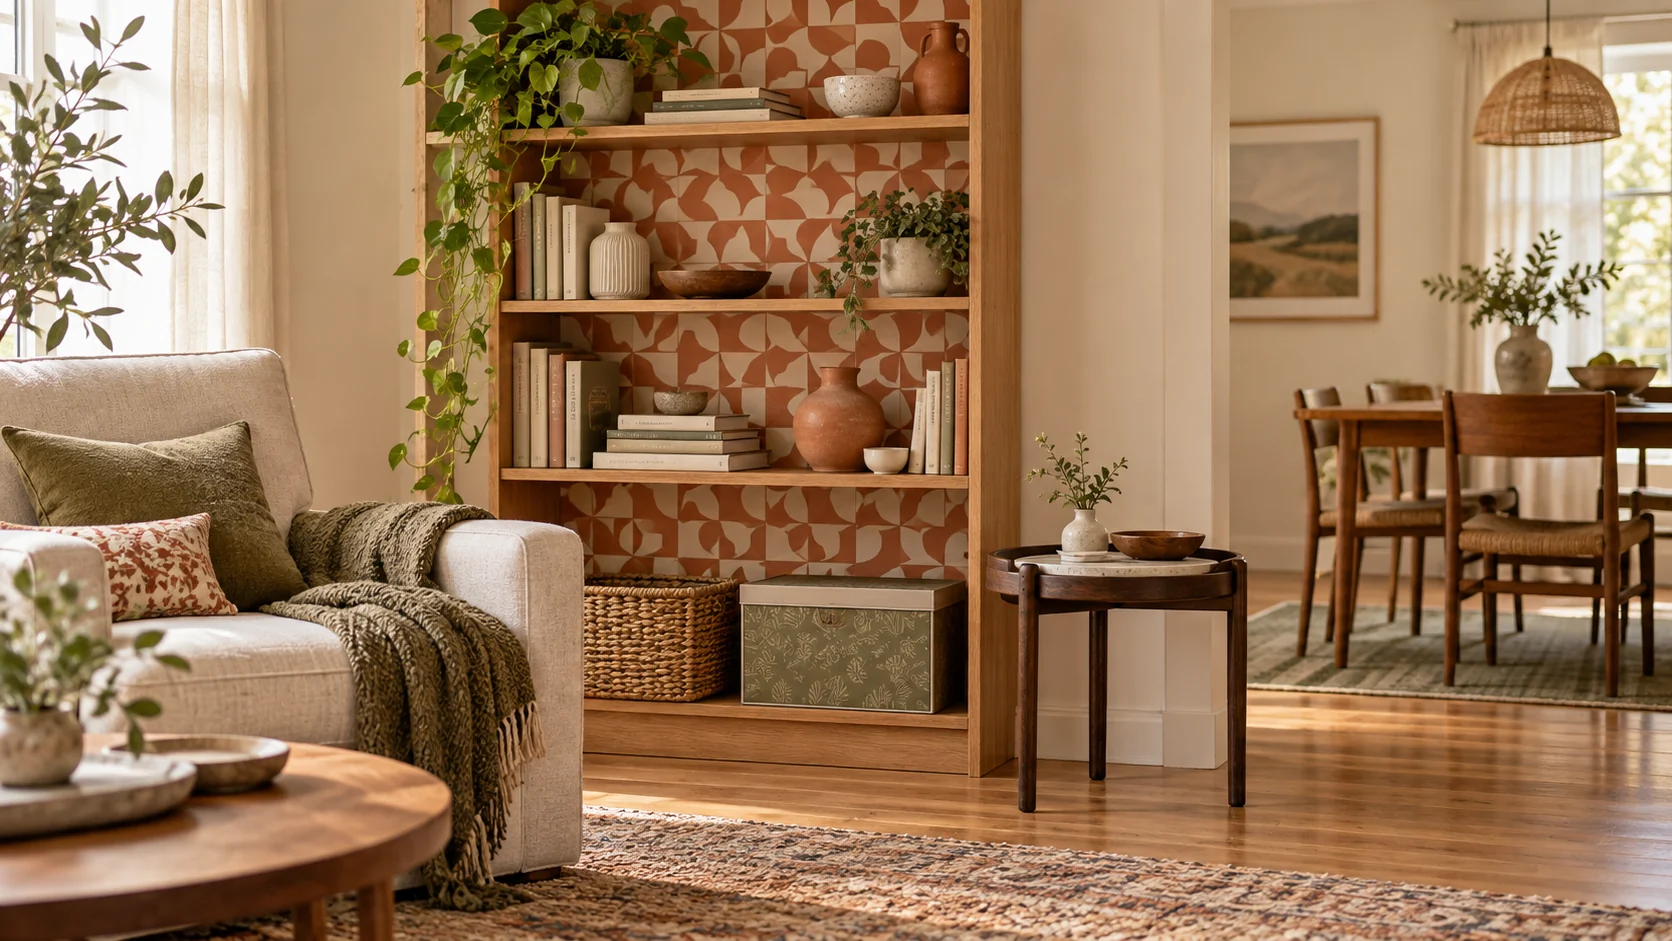
A plain bookcase can carry a bold pattern without taking over the room. Keep the shelves and frame simple, then use geometric contact paper behind the books. Small terracotta shapes on a cream background work well with warm wood and woven storage.
- Leave a few gaps between books so the pattern stays visible.
- Repeat one color in a small vase or bowl.
- Choose a smaller print for narrow shelf openings.
Check the backing first. Some inexpensive bookcases have paper-covered panels that may tear during removal. A separate, snug-fitting insert lets you decorate that piece instead. Avoid covering ventilation openings or changing the bookcase’s required wall anchoring.
Measure each opening
Fixed shelves may divide the backing into separate panels. Check each space before cutting.
Follow the repeat
Line up the pattern across shelf openings before attaching it to your backing pieces.
Keep inserts secure
Check that each insert stays upright and does not shift when you move a book.
2. Hide a Tiny Floral Print Along Drawer Sides
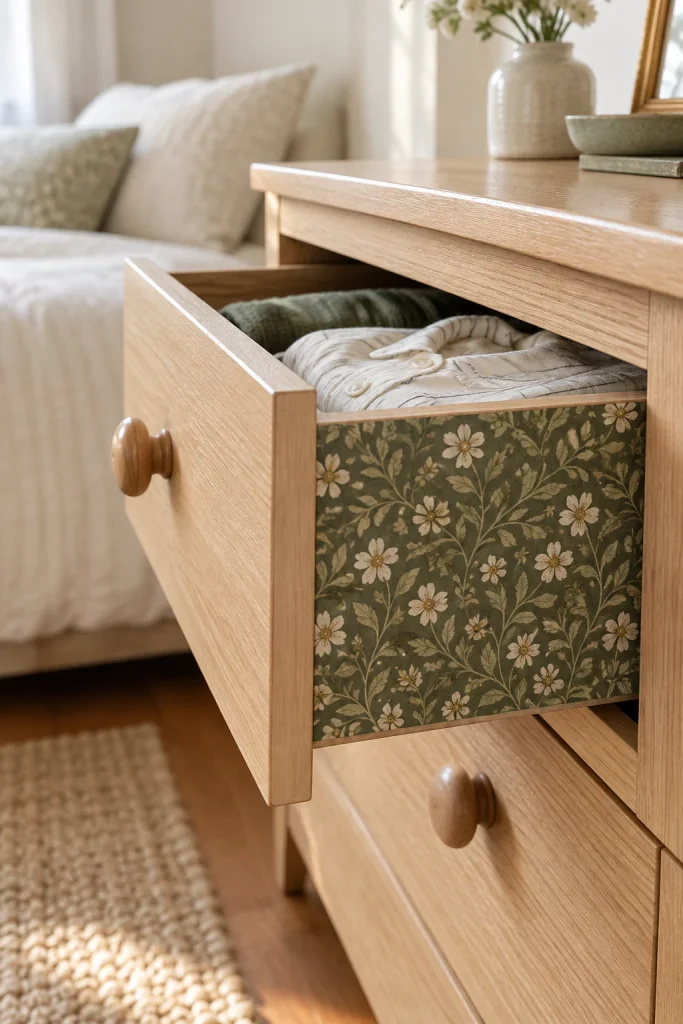
The outside face of a drawer gets all the attention. Its side can hold a quieter detail: a tiny olive-green floral print that appears only when you pull it open.
Start with a dresser you own and a drawer with a smooth, flat exterior side.
- Open and close it to check where the sides pass near the frame.
- Test a small piece on a hidden part of the same finish.
- Keep the film clear of runners, grooves, and rubbing edges.
A thin border of bare wood can make the panel look neat. Stop if the drawer catches. A hidden pattern is not worth a drawer that sticks every morning.
✅ A useful candidate
An exposed, flat side with room to move freely.
An intact finish that passes the product’s surface test.
🚫 Leave these uncovered
Slide hardware, moving joints, and drawer grooves.
Tight spots showing scratches or marks from rubbing.
3. Put a Marble-Look Insert Inside a Decorative Tray
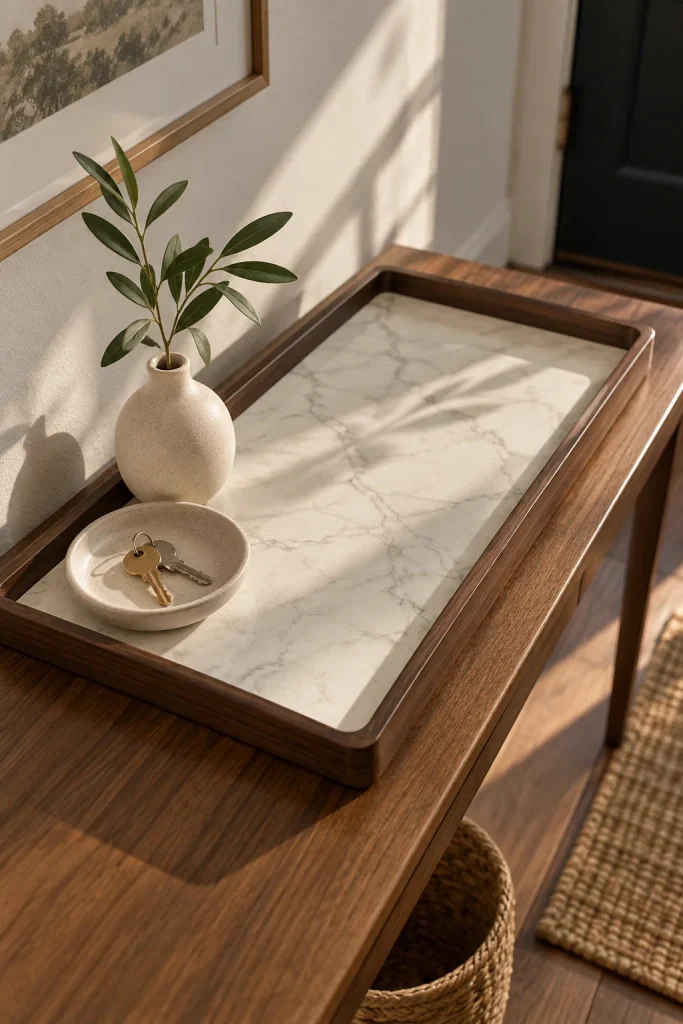
Leftover marble contact paper suits a small tray because the pattern has less space to repeat. Use it beneath a ceramic vase and a dish for keys on an entry console.
For a crisp look: choose pale marble with fine gray veining and pair it with a dark tray.
For a softer look: use cream stone print inside a natural wood tray.
Cover a separate, firm insert cut to fit the base, then place it inside. You can lift the whole piece out when you want another pattern. Keep this as a decorative surface unless the product is approved for direct food contact. Water-resistant film also does not guarantee sealed edges.
💡 Make a paper template first
Fit ordinary paper inside the tray and mark its rounded corners. Use that shape to cut your insert on a protected work surface. Leave enough clearance to lift the insert out without bending it.
Coverage tracker
| Entry | Location | Topics covered | Visual |
|---|---|---|---|
| 1 | Bookcase backing | Geometric patterns, fragile backing, separate inserts | Card grid |
| 2 | Exterior drawer sides | Floral patterns, clearance, friction, surface testing | Do and skip panels |
| 3 | Decorative tray insert | Leftover scraps, marble print, removable inserts, moisture limits | Tip box |
4. Line the Inside of a Cabinet Door With a Quiet Pattern
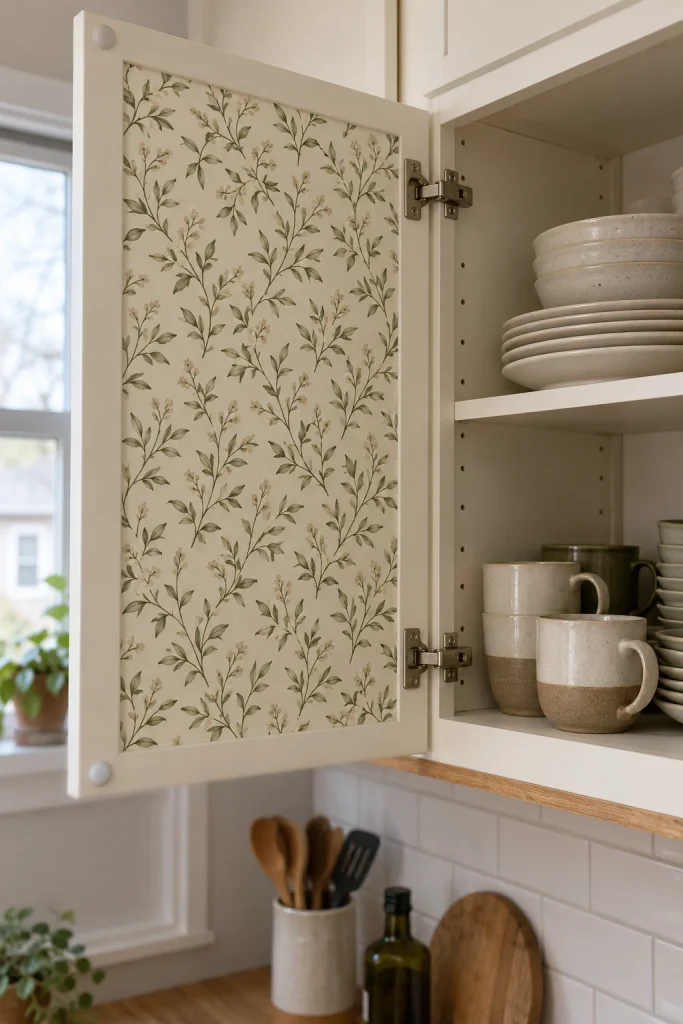
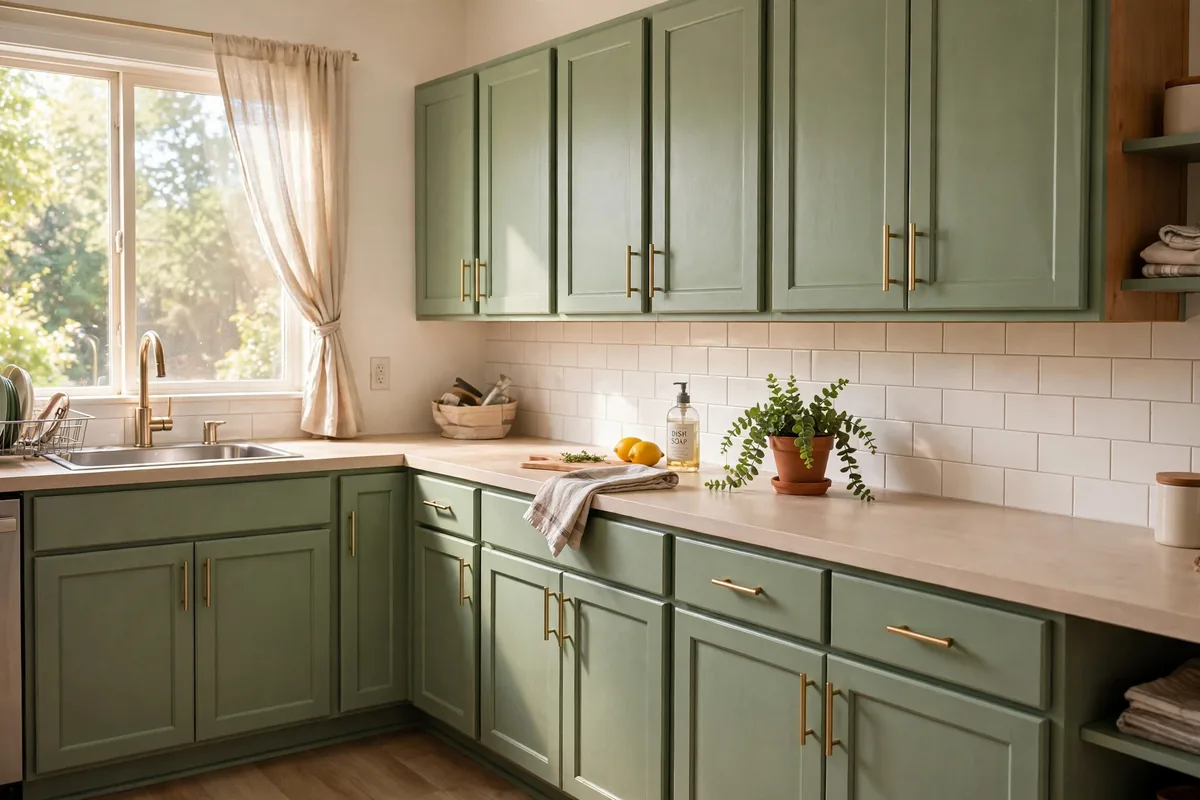
Opening the cupboard for a mug can reveal a detail that stays hidden when the kitchen is tidy. A small cream-and-olive print on the inside of a cabinet door brings interest to a plain rental kitchen without changing its whole color scheme.
Keep the pattern inside the door’s flat center. Leave the surrounding frame visible so the result feels deliberate.
Before cutting, check three things:
- The finish: Loose paint, lifting veneer, or a peeling coating needs attention before any decorative film.
- The hardware: Keep hinges, catches, and door bumpers uncovered.
- The fit: Close the door and note where it touches the cabinet frame.
A flat door interior is easier to work with than one with deep grooves. If the surface belongs to your landlord, check whether adhesive coverings are allowed, even when the product says removable. For a cupboard that holds everyday dishes, choose a film with suitable cleaning instructions and let the surface dry fully before applying it.
📋 Before you cut the panel
5. Wrap Plain Storage Boxes for an Open Closet
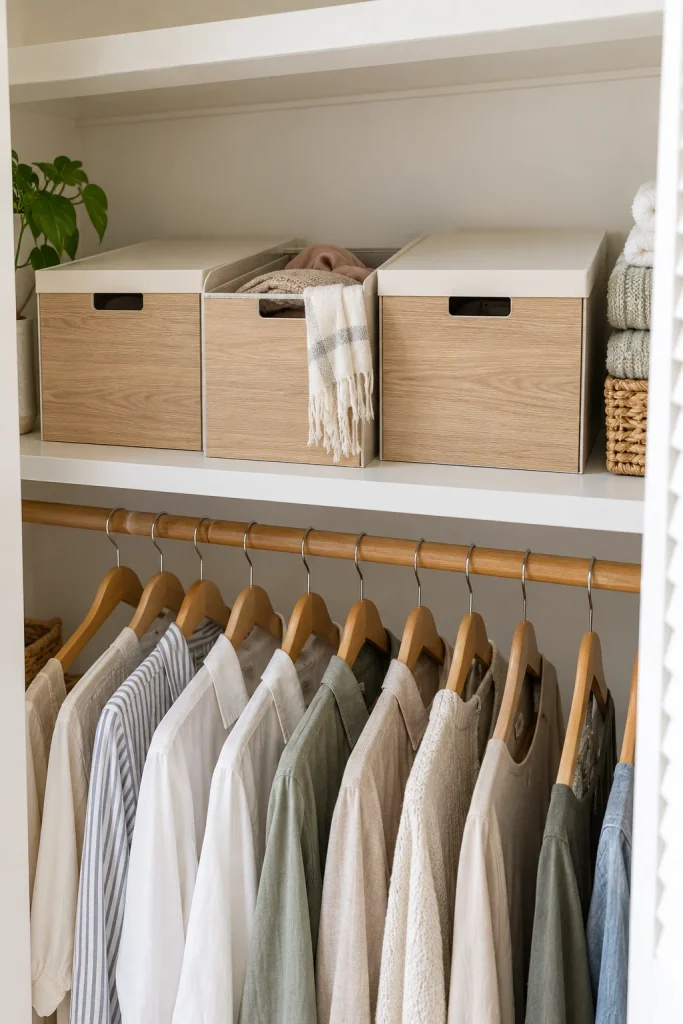
Mismatched storage boxes can make an open closet look busy even when everything is sorted. Covering their visible fronts with the same contact paper gives the shelf a calmer rhythm.
Choose the finish by what sits nearby:
| Finish | Where it works visually |
|---|---|
| Pale wood grain | Beside white shelves and cotton storage bags |
| Small neutral checks | Alongside plain baskets and folded linens |
| Muted solid color | When clothing already brings plenty of pattern |
Start with boxes you own. Smooth, rigid surfaces are easier to cover neatly than flexible bins with deep ridges. Adhesive may tear cardboard if removed, so treat paper-covered boxes as a lasting craft project rather than a reversible makeover.
For a shelf of matching boxes, covering just the front panels may be enough. Keep handles accessible and test the lid after wrapping. Film folded over a tight-fitting rim can make it harder to close.
Leave one box slightly pulled forward in the finished shelf arrangement. It makes the storage feel used, and gives you somewhere easy to drop the scarf you reach for every morning.
| Front panel only | Front and sides |
|---|---|
| Useful when boxes sit closely together and their sides stay hidden. | Useful when an end box or a pulled-out box exposes its sides. |
| Measure each front separately, even if the boxes look alike. | Plan where the pattern meets before folding around corners. |
6. Turn a Wide Picture Mat Into a Patterned Border
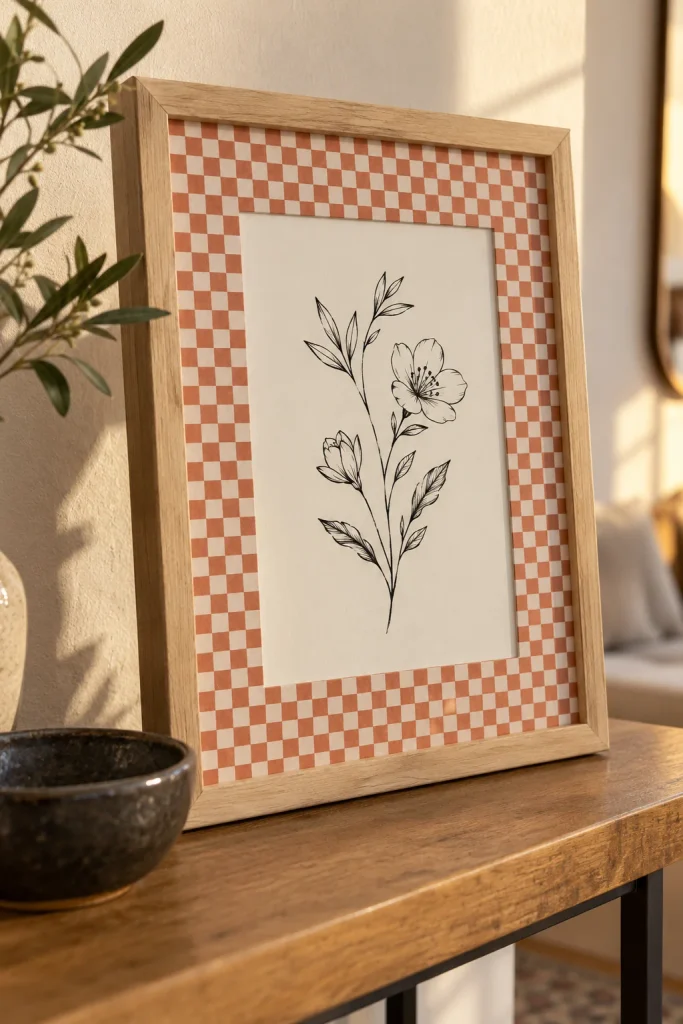
A plain print can look quite different with a patterned border around it. Cover a spare picture mat with a small terracotta check, then place it around a simple botanical illustration or monochrome photograph.
The balance matters: detailed artwork needs a quieter border. A sparse sketch can handle a stronger pattern.
Here is a straightforward way to approach it:
- Remove the mat and work on a protected cutting surface.
- Position the contact paper so the pattern sits straight around the opening.
- Trim the outer edge and window carefully, then check that the covered mat still fits inside the frame.
Use an inexpensive replacement mat rather than covering one you want to preserve. The adhesive can tear its surface during removal.
Keep this project for replaceable prints. Contact paper is not a conservation material, so valuable photographs and original artwork deserve appropriate archival framing materials. Lean the finished frame securely on a console or display it on an existing shelf.
🎨 CHECK THE PATTERN AT ROOM DISTANCE
Rest an offcut beside the print and step back before cutting. If the border catches your eye so strongly that the artwork disappears, choose a smaller pattern or a softer contrast.
7. Give a Desk a Wood-Look Surface
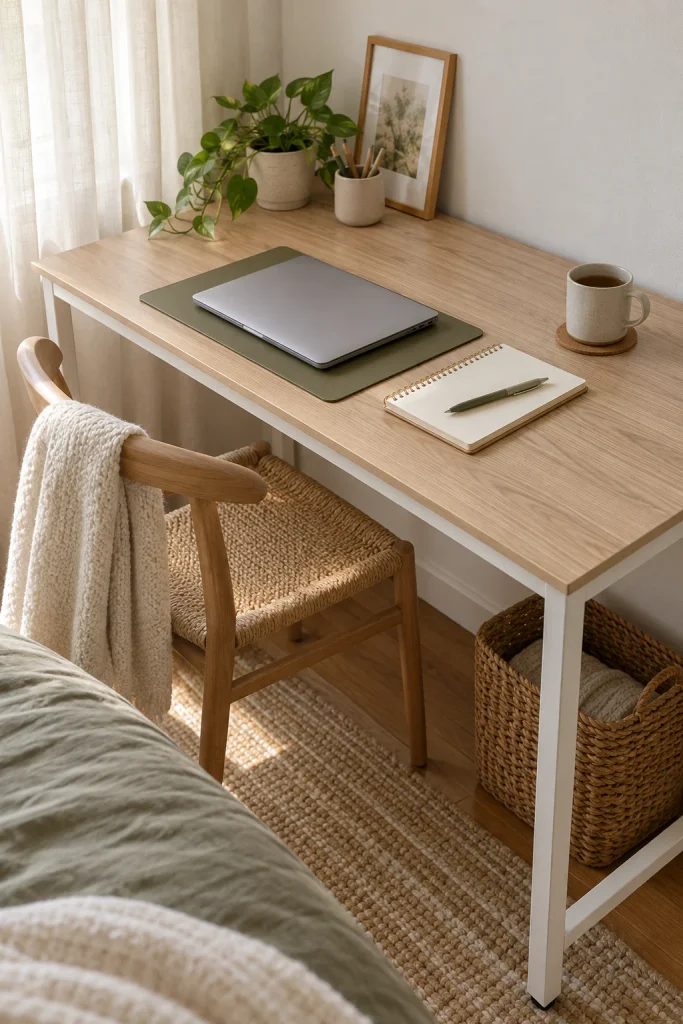
The desk beside your bed might work well but look out of place. A pale wood-grain contact paper can help a plain desktop sit more comfortably beside woven baskets, cotton bedding, and warm white walls.
Measure before choosing the roll. A product that covers the desktop in one piece avoids a seam beneath your keyboard or writing pad. Check the usable width, including any material needed to wrap the edges.
Keep the grain running along the desk’s longest side. Before peeling the backing, lay the cut piece across the surface to see whether the print looks balanced.
Rounded corners need more care than square ones. Follow the product’s wrapping instructions rather than pulling the film until the grain stretches. Cut on a protected surface whenever possible, since trimming directly against the desk can score its finish.
A desk mat under your main work area can reduce rubbing from daily use. Keep drinks on a coaster and check the edges when cleaning.
📏
Check usable width
Include the top and any edge returns. A roll’s total area alone does not tell you whether one piece will fit.
🧩
Plan any join
If a seam is unavoidable, follow the product’s joining method and keep it away from the busiest work area.
🎨
View a sample
Check it beside your furniture in daylight. Printed wood tones can look warmer or cooler than expected.
8. Outline a Closet Door’s Flat Inset
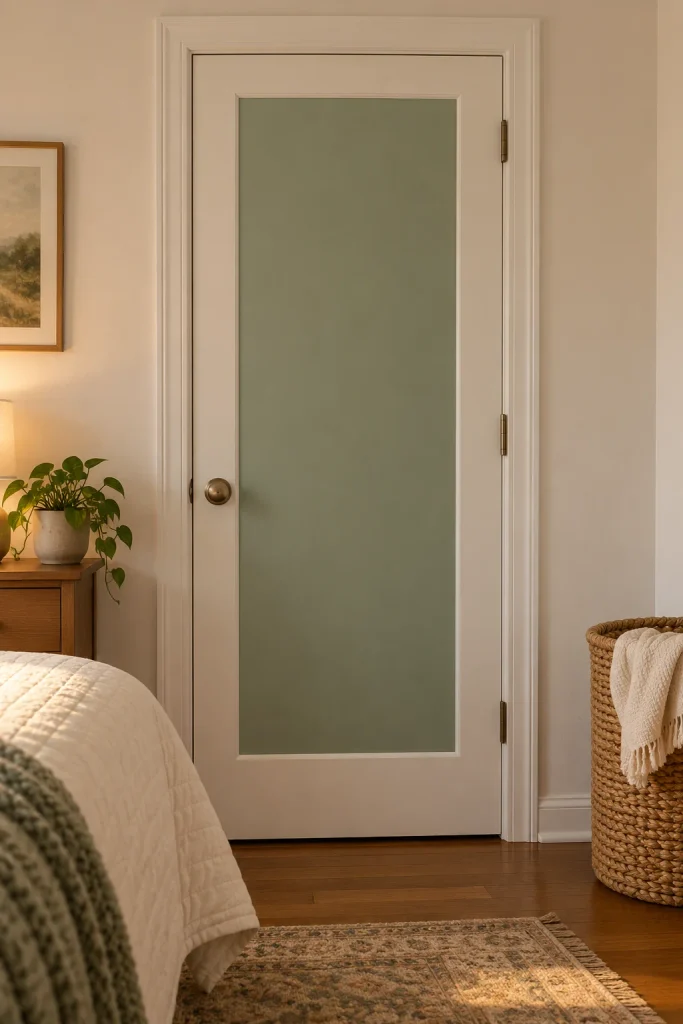
A closet door can become a small design feature with contact paper placed inside an existing flat inset. A muted sage panel gives the door some definition while leaving its painted frame visible.
This works visually when the shape is already there. Deep molding and curved profiles make the job more complicated, so keep the film on the flat area.
Keep the detail restrained:
- Choose a solid color or a small print that works with nearby bedding.
- Measure each inset separately, even when the doors look identical.
- Keep the edges clear of knobs, hinges, and moving door parts.
For a landlord-owned door, confirm that adhesive coverings are allowed and test the actual finish. Fresh, loose, or poorly bonded paint can make removal troublesome.
If the inset is larger than the roll width, plan the join before buying. A visible seam across a plain solid color may bother you more than it would within a busy print.
✅ Keep the outline simple
Make a paper template and check it against the inset. A consistent border helps the panel look intentional.
🚫 Skip stretching across grooves
Film spanning a recessed detail can bridge the gap and lift. Choose a flat section that suits the product.
9. Give a Glass-Front Cabinet a Dark Interior Back
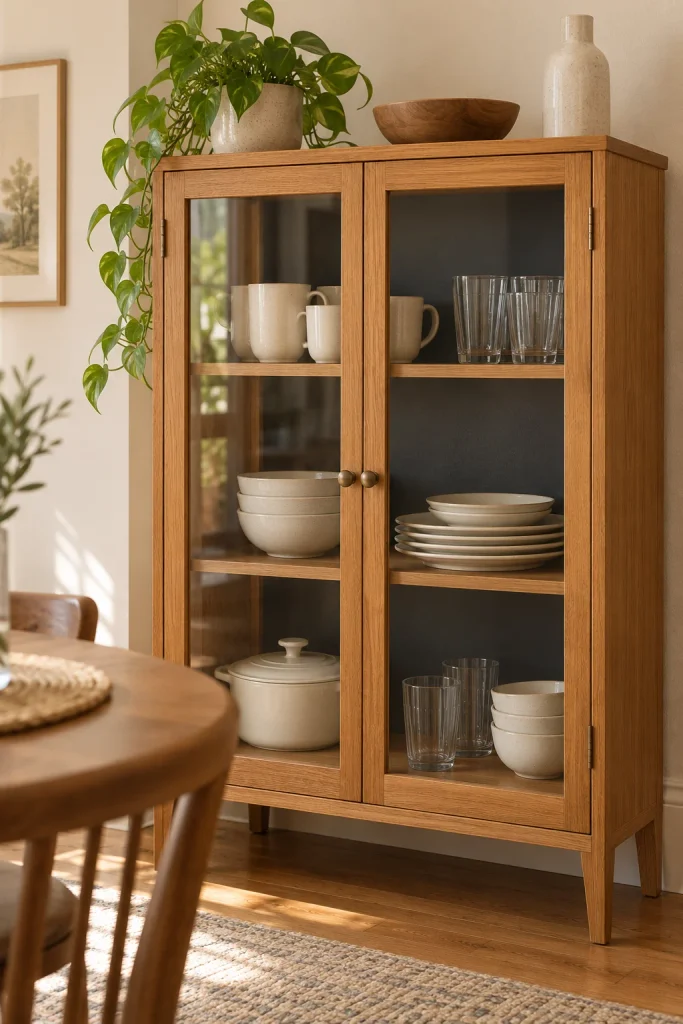
A glass-front cabinet creates a different design challenge from an open bookcase. The pattern needs to read through the glass without competing with everything stored inside.
For this project, use a matte charcoal contact paper on the cabinet’s interior back panel. Pale cups and clear glasses stand out against it, while the glass doors keep the overall arrangement contained.
Leave the shelves and side panels in their original finish. Keeping the darker color at the back gives the dishes a clear backdrop without making every surface feel heavy.
A small cabinet you own is a useful place to consider this idea. Check the backing material first. Thin, paper-faced panels may be damaged by adhesive removal. Where the construction allows it, a securely fitted, separately covered insert can keep the film off the original backing.
Before committing, hold a large sample behind your dishes and close the doors. Reflections, textured glass, and room lighting can change how much of the finish you actually see.
💡 Compare it with the doors closed
Place matte and glossy samples behind the same pale cup. Check them in daylight and under your usual room lighting. Choose the finish that lets you see the objects clearly without distracting reflections.
10. Give Cabinet Toe-Kicks a Subtle Pattern
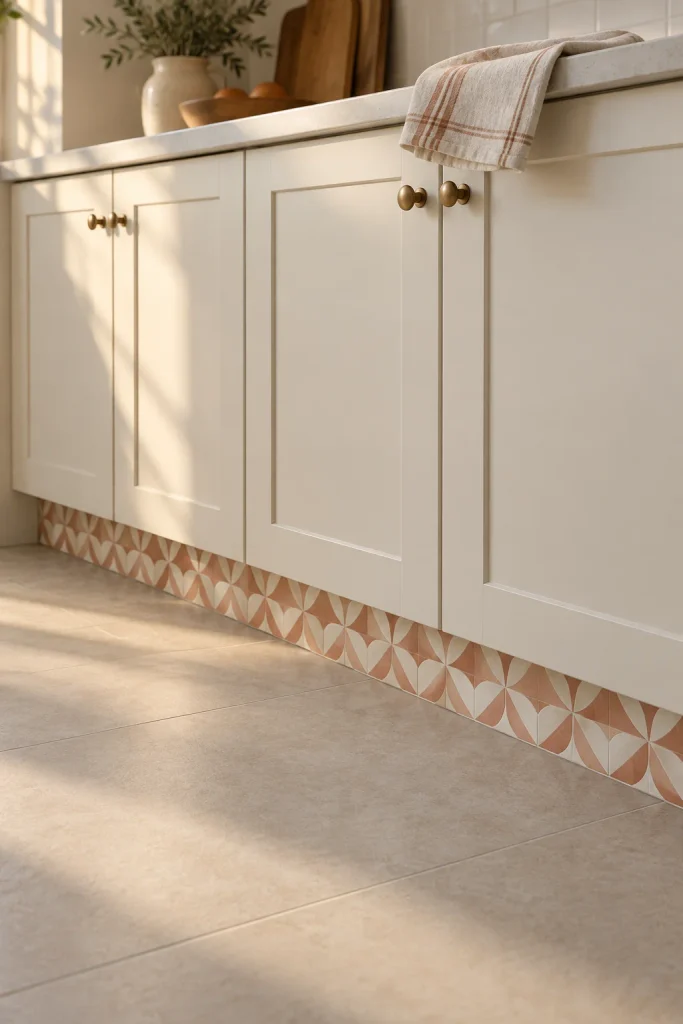
The recessed strip beneath kitchen cabinets is easy to overlook. A small geometric print there can add a detail you notice when you step back, especially in a kitchen with plain cabinet fronts.
Keep the pattern small enough to make sense across a narrow band. Cream and muted terracotta checks can work beside warm wood, while a quiet charcoal pattern suits white cupboards.
Treat this as a surface-check project first. Toe-kicks catch shoe scuffs, mop splashes, and crumbs. Look for swollen board, lifting veneer, or a loose finish before considering adhesive film. Check permission if the cabinetry belongs to your landlord.
Measure each section separately and keep access panels removable. Never bridge a ventilation grille, appliance opening, or panel joint with contact paper.
A washable surface does not make its seams waterproof. Choose a product approved for the conditions, keep its edges out of standing water, and use the manufacturer’s cleaning instructions. If the area regularly gets soaked, choose another location.
🔎 Check the strip at floor level
11. Put a Stone-Look Top on a Small Side Table
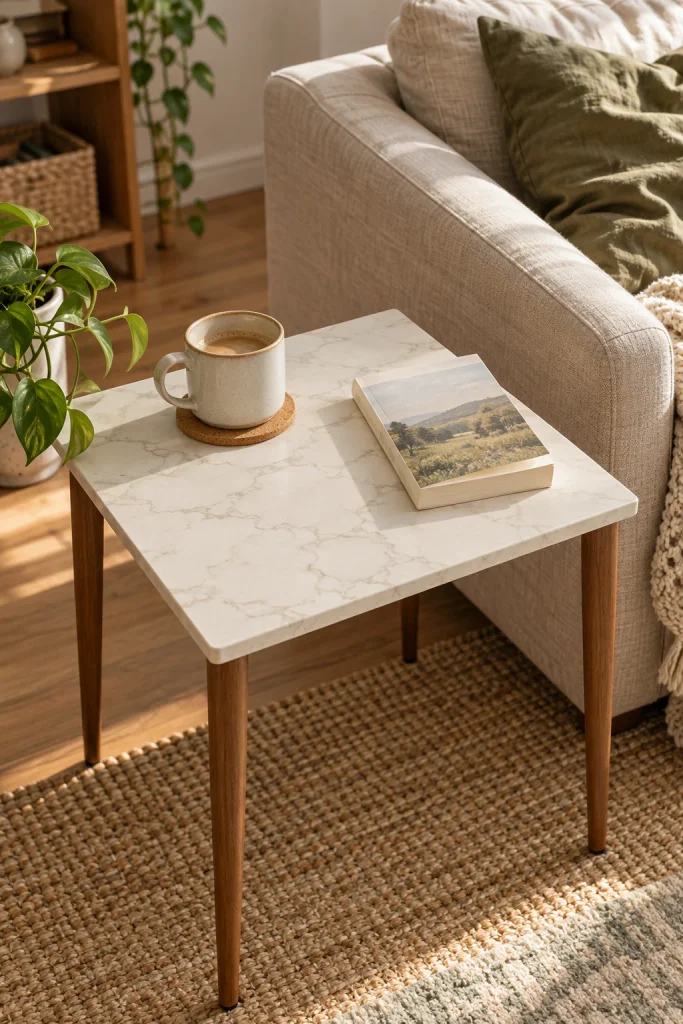
A small side table gives you a manageable place to try a bold stone print. Choose a table you own with a smooth, sound top, then keep the legs and base unchanged.
The finish changes the mood:
- Cream stone print feels quiet beside linen upholstery and a warm wood base.
- Dark marble print gives a pale table more contrast.
- Fine gray veining leaves room for patterned cushions nearby.
Lay the paper loosely over the tabletop before cutting. Move it around until the most noticeable vein sits where you want it. On a small surface, one heavy streak can dominate the whole piece.
A square or rectangular top is a simpler starting point than a round top with a curved lip. Follow the product’s edge instructions, and check that the film suits the existing finish.
Use a coaster beneath drinks. Ordinary decorative contact paper should not be treated as a heatproof surface, even when its print looks like stone.
| Check the sample | Why it matters |
|---|---|
| Pattern scale | Large veins can crowd a small tabletop. Check the whole print before choosing your cut. |
| Surface sheen | View the sample beside a lamp to see how strongly it reflects light. |
| Background color | Compare it with the table base and nearby upholstery in the room where it will sit. |
12. Give a Plain Dresser Alternating Drawer Fronts
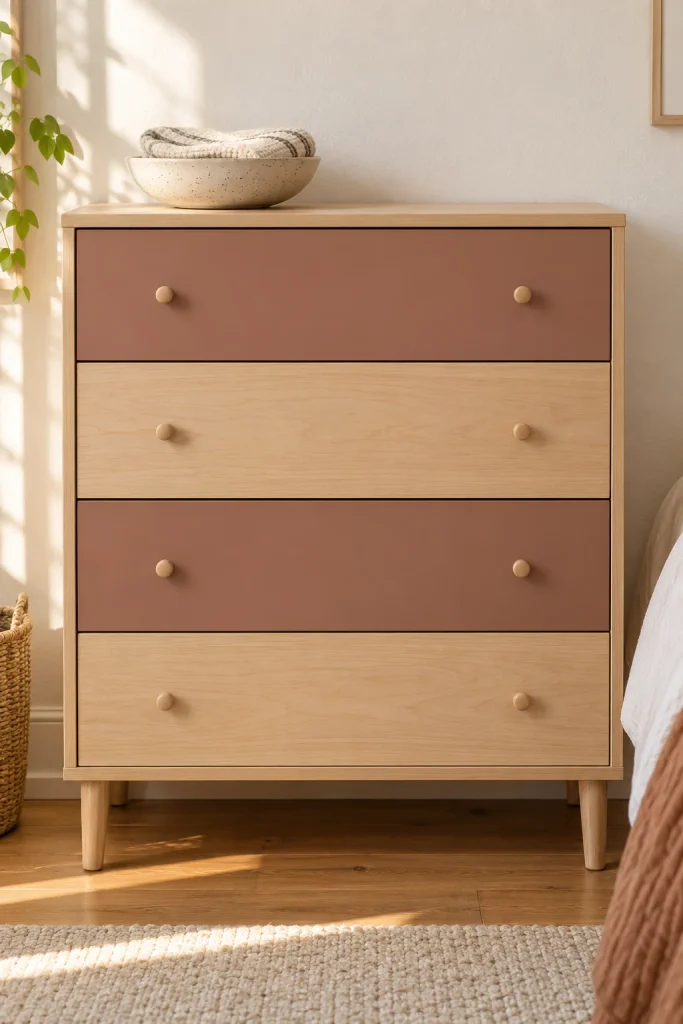
Covering selected drawer fronts can give a basic dresser a more considered look without wrapping every visible surface. On a light wood dresser, muted clay-colored contact paper on alternating drawers creates a rhythm while allowing the original finish to show.
Use this idea on a dresser you own with flat, intact drawer fronts. Raised trim, loose veneer, and rounded profiles make application more difficult.
Plan the arrangement before applying anything:
- Hold paper samples against the closed drawers to choose which fronts to cover.
- Photograph the arrangement so you can follow it while working.
- If the handles can be removed and reinstalled easily, keep each handle with its original screws.
- Apply the film according to its instructions, keeping moving parts and tight clearances uncovered.
Reinstall the hardware without overtightening it. Then open and close every drawer to check the edges.
A solid color makes alignment easy to judge, but it can also reveal bumps underneath. Clean the surface carefully and avoid using film to disguise a finish that is already coming apart.
13. Give a Suitable Refrigerator Side Panel a New Finish
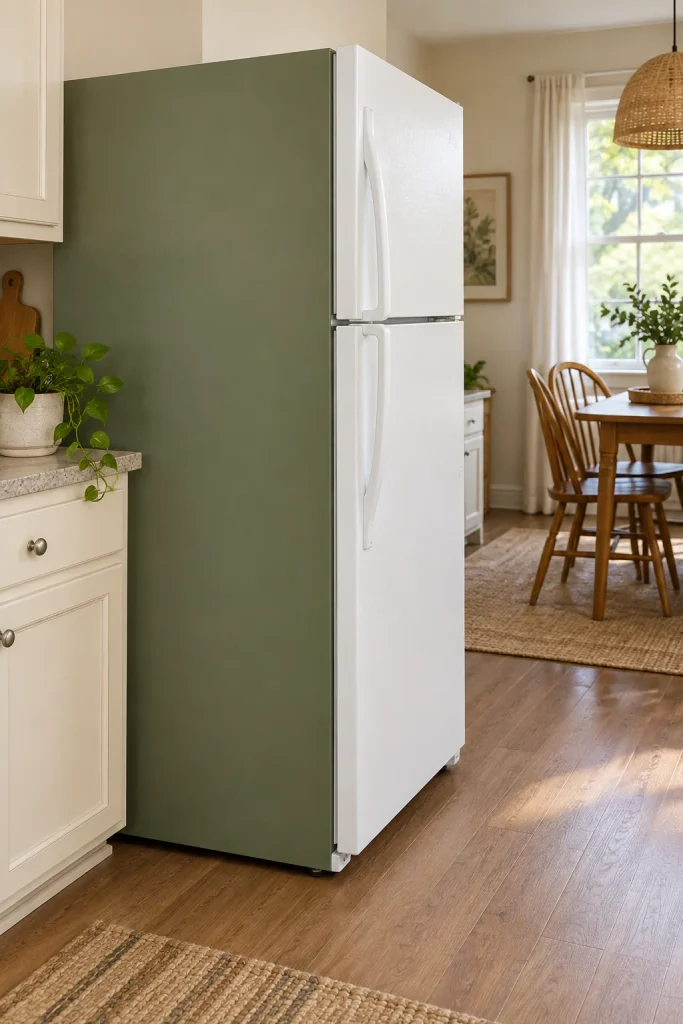
Sometimes the part of the refrigerator you see most is its side. In a small apartment, that broad panel may face the dining table or sit beside an open kitchen entrance.
A muted solid-color film could make it feel more connected to the room. Match a warm cream to nearby cabinets, or consider a soft olive that picks up the color of your dining chairs.
Check the appliance instructions before choosing the paper. Some refrigerators release heat through their side panels. A smooth-looking surface is not enough to establish that it can be covered.
- Confirm that the manufacturer permits a decorative covering in that location.
- Check that the film is suitable for the appliance surface and operating conditions.
- Get permission for a landlord-owned refrigerator.
- Leave vents, seals, labels, controls, and required clearances unobstructed.
If the instructions are unclear, skip this project. There are plenty of smaller surfaces in this list that do not involve an appliance.
Where covering is permitted, test the coating and plan the piece before applying it. Keep the film within the approved panel rather than wrapping it across adjoining parts.
📌 Keep approval and removal details together
Save the appliance guidance, the film’s instructions, and a photo of the original finish. A product described as removable still needs to be compatible with the particular appliance coating.
14. Line the Inside of a Freestanding Entryway Cubby
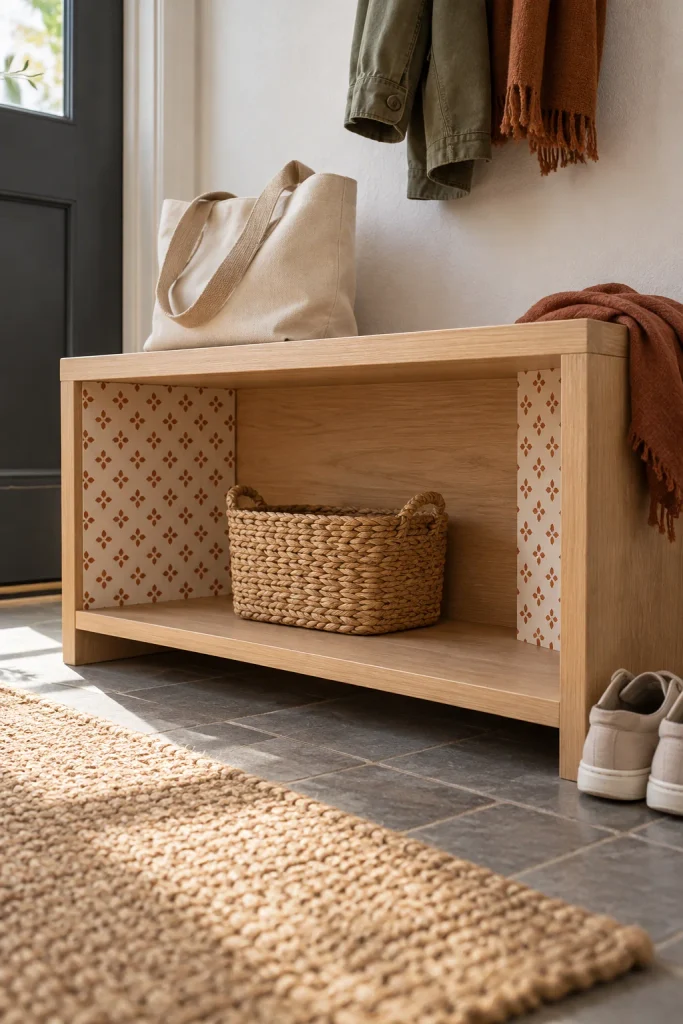
The little cubby beneath an entryway bench often becomes a dark pocket for bags and shoes. A light patterned contact paper on its interior side walls can make the compartment easier to see and give a plain bench some character.
Choose a freestanding piece you own. A cream background with a small rust-colored print works beside canvas totes, woven baskets, and a wood seat.
Keep the design on the upright sides, where it is less exposed to grit and wet soles. Leave the bottom surface suitable for its normal use.
Make the pattern easy to notice:
- Cover the inward-facing side walls of one open compartment.
- Keep the back and shelf edges plain.
- Leave enough space around a basket to reveal the print.
Measure the two side pieces separately and check how the pattern will face once installed. A removable basket should slide in and out without scraping the paper.
This is also a useful place to use two matching offcuts. They do not need to form one continuous picture, but their scale and direction should look consistent.
🧺 Check the basket before applying film
Slide the basket in and out. Notice whether its rim or handles touch either side wall.
Choose a smaller basket if it rubs. Do not rely on decorative film to withstand repeated scraping.
Check again after application, especially where the paper ends near the front opening.
15. Wrap the Base of a Small Display Pedestal
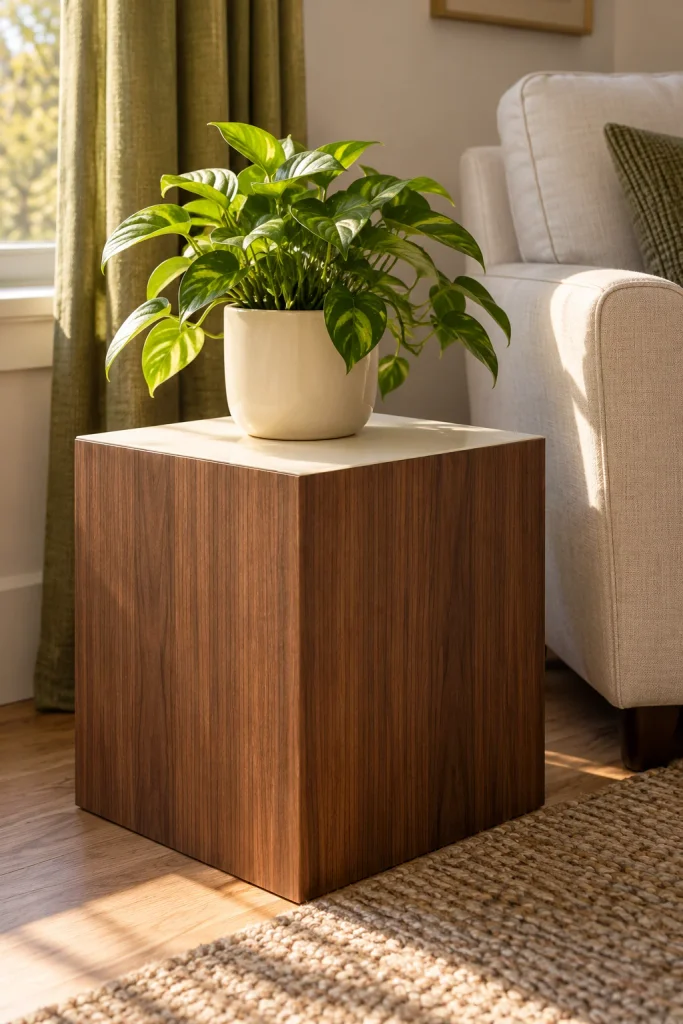
A plain display pedestal can give a plant or ceramic bowl some height, but its boxy base may look unfinished. Contact paper lets you give that vertical surface a simple pattern while keeping the top unchanged.
Use a stable, freestanding pedestal you own with smooth, flat sides. A fine walnut print can bring warmth to a cream room. Narrow stripes work when the surrounding furniture is plain.
Choose the wrapping approach before cutting:
- Separate side panels: Useful when you want crisp boundaries at each corner.
- One continuous piece: Worth considering only when the film’s instructions and the pedestal’s shape allow a neat wrap.
Check the pattern direction on every visible face. Wood grain running vertically on one side and horizontally on the next can look accidental.
If you display a plant, use a watertight outer pot or suitable saucer and wipe up spills promptly. Keep soil and damp pot bases away from paper edges. The pedestal must also be stable enough for the object it holds, especially beside a walkway.
✅ Plan the least visible join
Set the pedestal in its intended position before planning the cuts. Place any permitted seam where it is less noticeable, using the product’s joining instructions.
🚫 Do not cover a structural problem
Loose joints, swollen board, or a wobbling base need attention first. Decorative film cannot strengthen the stand.
How to Choose Contact Paper for Your Project
Choose the product for the surface first, then pick the pattern. A convincing marble print is little help if the film is unsuitable for daily use on your table.
Contact Paper, Wallpaper, or Shelf Liner?
Product names overlap in shopping listings. Peel and stick describes how something attaches. It does not promise clean removal.
Compare Samples in the Actual Room
Hold a sample beside the furniture and look at it during the day and under your usual evening lighting.
- Matte finishes: Consider these where reflections could distract from the pattern.
- Glossy finishes: Check how strongly they reflect nearby windows and lamps.
- Small prints: Useful for drawer sides, narrow strips, and picture mats.
- Large patterns: Plan the cut so the main motif lands where you want it.
- Wood grain: Decide its direction before cutting separate panels.
Thicker film is not automatically the best contact paper for renters. Corners, clearances, surface texture, and the product’s intended use still matter.
Buy where you can see clear specifications, application instructions, and return terms. Order a sample when available, especially before covering a large surface.
How Much Contact Paper Do You Need?
Measure each section separately. Two drawers that look identical can still need slightly different cuts.
Write down:
- The width and length of each face.
- Any material needed around edges, as directed by the manufacturer.
- The pattern direction and repeat.
- Where seams would fall.
- Which offcuts can cover smaller pieces.
Check roll width before calculating total coverage. A roll can contain enough material overall and still be too narrow to cover a desktop in one piece.
For patterned paper, lay out the pieces on paper first. Matching a floral or geometric repeat may leave offcuts that are too small for another large panel.
Build a Budget Around the Whole Project
Include the film, delivery, samples, and any tools you need. Depending on the product, those may include a measuring tape, straightedge, scissors, a suitable smoothing tool, and a protected cutting surface.
A cheap narrow roll can create more seams than a wider one. Compare what it costs to complete your particular project, rather than comparing roll prices alone.
For a smaller budget, cover the visible face of an object or use leftovers on a tray insert, frame mat, or storage box.
How to Apply Contact Paper Neatly
The instructions supplied with your product take priority. Use this sequence to plan the work.
Prepare and Position
Check the surface, complete your test, and clean it using a compatible method. Let it dry as directed.
Measure and cut on a protected work surface. Lay the piece in position with its backing still attached so you can check the grain, pattern, and edges.
Expose the Adhesive Gradually
Avoid removing the entire backing at once. Start with a small section, align it, and smooth as you reveal more adhesive. This gradual approach also appears in d-c-fix’s application instructions. Self-adhesive d
If the product permits repositioning, correct an early misalignment before continuing. Repeatedly lifting the film can affect the surface or adhesive, so do not assume unlimited retries.
Plan Corners and Seams
Follow the manufacturer’s method for corners and joins. There is no universal rule that every film should overlap or meet edge to edge.
Keep cuts away from the underlying furniture whenever possible. Stretching film hard around a curved corner may distort the print.
Check the Finished Piece in Use
Open the drawer, close the door, and slide the basket back into its compartment. Look for rubbing, catching, or an edge that begins to lift.
If the film keeps lifting, investigate the surface and product compatibility before adding more adhesive.
Where Contact Paper Is a Poor Choice
Ordinary decorative film is not a universal covering. Reconsider the project when the surface has:
- Loose paint, peeling veneer, or water damage.
- Persistent wetness or standing water.
- Heat exposure outside the product’s limits.
- Heavy friction or regular scraping.
- Texture or grooves the film is not designed to follow.
Appliances need their own checks. A refrigerator side can look suitable while serving a heat-release function. Confirm both appliance and film guidance before covering it.
If adhesives are prohibited, use non-adhesive liners where appropriate, decorate a separate insert, or work on a freestanding item you own.
Cleaning, Wear, and Removal
Keep the product label after installation. It should be your starting point for cleaning and eventual removal.
Use the recommended cleaning method. Do not assume that a cleaner suitable for the original furniture finish is also suitable for the printed film. On desktops and side tables, coasters and desk mats can help limit everyday wear.
There is no useful universal lifespan for contact paper. Surface condition, product, installation, handling, sunlight, and moisture all affect how it holds up.
Plan Removal Before Moving Day
Allow time to work carefully and deal with residue. Start according to the manufacturer’s directions and watch the finish underneath.
Some manufacturers, including d-c-fix, describe gentle warming as a removal aid. That is not a reason to apply strong heat to every surface. Check that the underlying finish can tolerate the recommended method. Stop if paint or veneer begins to lift, and seek product-specific advice before continuing. d-c-fix
For adhesive residue, use a cleaner approved for both the finish and the situation. Test it inconspicuously rather than reaching immediately for a strong solvent.
Frequently Asked Questions
Does Contact Paper Damage Rental Cabinets?
It can. Removable adhesive does not make a weak finish stronger. Check permission, inspect the coating, and test the exact product on a hidden area. Avoid guarantees about protecting a security deposit.
Is Contact Paper Waterproof?
Check the specific product. Even if the film itself resists water, seams and exposed edges can allow moisture to reach the material underneath. A covered surface should not automatically be treated as waterproof.
Can You Use It on Bathroom Furniture?
Only where the film and underlying finish suit the conditions. Humidity, splashes, cleaning products, and vulnerable edges all matter. Do not cover swollen board or damaged veneer to hide a moisture problem.
Can Contact Paper Cover Rental Countertops?
Some films are sold for countertop use, but you still need permission and suitable product guidance. Check wear, heat, cleaning, and water exposure around the sink. Do not assume a decorative film is a cutting surface or suitable for direct food contact.
What About Grooved Cabinets or Curved Edges?
They require more careful shaping than flat panels. Film stretched across a recess can bridge the gap instead of following the surface. Choose a product with instructions for that shape, or select a flatter project.
Can You Put Contact Paper on Stair Risers?
Only if the product, finish, and rental rules allow it. Risers are the upright faces, not the surfaces you walk on. Keep material away from treads and edges where lifting could create a problem.
Does Painter’s Tape Underneath Prevent Damage?
It does not guarantee protection. You are introducing another adhesive and another layer that may lift or affect the finish. Treat it as an unverified workaround unless the relevant manufacturers approve the complete method.
Can Contact Paper Be Reused?
Do not confuse repositionable with reusable. A product may allow adjustment during installation without being designed for removal and reapplication later. Check its instructions.
What Is the Easiest Project for a Beginner?
Choose a small, flat piece you own with few corners. A replacement picture mat or separate tray insert keeps the project manageable. Save large appliances, curved edges, and multiple matching panels for later.
Start With the Detail You Notice Every Day
Choose the surface that bothers you most, then decide whether it is a sensible place for adhesive film. A drawer side, tray insert, or bookcase backing may give you the change you want without turning the weekend into a kitchen project.
The best contact paper ideas for renters suit both the room and the surface underneath. Keep your measurements, save the product instructions, and leave yourself a clear plan for removal. If a fixture feels uncertain, start with something you own.
Save your favorite idea to a Pinterest board so you can find it when you are ready to choose a pattern.